2 Easy Fixes for Scratches on Wooden Picture Frame
This charity shop photo frame had both shallow and deeper scratches on the wooden frame. Shallow and medium-depth scratches can often be repaired with household items or quick DIY techniques. Here I’ll show you 2 easy fixes for scratches on wood.
Scratches on wooden furniture and decor can be frustrating, but the good news is that many of them are easy to fix.
This means you can refresh and repair damaged pieces in your home instead of replacing them.
And don’t overlook secondhand finds at charity shops — just because something isn’t in perfect condition doesn’t mean it’s not worth picking up. Those scratches might be an easy fix.
I’ll share two simple techniques to repair scratched wood. Both methods are easy and help restore the wood to good condition.
This post includes affiliate links so you can easily find the products I use myself and recommend to friends. If you purchase these products, I may earn a small commission at no extra cost to you.
Would you rather opt for video tutorials instead of step-by-step instructions? We’ve got you covered with a comprehensive video tutorial that guides you through easy fixes for scratches on wood.
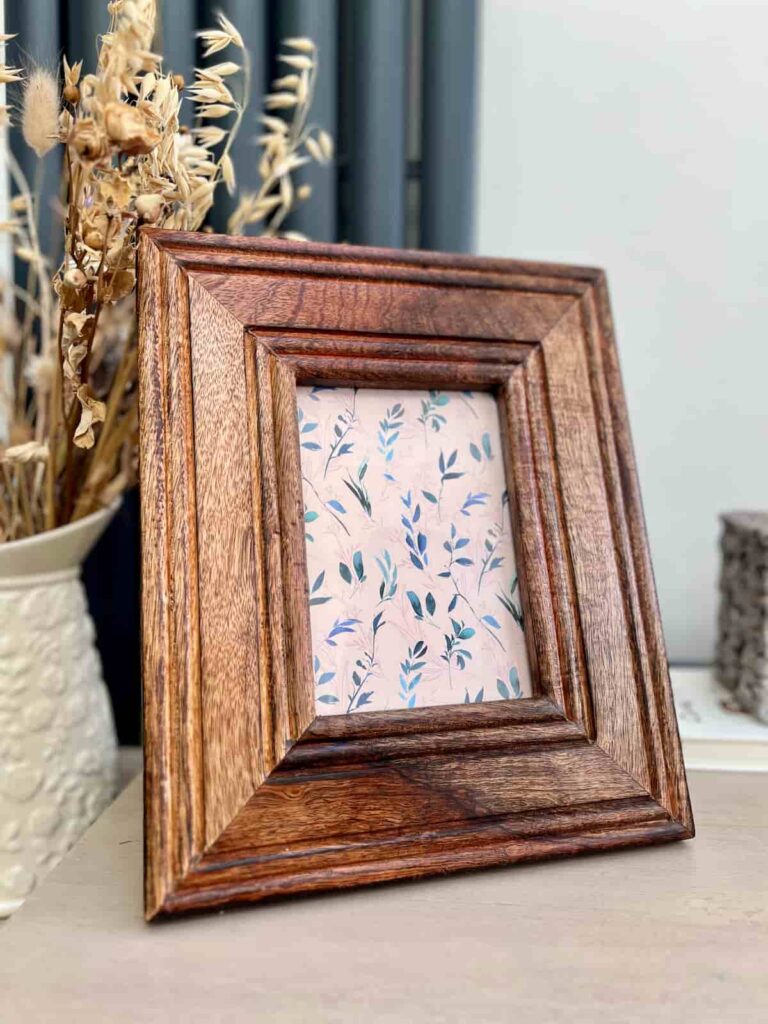
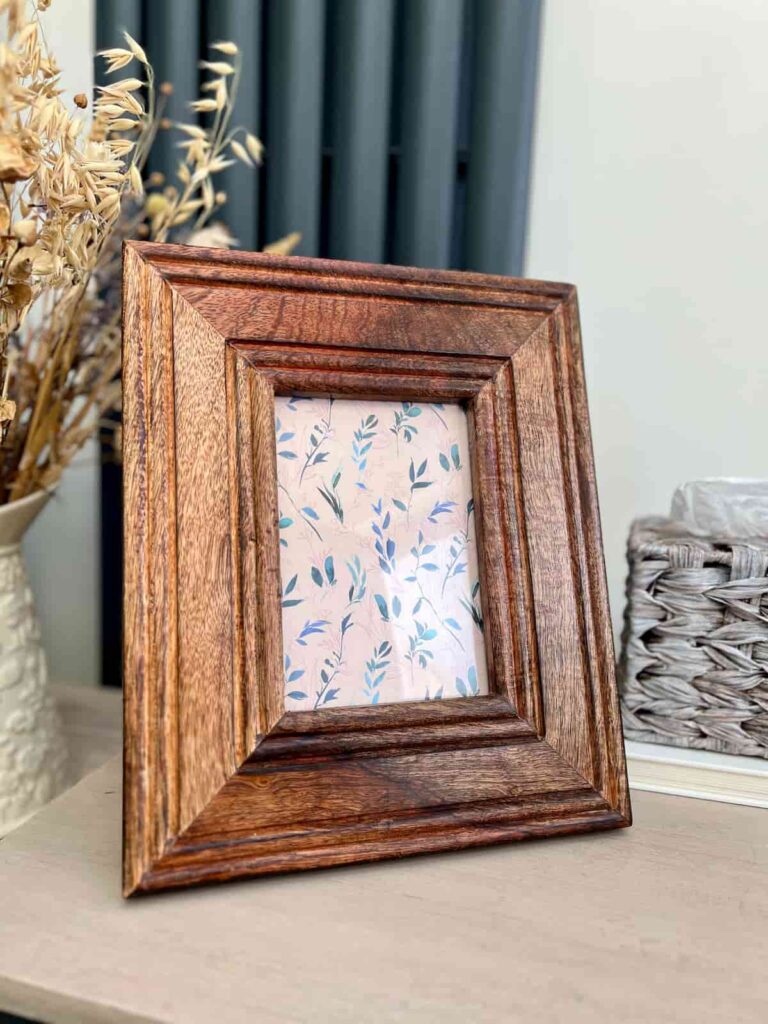
Wooden Photo Frame with Small Scratches
Materials Needed for Shallow Scratches
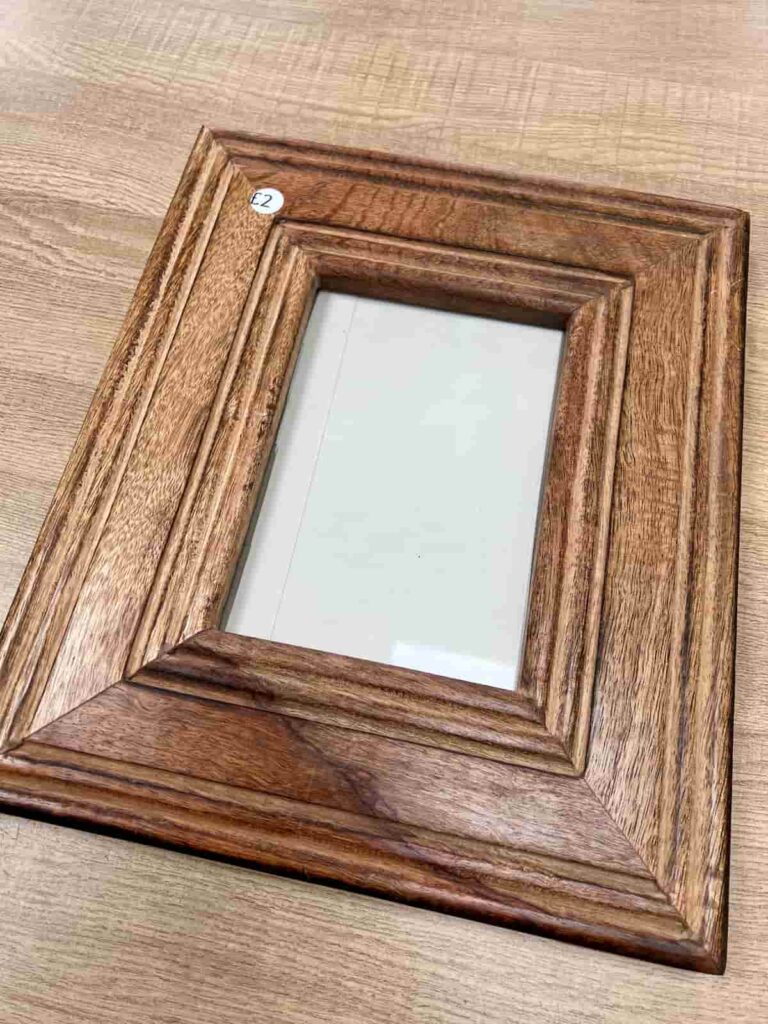
This wooden photo frame cost £2 in a charity shop. The wood is beautiful and interesting but the frame had both fine scratches and a few medium gouges.
Whether the wood you want to restore is something you already have at home or a charity shop find, it can usually be restored to its former glory.
For the types of scratches that are surface-level, it’s an easy fix.
The most obvious thing about these scratches is that they are diagonal across the piece.
This makes them stand out against the grain, despite only being fine scratches.
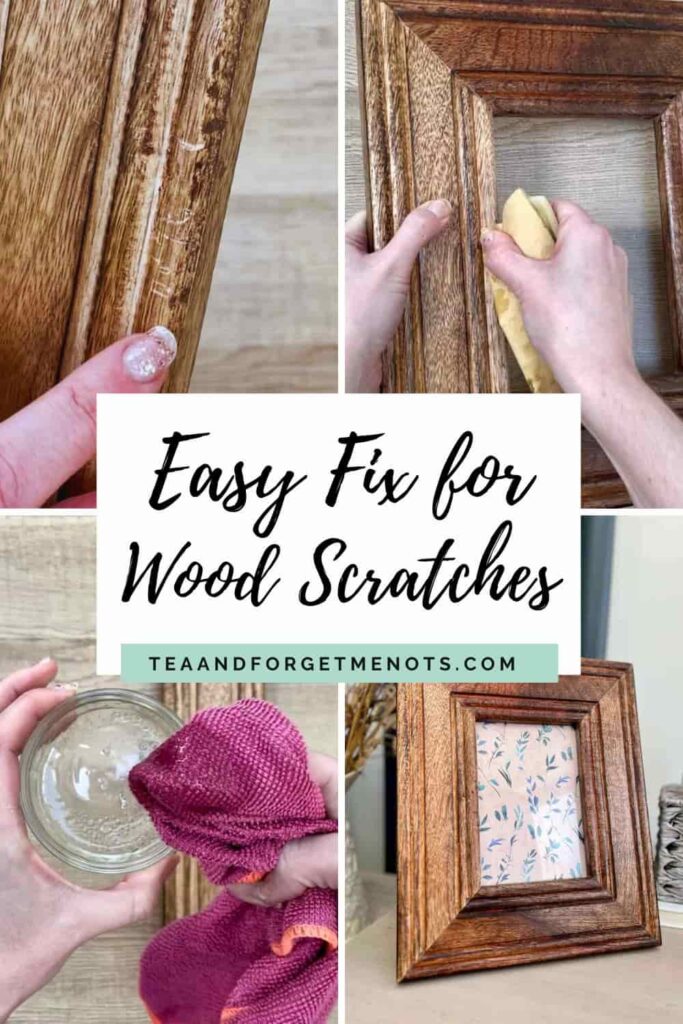
Step 1: Supplies to Restore Lightly Scratched Wood
For minor scratches on wood, the best option is a mixture of vinegar and oil. You can use household items; white vinegar and an oil such as vegetable oil or olive oil.
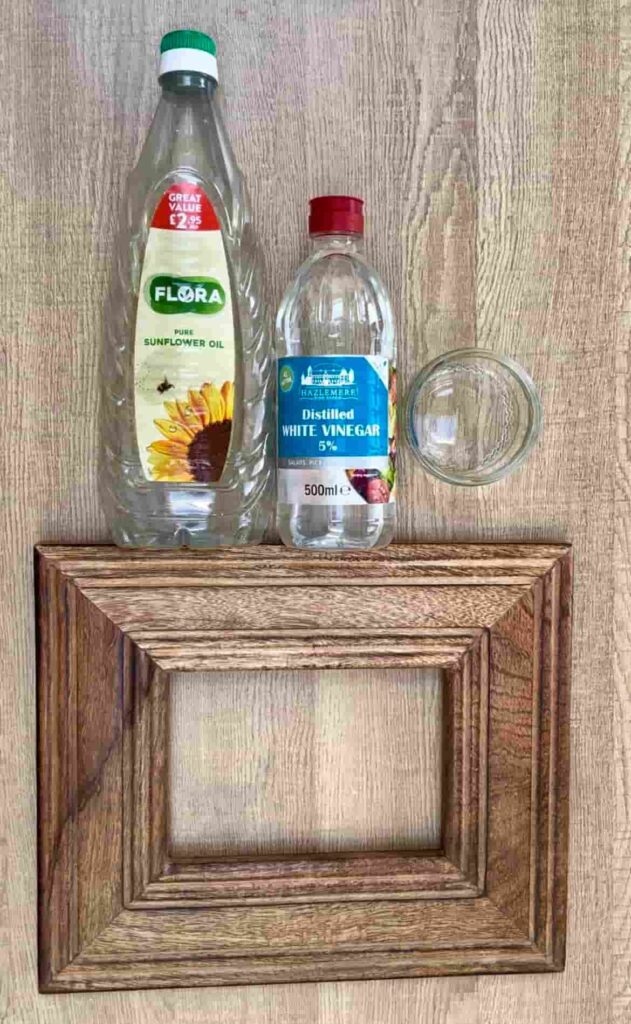
This works because it both cleans the surface of the wood and moisturises the wood to blend minor surface scratches into the surrounding wood finish.
Step 2: Mix Vinegar and Oil
To use this easy method, combine the vinegar and oil in a small bowl and stir well. A little goes a long way. For something like this small photo frame, you only need a small amount.

Step 3: Apply Oil and Vinegar to Light Scratches
Then apply the mixture to the damaged area with a clean cloth. Using circular motions will help the mixture sink into all the details of the affected area.
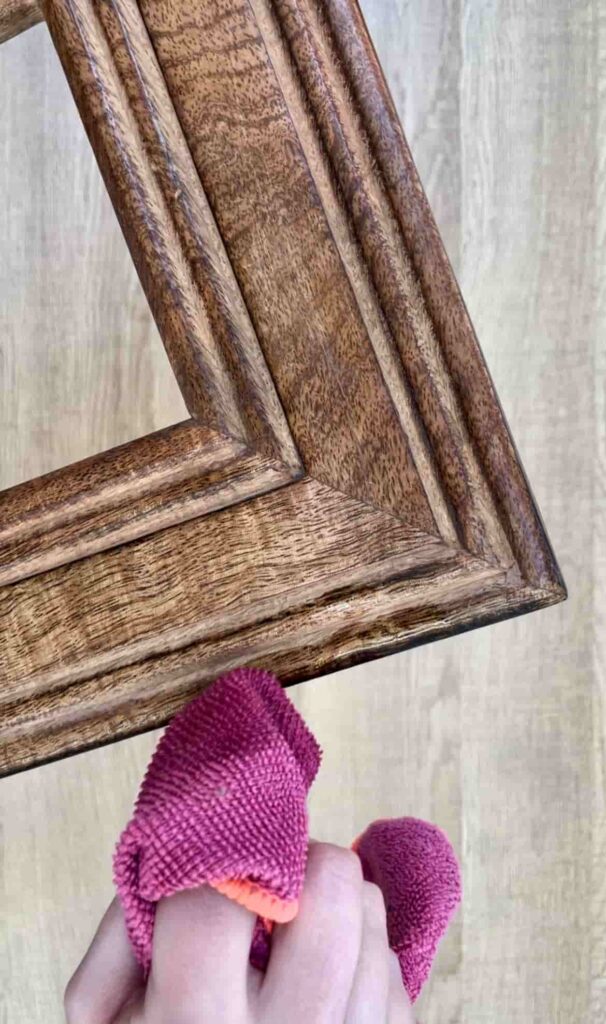
It doesn’t take long to work, you can let it sit for 5-10 minutes. Finally, wipe away any excess with a dry cloth to avoid the wood feeling greasy.
You can also use this opportunity to add a new coat of oil to the entire piece which helps refresh the wood.
Using vinegar and oil is an easy solution and an effective way to fix superficial scratches on a wooden photo frame.
If the scratch is still visible, repeat the process until the wood is fully restored.
This method works well for light and medium scratches but may not be effective for deep gouges. If you think that it hasn’t made a significant difference, then you might have deeper damage that needs another process.
Instead of replacing scratched wooden decor, try this easy fix to refresh and preserve your pieces.
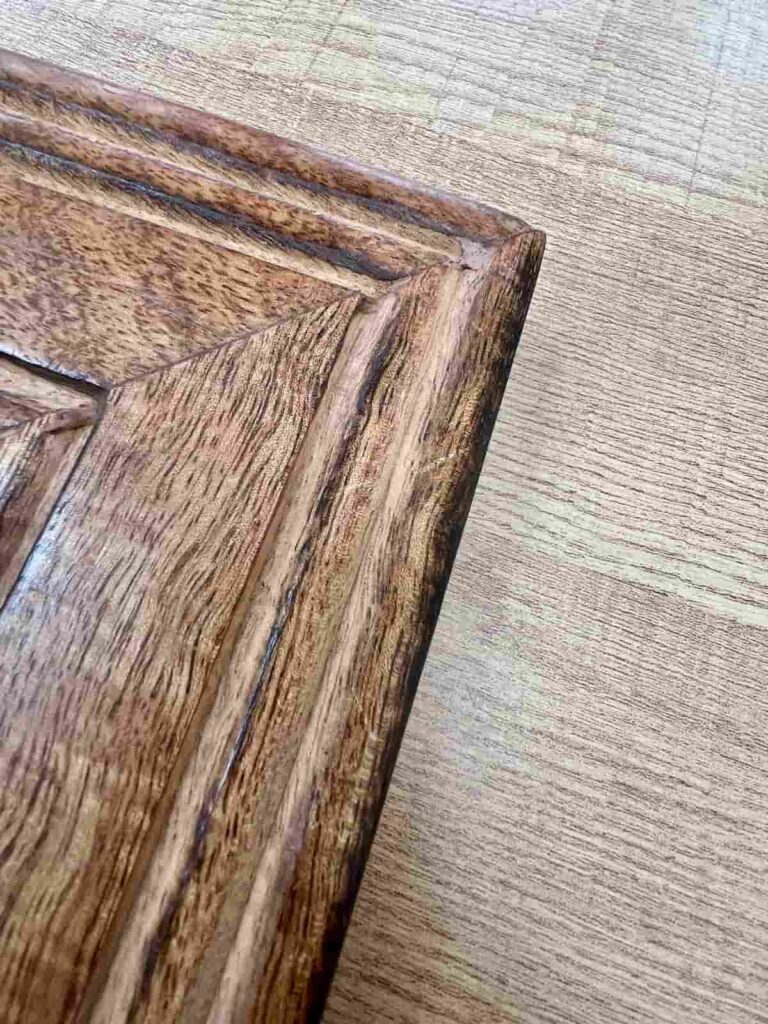
Wooden Frame with Medium-Depth Scratches
Materials Needed for Deeper Scratches
For the type of damage with medium-depth scratches on wood, sanding and using furniture pens can be a great solution.
Step 1: Lightly Sand the Scratched Wood
Sanding smooths out rough or raised scratches and preps the surface to take the stain evenly.
Use medium or fine-grit sandpaper to smooth out the scratches gently. You only need light sanding to remove the original finish layer and smooth the rough edges. The best thing is to sand in the direction of the wood grain to avoid creating new marks.
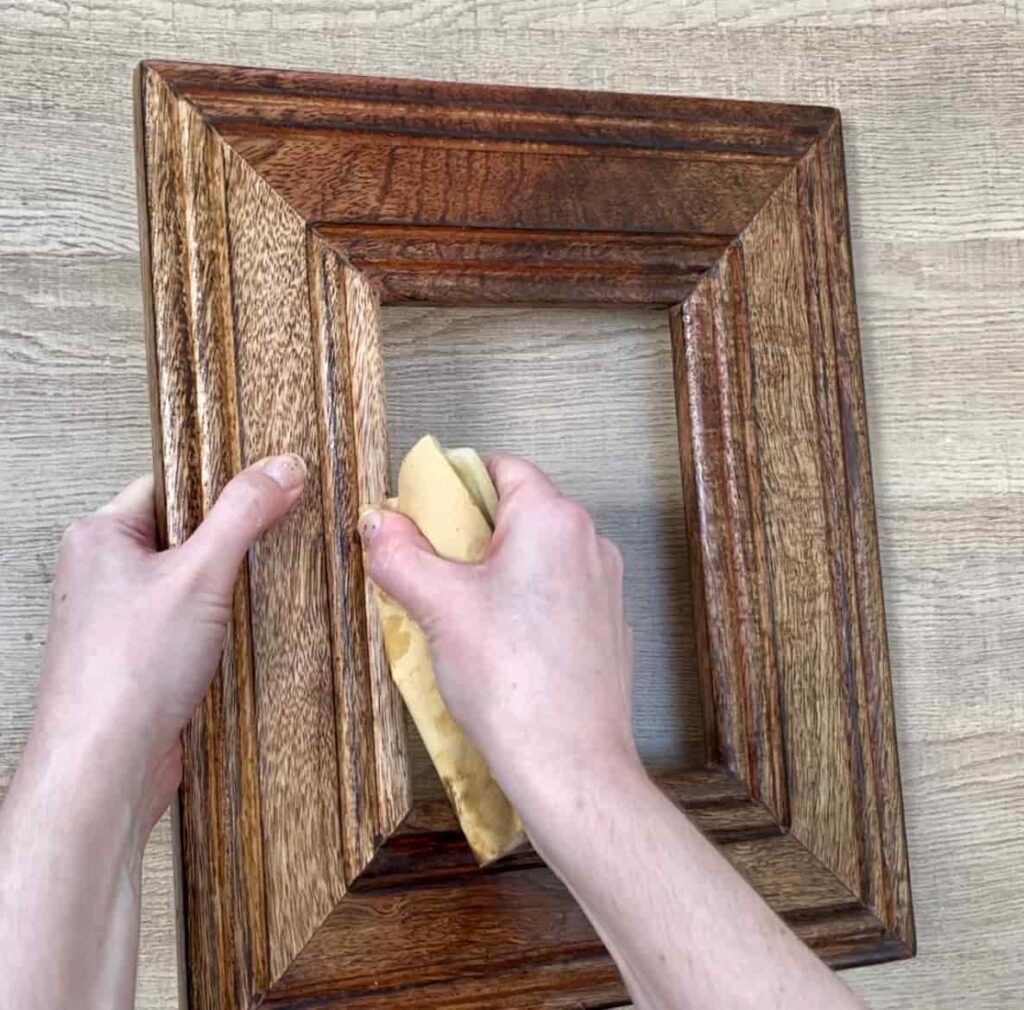
With a photo frame in this design, it’s easier to sand the entire surface where the scratches are. In this case, the whole piece of wood along the inner edge. This makes it easier to blend rather than sanding only the damaged area.
Sanding minimises deeper scratches by evening out the wood surface. Although, it also reduces the visibility of the wood grain on the surface.
To help blend the sanded area in with the rest of the wood, you need to replicate the wood colour and grain pattern.
Step 2: Apply a Layer of Wood Stain
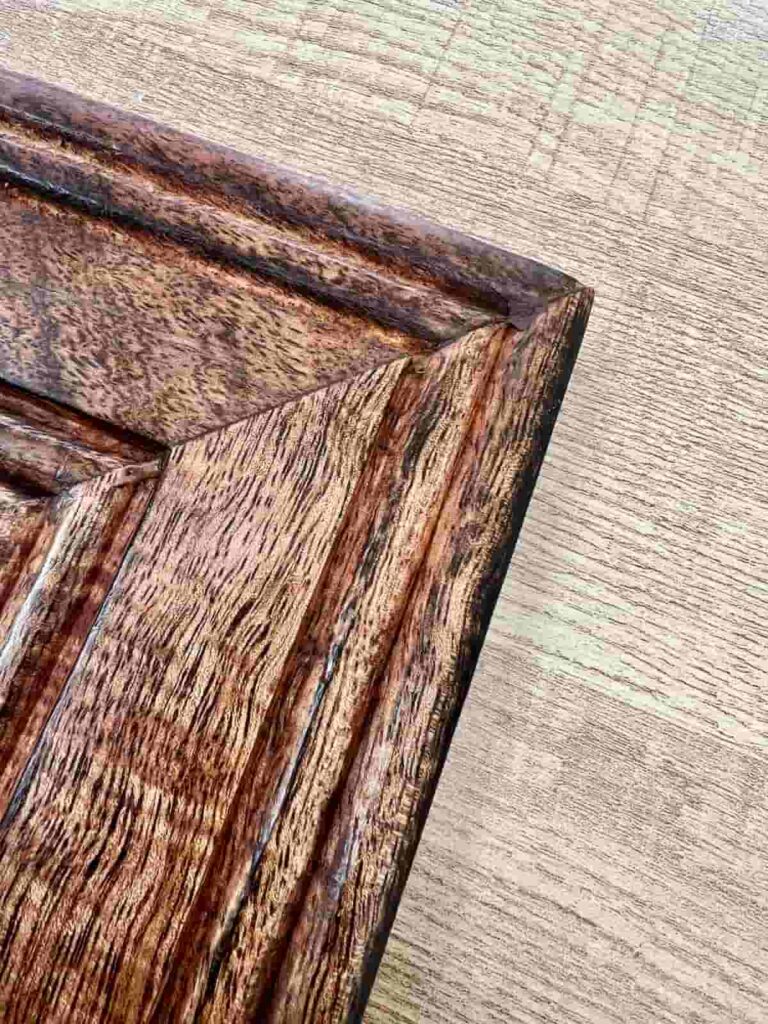
One of the nicest things about a wooden photo frame like this is the variation of the colours in the piece. You can’t paint it solid brown and expect it to blend in. So, you need to add a few layers to mimic the surrounding area.
To start, use a small amount of stain to darken the natural colour of the wood. I applied an oil-based dark stain with a small brush. This gives it a translucent layer which adds dimension to the final look.
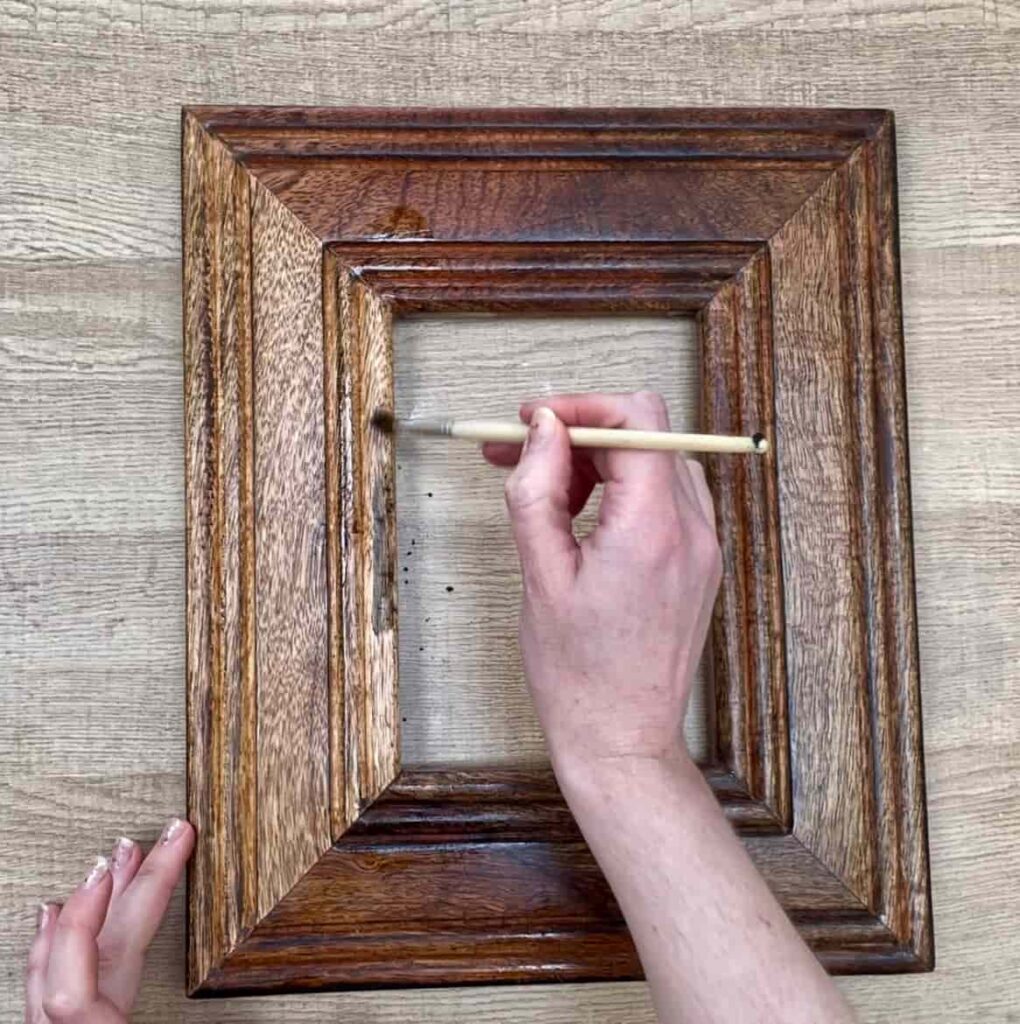
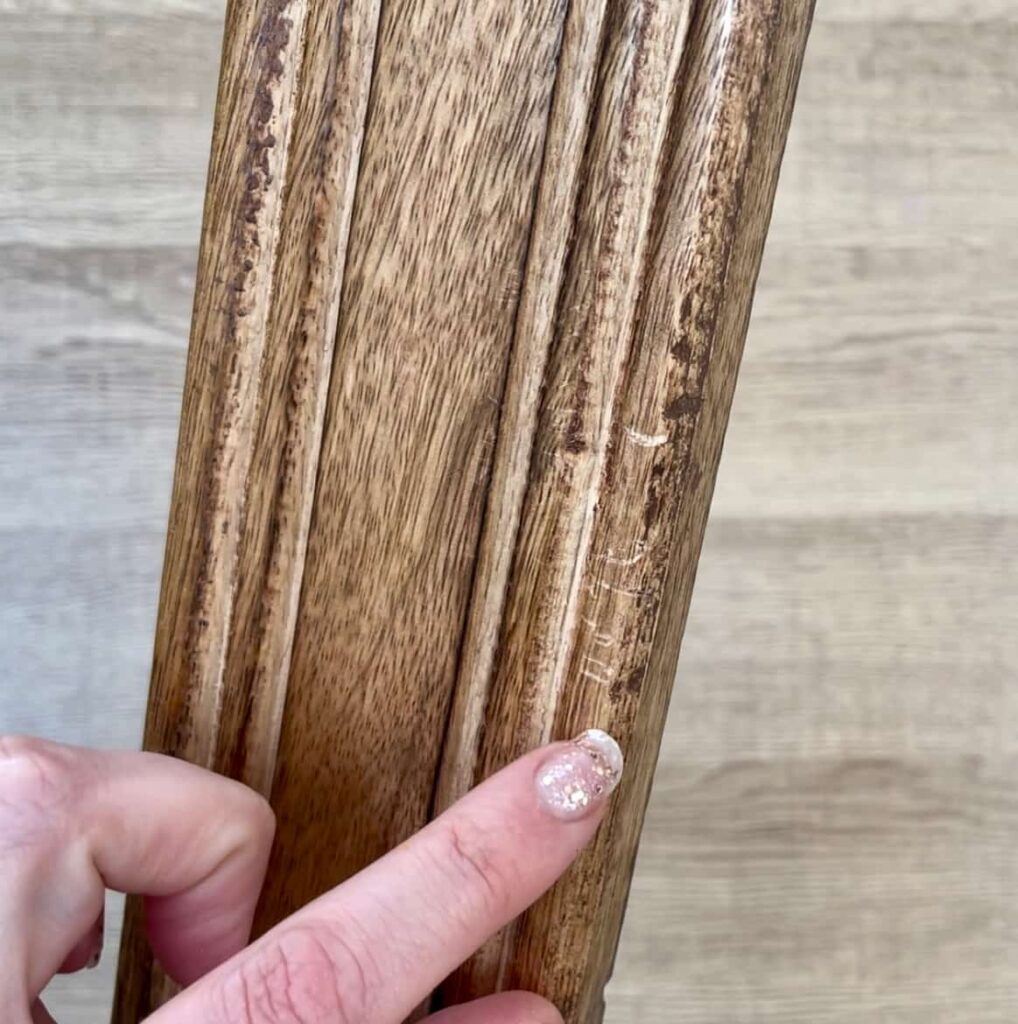
Step 3: Recreate the Wood Grain with Stain Pens
As sanding reduces the visible grain on the surface of the wood, it’s helpful to build texture back in. You can easily do this with these stain pens from Varathane. By building up layers in small strokes, it creates the look of the grain.
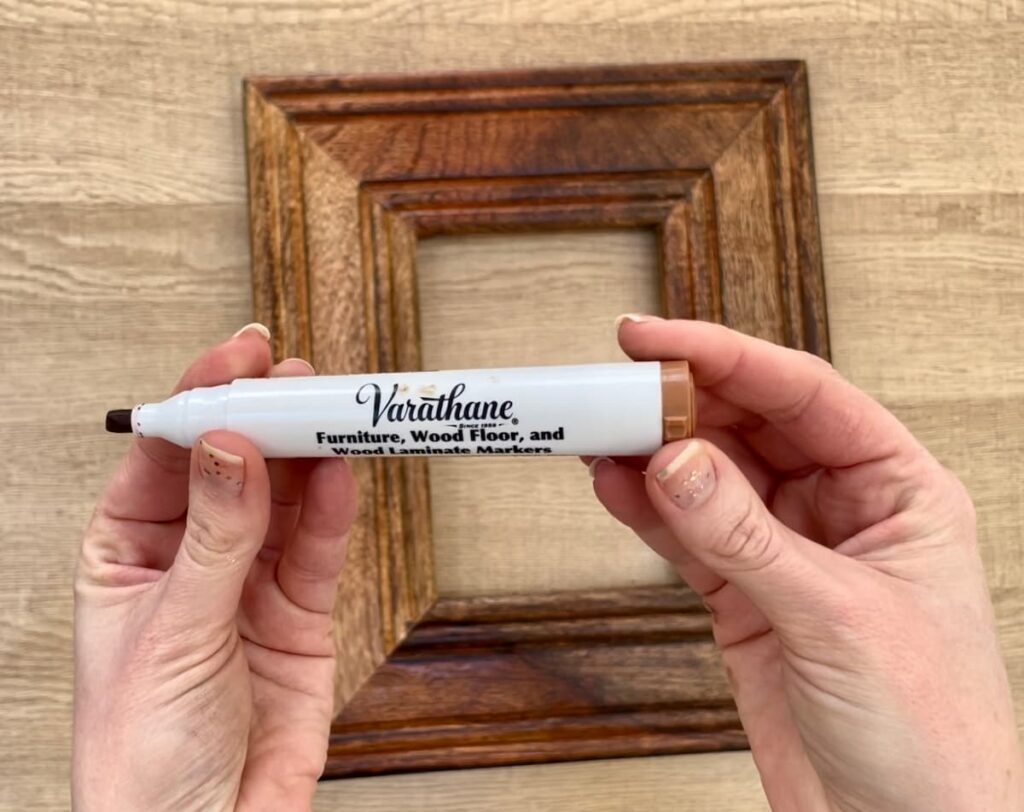
I used two colours to achieve a similar look, Walnut and Maple. You can wipe the stain with a soft cloth or a finger to help disguise the pen strokes.
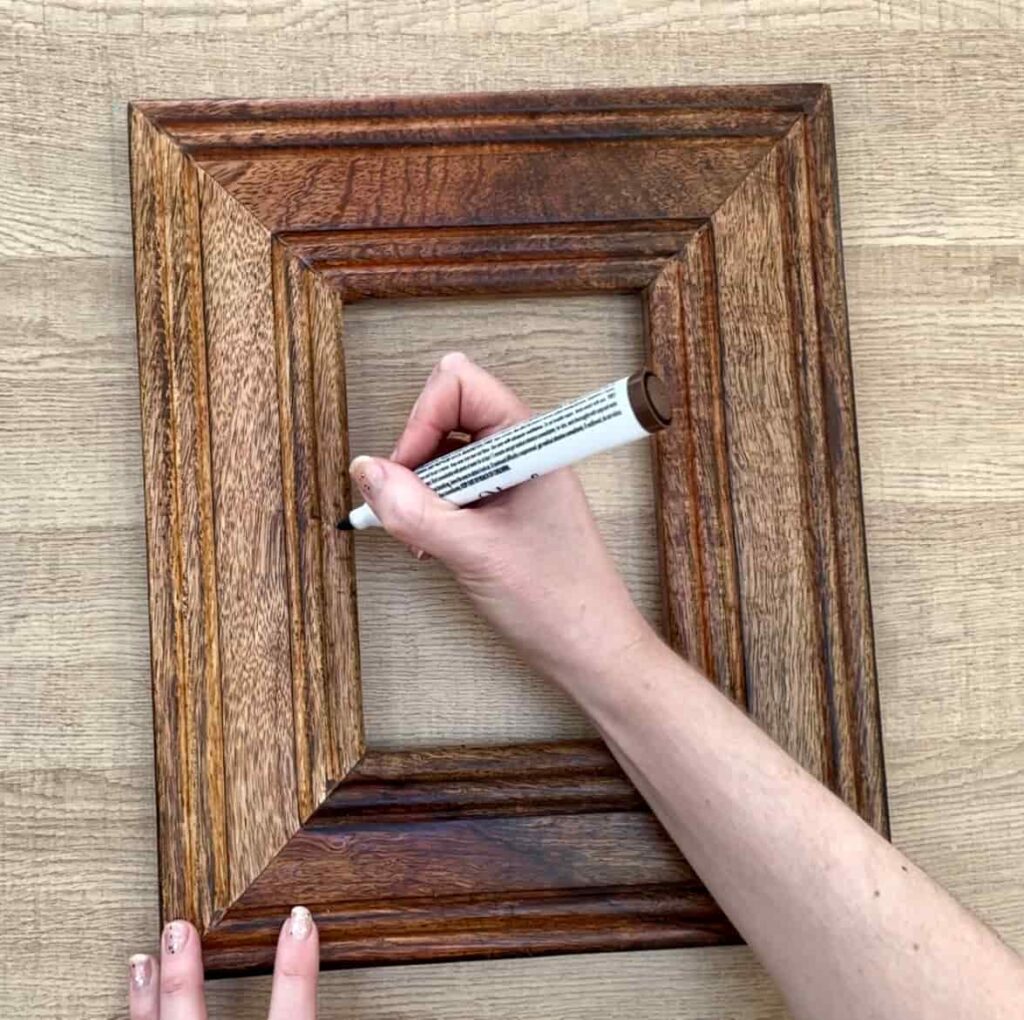
This photo frame has so much colour variation that the different stains help blend it all together.
Sanding and using stain pens is a great way to fix a scratched area and restore wooden frames to their original look.
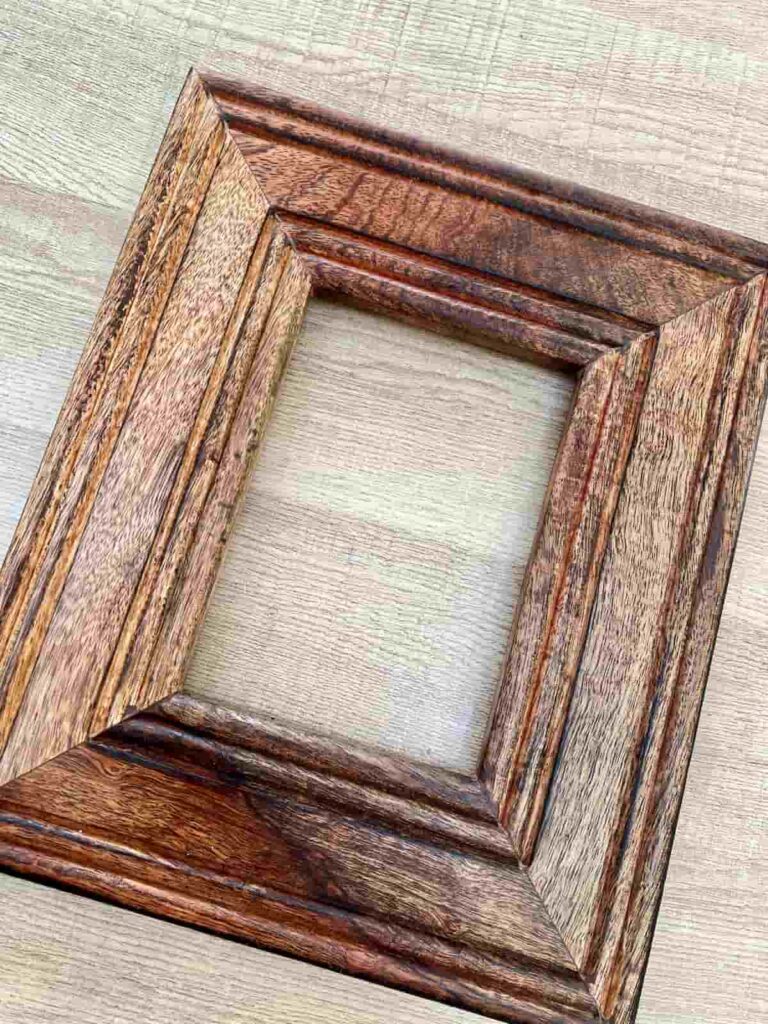
This technique is simple, cost-effective, and can save your decor from being thrown away.
Fixed Scratched Wooden Photo Frame
It’s so nice to be able to see otherwise minorly damaged items and see the potential in them. Whether that’s to buy something imperfect and improve it or save it from being thrown away.
By following these simple techniques, you can easily refresh your wooden pieces. Whether it’s a scratched photo frame or a scuffed wood table, a little care can bring them back to life and keep them looking great in your home.
With just a bit of effort, you can make the most of what you have and even turn charity shop bargains into beautiful, display-worthy decor.
When you don’t have stain pens, you can use something that you probably have at home. A wax crayon can work like a wax stick to fill in the scratches. Simply rub a crayon over the gaps until they fill up to the surface level. Then you can blend out the colour.
Do these methods work on deep scratches? You’ll first need to use wood filler to even out the scratches. Paintable or stainable wood filler will help to blend the colour into the surrounding area once it is dry.
How to Fix Scratches on Wood Instruction Video
You can find more video tutorials on our Youtube Channel
If you loved this project, you’ll love these projects too:
Tips for Painting furniture

Remove paint without chemicals
How to paint candles
Pin it for later – Easy Fixes for Scratches on Wood

Hi there! I'm Rachel Bowyer, a passionate DIY enthusiast with a knack for transforming the old into something beautifully new. With a deep love for furniture painting, refinishing, and the art of crafting. I've been documenting my DIY projects and restoration journey since 2018. I specialise in techniques like decoupage, stencilling, and decor transfers. Join me as we explore the world of creativity and home improvement, one project at a time.