7 Easy Ways to Paint Old Glass Bottles for Autumn Decor (Part 1)
Want to reuse or repurpose old glass bottles? Here are 7 ways to paint glass bottles to make beautiful home decor.
A classic way to reuse an old glass bottle is to place fairy lights in an empty wine bottle.
And a great way to repurpose old jars could be a soap dispenser, candle holder or bird feeders.
But what if you can be even more creative? Glass jars and old bottles have so much potential as DIY projects.
Either save them after using them at home. Or find them at thrift stores and charity shops.
But today is about how to paint a glass container in a creative way. They make perfect flower vases and home decor. But it doesn’t matter what you do with it.
This post includes gifted products and affiliate links so you can easily find the products I use myself and recommend to friends. If you purchase these products, I may earn a small commission at no extra cost to you.
7 easy ways to create unique autumnal home decor on a budget
I’ve been collecting interesting glass bottles for a while. I’d built up a little collection of bottles with interesting shapes.
I had liquor bottles such as whisky, gin and beer bottles. Also coffee bottles and the stunning, Nando’s sauce bottle.
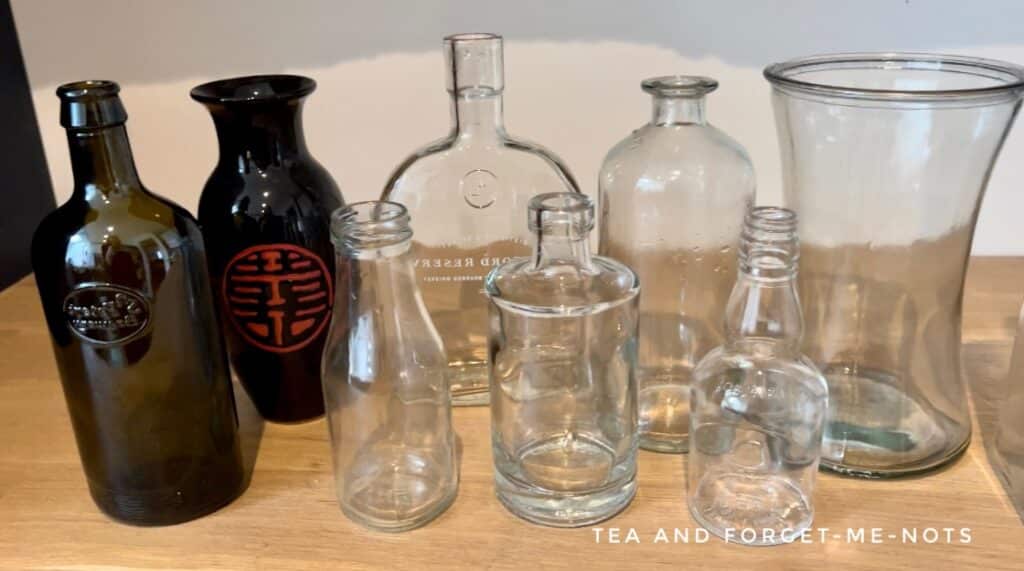
And there’s a bonus DIY project of a flower vase. Not glass. But something I wanted to update.
Preparing the bottles for their makeovers
I started all of these projects by removing the labels and stickers. I put them in a sink of hot, soapy water. Then for any stubborn labels, I used acetone and fine sandpaper.
Then I washed them all with a TSP cleaner. And then rinsed them in clean water.
Project 1 – Coffee Bottles
This might be my favourite one of the creative ideas. It’s certainly the cutest. And you could easily recreate this with old mason jars or soda bottles too.
I have a large collection of these bottles. I saved them thinking they were too good to put in the recycling bin or take to the local recycling center.
Fortunately, I did eventually do something with these. Unlike some of my other ‘potentially useful’ craft supplies!
To start, I used Slick Stick to add a matte layer to the bottles. Glass, like laminate, is slippery and therefore difficult for paint to stick to. Slick Stick is a simple way to apply paint to these types of surfaces.
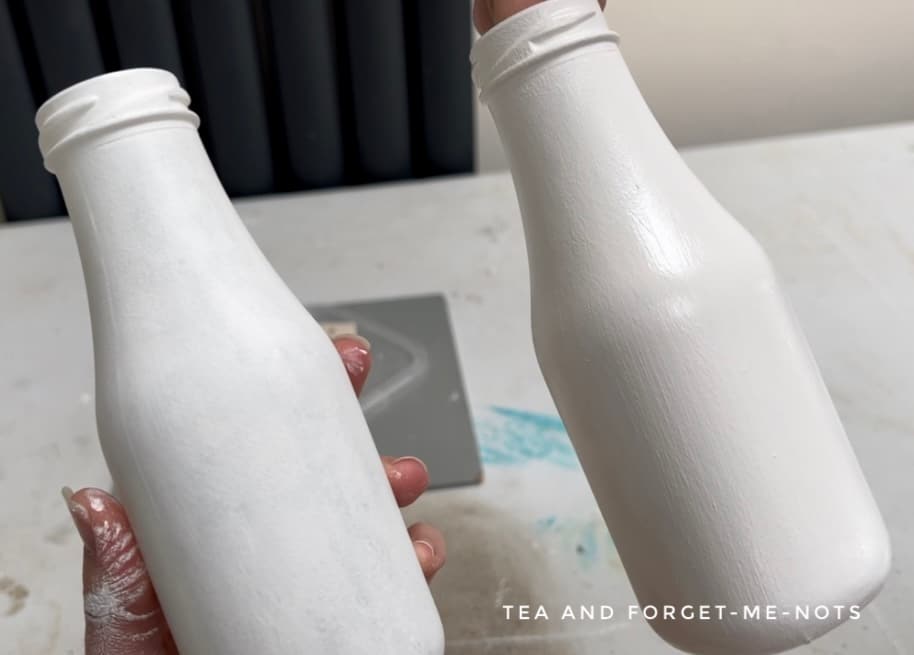
I pictured turning these bottles into something like milk glass bottles. So they needed to be white and opaque.
I used a brush and roller to apply two coats of Salt Water to get that bright white. Then to seal I used Clear Coat in Satin.
Have mismatched things? Here’s how paint can make them look like a set!
Then onto the decoration. This is the autumnal, fall part of this fun DIY project. (The cute bit!)
It was a simple design but I liked the idea of having little labels. Almost something you’d see in Alice in Wonderland.
I decided to make two sets of labels with modelling clay.
I used a cookie letter stamp set and imprinted ‘autumn leaves’ and muddy puddles’. Then I cut them out with a knife into leaf shapes and rectangles.

I painted the leaf labels in a gradient of Rustic Red to Marigold Orange. I used a small artist’s brush so that I didn’t get paint in the grooves of the letters. So that they would stand out still.
Want to know how to choose paint colours? Here’s how to choose the best paint colours for furniture!
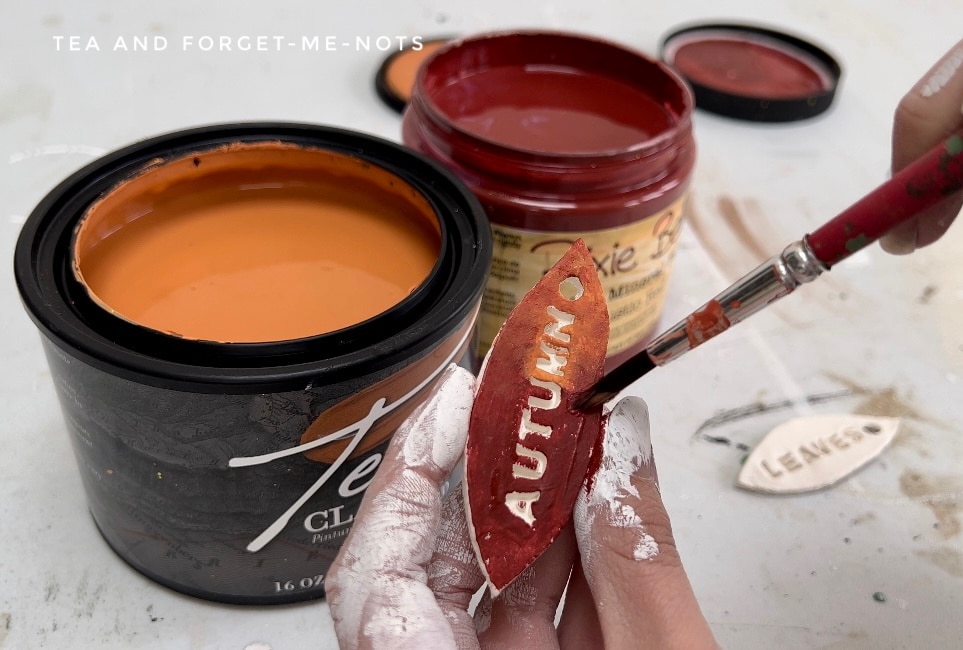
And sealed them with Satin Clear Coat.
While this modelling clay is already white, it looked unfinished. So, I painted the muddy puddle labels with Salt Water.
To finish, I used furniture wax in Sparkling Copper. This gave it a brown colour to make the imprint of the words more visible. It also gave it a slight sparkle rather than a dull brown, that paint would give.
You won’t believe how this wax TRANSFORMED this chest!
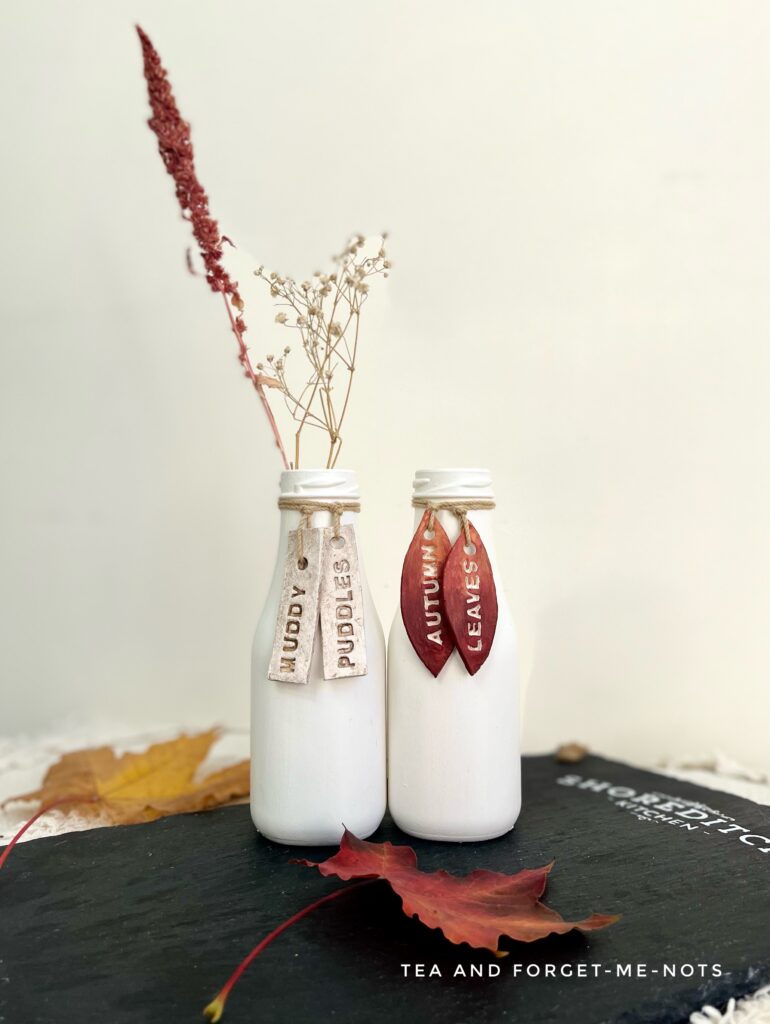
I tied the labels on with some string. Making sure to let the labels hang separately so that both words were visible.
This is such an easy glass milk bottle look. You could even personalise the labels and make them into a great gift.
Upcycling glass bottles for beginners
I’ve created these bottles in a way that is completely beginner friendly. If you use a bottle cutter to cut the neck of the bottle, you can make it even easier to give bottles or an empty jar a new purpose.
A bottle cutter might not be something that you’d find in craft stores. But they’re easy to order online.
Then you’re not restricted by the size of the opening of the bottle. You could add something like a tea light to the inside of the bottle.
Just like charity shops, flea markets and car boot sales are also great places to find empty liquor bottles. Sometimes it’s a vintage glass bottle and other times new glass, but there are always options.
Here’s how to find the best things for free!
The most important thing is the shape of the bottle. Everything else can be changed.
Project 2 – Old Glass Bottles (Nando’s Sauce)
Onto the next awesome way to upgrade an empty bottle. And it’s over to Nando’s sauce! This shape is similar to an old wine bottle but with a square base.
For this, I painted the first coat of Slick Stick. Then I chose the chalk paint, Aubusson Blue, by Annie Sloan. I only did one light coat because it was only to give a subtle hint of colour.
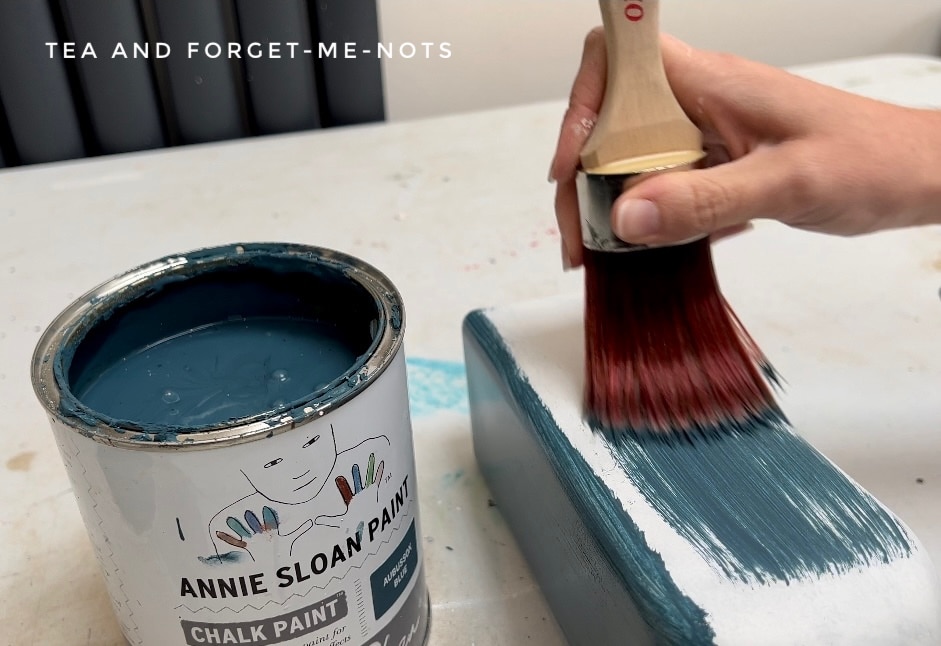
The next step was to add a coat of crackle glaze. This produces cracks between coats of paint. It’s one of the awesome ways to create texture and dimension.
It’s important to apply crackle glaze in even strokes in the same direction. The goal is for Aubusson Blue to be the hint of colour under the cracks.
Then for the top layer of paint. I chose a white paint, Salt Water. To help give the blue paint a dramatic look.
For the top paint layer, you apply it in the opposite direction to the crackle glaze. So, I put a thick coat of Salt Water on, horizontally along the bottle.
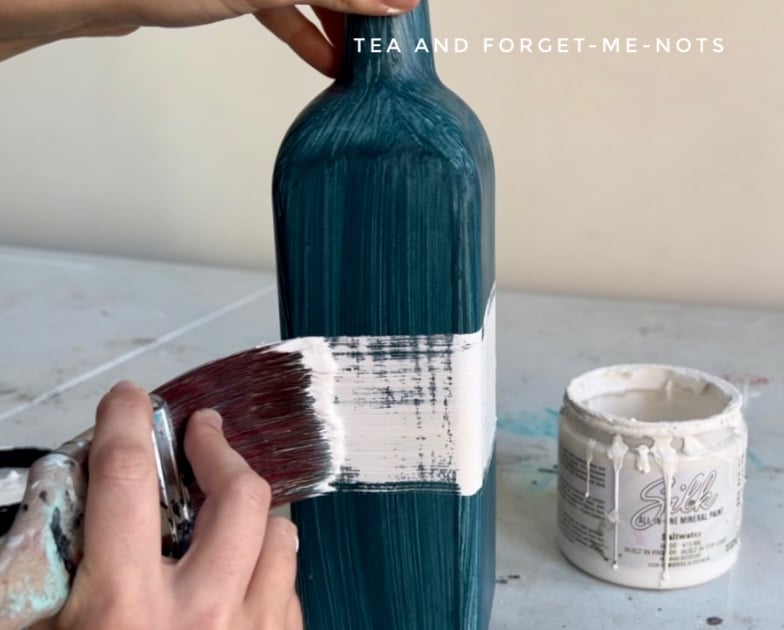
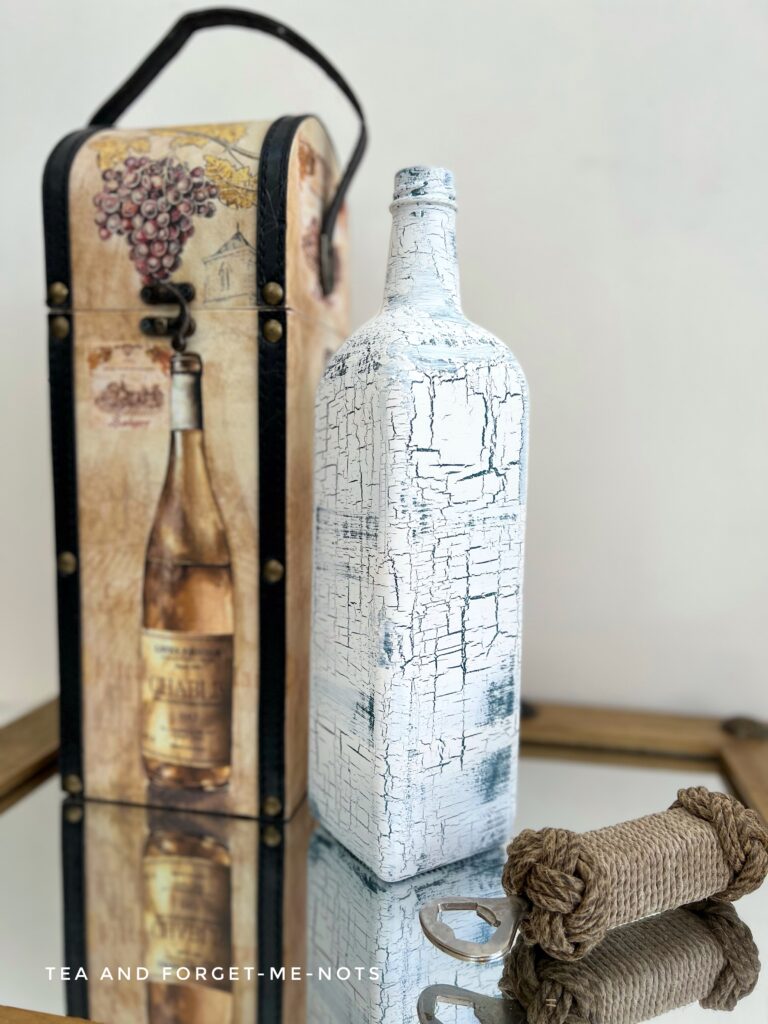
The best part is seeing the cracks reveal themselves, almost instantly. Some small, some large, depending on the thickness of the glaze and the paint.
Then to seal, I used a coat of Clear Coat in Satin.
Blue is not an autumnal or Fall colour.
So why did I choose it? Because a vase for autumn decor will often have red and orange flowers in it. So I deliberately chose blue for this effect to enhance the impact of these warm colours.
Thanks to Nandos for helping to bring new life to this clear bottle!
Project 3 – Upcycled Gin Bottle
Now the next one is an empty liquor bottle. A really cute gin bottle.
This is in complete contrast to the last project. The glass bottle itself is going to get the autumnal, fall colours.
Again I started by coating it with a Slick Stick.
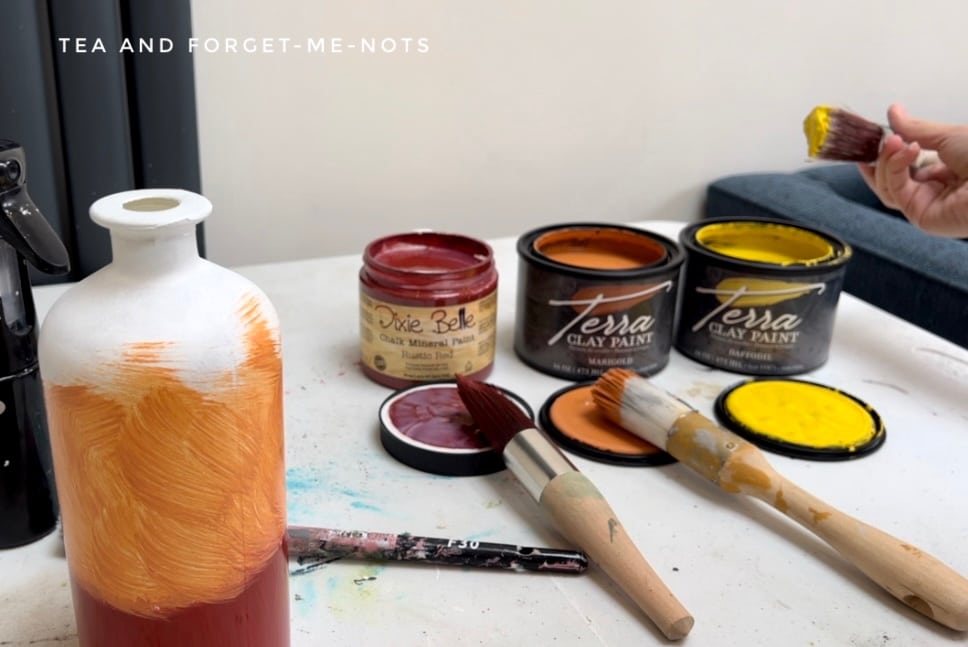
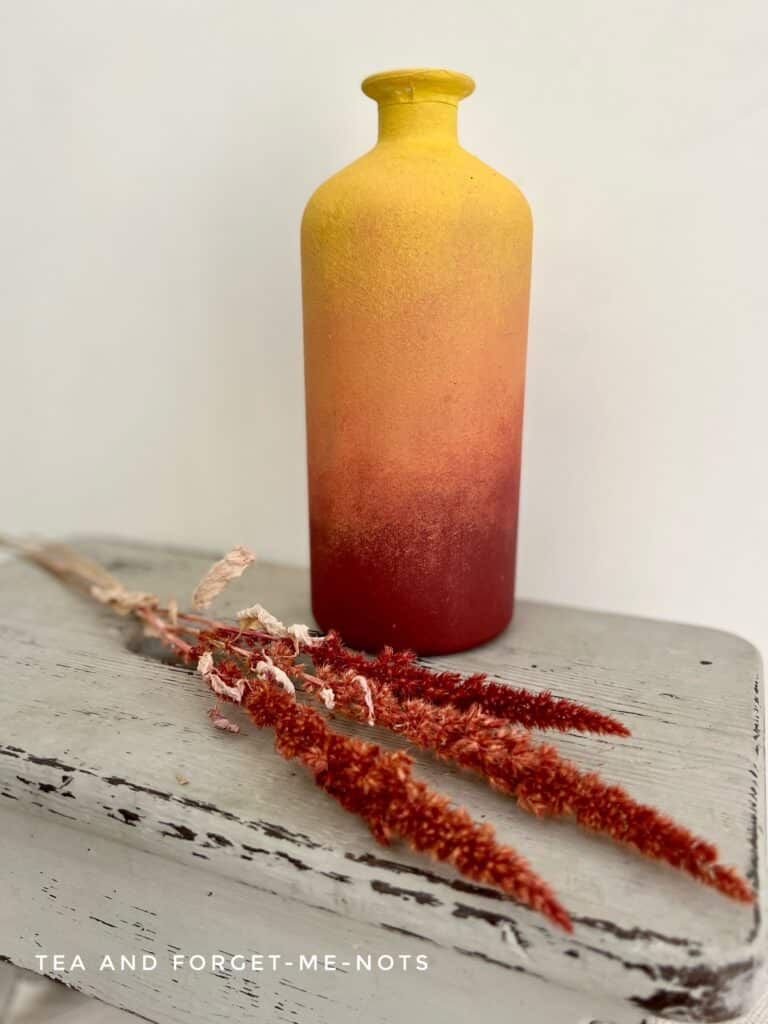
My aim for this vase is to blend a lovely combination of red-orange into yellow. For a really bright and vibrant vase. So, the three paints I used were Rustic Red, Marigold and Daffodil.
The best way to blend a piece is to start with a solid base coat of each of the colours that you’re going to use. You don’t want to blend and see that white underneath.
For the second coat, I added a fresh layer of each colour of paint. I had a separate paintbrush for each of the three colours. Then also a dry brush to blend the colours.
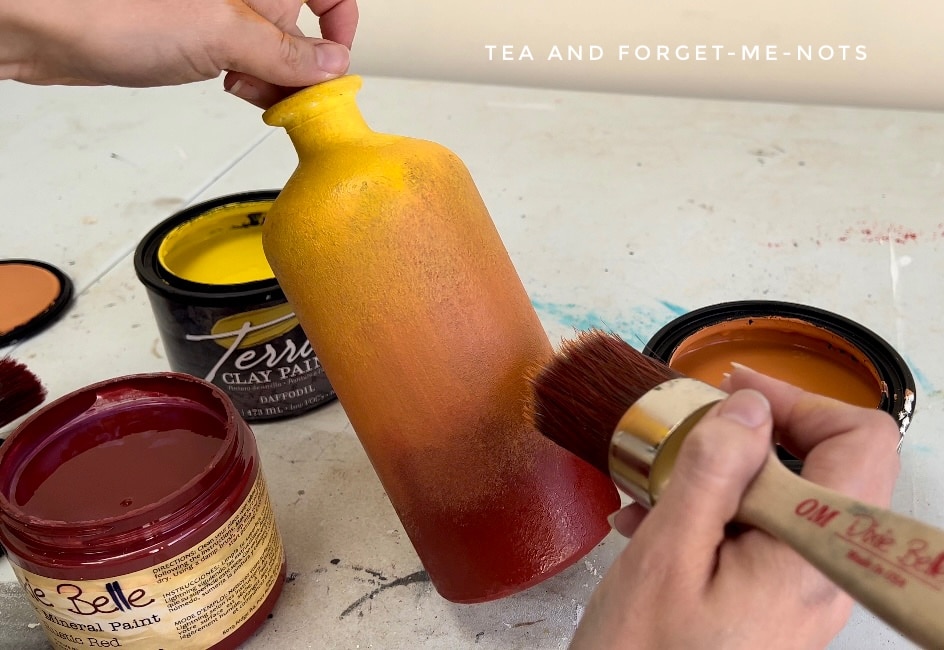
Blending is essentially just an exercise in patience. The goal is just to take out any solid lines between the blocks of colour.
I really liked the colour combination that this created. So I used matte finish paint for the top coat. The result would be exactly as if I hadn’t put a top coat on it.
It reminds me of both autumn leaves and a sunset. As it’s quite small it adds just a bold splash of colour and something that’s so easy to do yourself.
Project 4 – IKEA Glass Vase Makeover
So, this isn’t a glass bottle. This is a glass vase from Ikea. But it’s perfect for a mercury glass DIY.
You might wonder what does mercury glass have to do with Autumn?
But metallics are trendy this Autumn. So it’s a good one to try out for yourself.
Here’s my most popular IKEA makeover ever!
Mercury glass has a silvery mirror-like surface. Often with gold or black speckles underneath it. It looks like a tarnished mirror and is really beautiful.
And also really easy to DIY!
To start, you need mirror spray paint. Not silver or grey spray paint, it won’t work with those.
I turned the vase upside down and lightly sprayed it inside. Then while it was still wet, I misted a mixture of water and vinegar over the top. The vinegar mixture removes some of that paint and creates that bubbly texture.
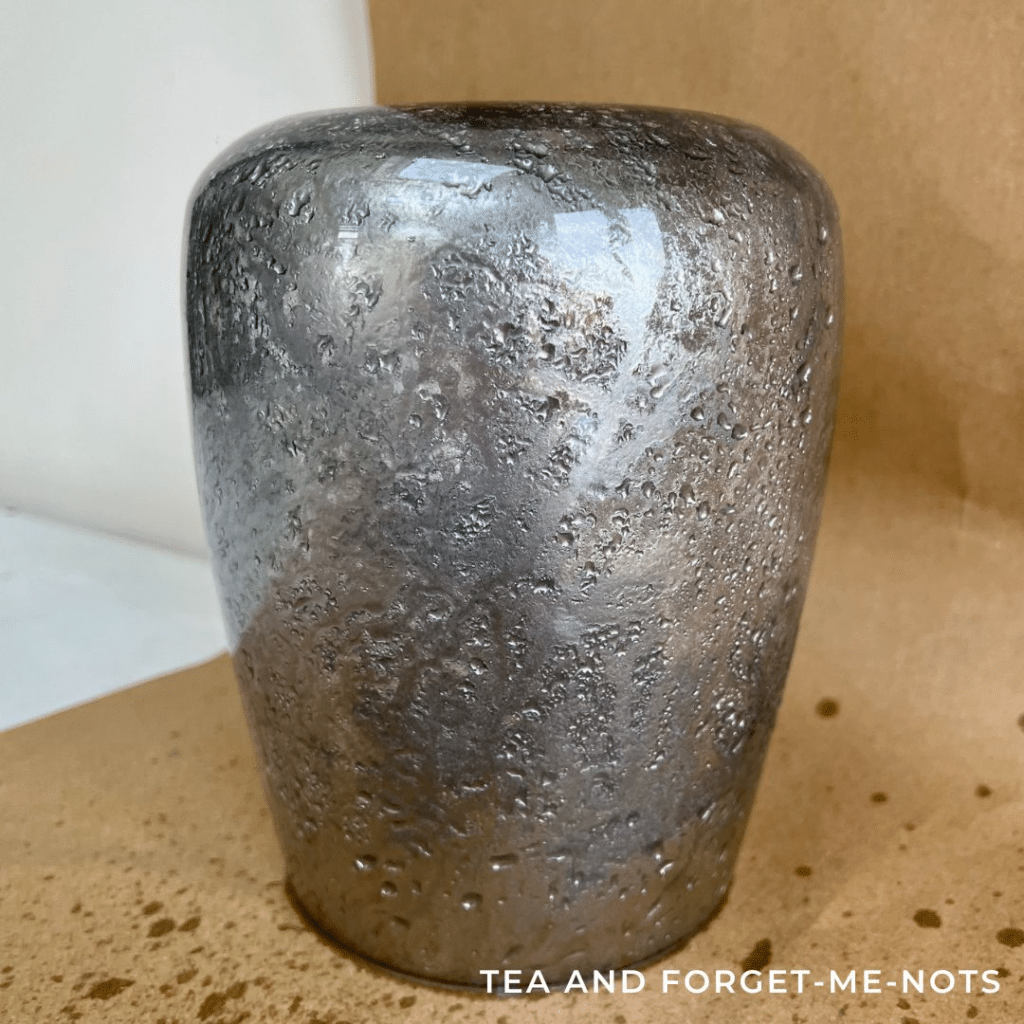
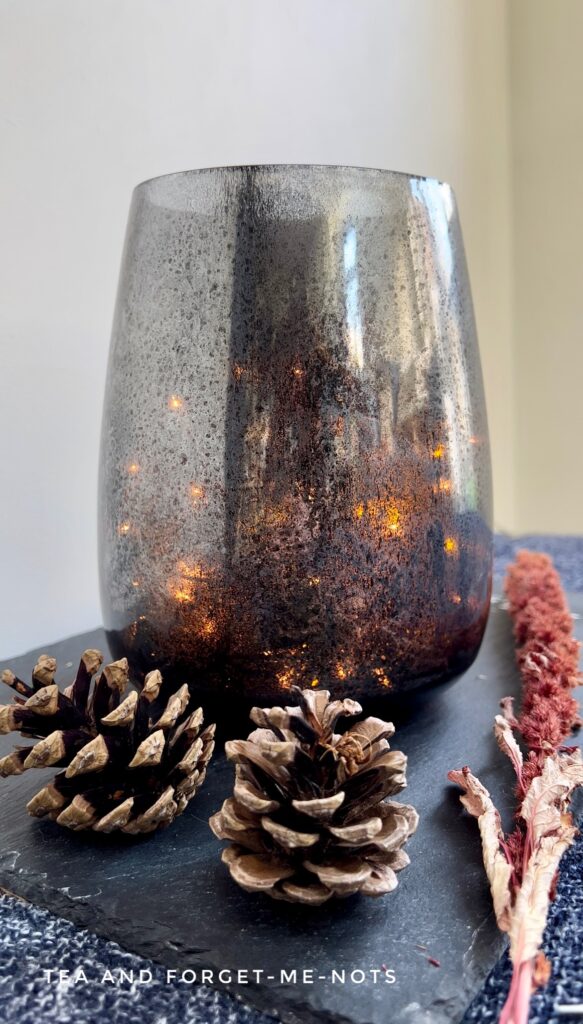
It looks really pretty, almost like it’s raining on the inside of the vase.
I did two coats of mirror spray paint and the vinegar and water solution. And let it dry between applications.
Then for the extra dimension. I added a coat of black matte spray paint.
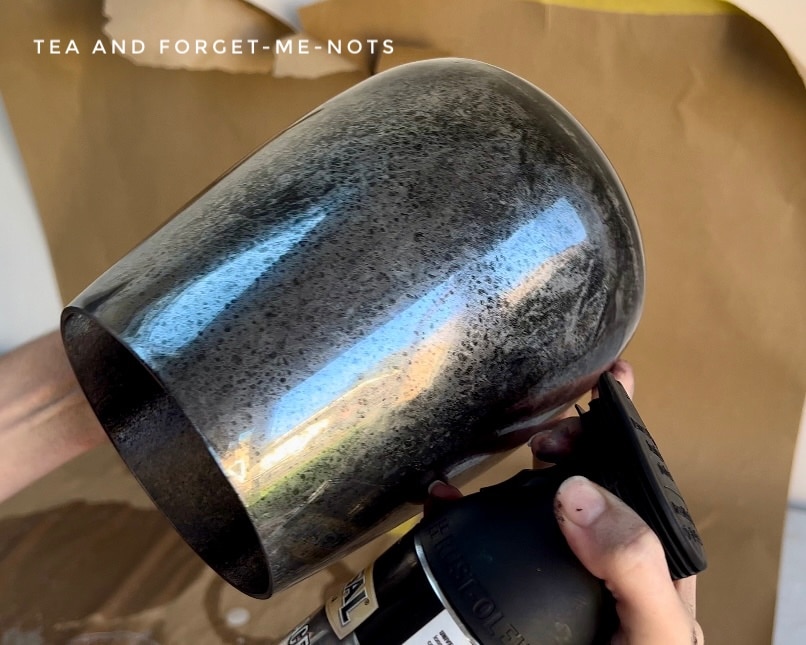
But I didn’t want it solid black inside. I wanted some of it to be able to catch the light. So again I used some vinegar and just dabbed away a little bit of where the black paint was still wet.
You could also do this with gold rather than black for a different look.
If you wanted to use this vase with real flowers and water I would put a second container on the inside. Then make sure that the water and flowers go directly into that rather than this vase.
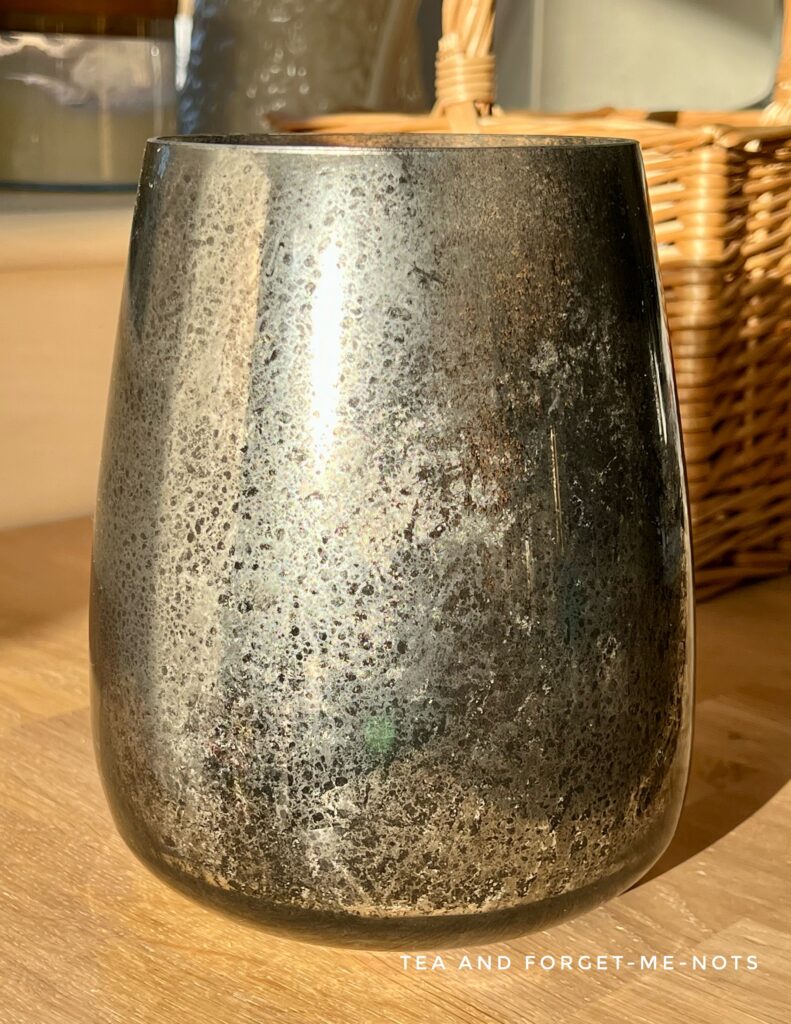
It was hard to get a photo that does it justice. It looks really beautiful in person.
Here there are fairy lights on the inside. You can see where there are see-through patches where it catches the shimmering light.
Repurpose old glass bottles
The good news is that I have 7 beautiful projects to share. The bad news is that this post is getting too long. So I have to divide it into two.
However, you can see all of the projects come to life in the YouTube video!
Which of these was your favourite way to repurpose old glass bottles? Mine is definitely the little muddy puddles, it’s just too cute.
Check out part 2 for the rest of the budget-friendly Autumn decor projects.
This post is part of a YouTube hop with several other creators. Want to see even more Autumn Decor inspiration? Check out the playlist!
Pin it for later – How to paint glass bottles
Hi there! I'm Rachel Bowyer, a passionate DIY enthusiast with a knack for transforming the old into something beautifully new. With a deep love for furniture painting, refinishing, and the art of crafting. I've been documenting my DIY projects and restoration journey since 2018. I specialise in techniques like decoupage, stencilling, and decor transfers. Join me as we explore the world of creativity and home improvement, one project at a time.


Rachel these are excellent ideas and I need to try at least one of them. Love the sustainability of these projects!
Thanks, Maria. Yes and the flexibility of changing them in the future is great too.
Great budget-friendly idea! I love the different looks you gave each bottle! It was so much fun to see how you completely transformed them! Thanks for all the inspiration!
Thanks, Donna, I’m glad you like them.
Excellent ideas and tips as always! Pinned
Thanks, Cindy
These are all very beautiful, but my absolute favourite is the blended bottle. Thank you for sharing. Really do enjoy your blog (and youtube posts). Just as an aside, you can tell this is a UK site as the US ones always want to correct my spelling on words such as “favourite”.
Thanks Barb, that’s very kind. Yes, colour and color is probably the word I use the most that would need changing!