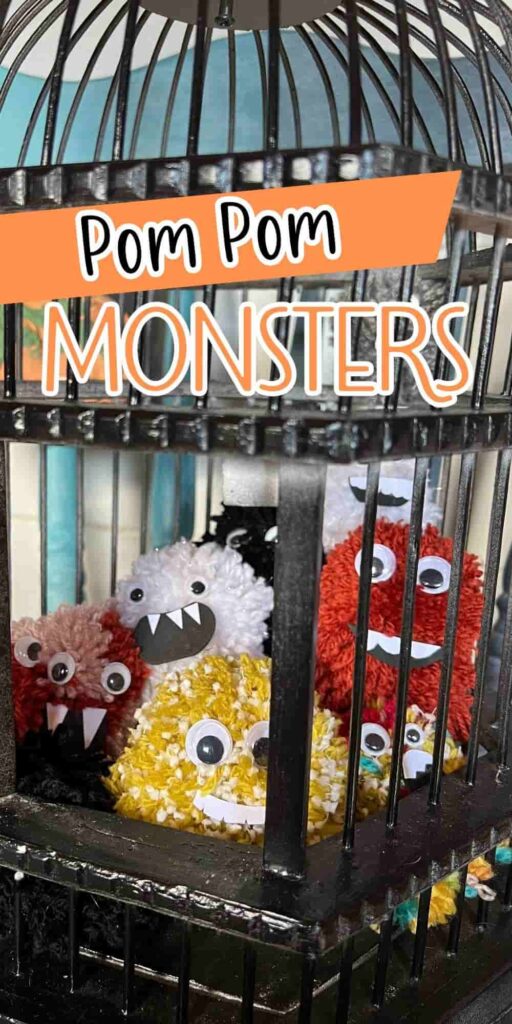
Pom Pom Monster Craft For Cute Halloween DIY Decor
Looking for cute Halloween decor you can make on a budget? Here’s how to make an easy pom pom monster with a few simple supplies.
Join me in creating the cutest Halloween pom-pom decorations that will melt your heart.
Maybe you’re not a fan of spooky Halloween. Or you have young children who want to make cute decorations. You can discover how to create these adorable pom pom monsters that will make you smile and not scream.
Many people struggle to find decorations that are both cute and easy to make, especially for Halloween.
We’ll go step-by-step through creating various pom pom monster decorations, using simple techniques.
See the full step by step video tutorial
How to Make a Pom Pom Monster Step by Step
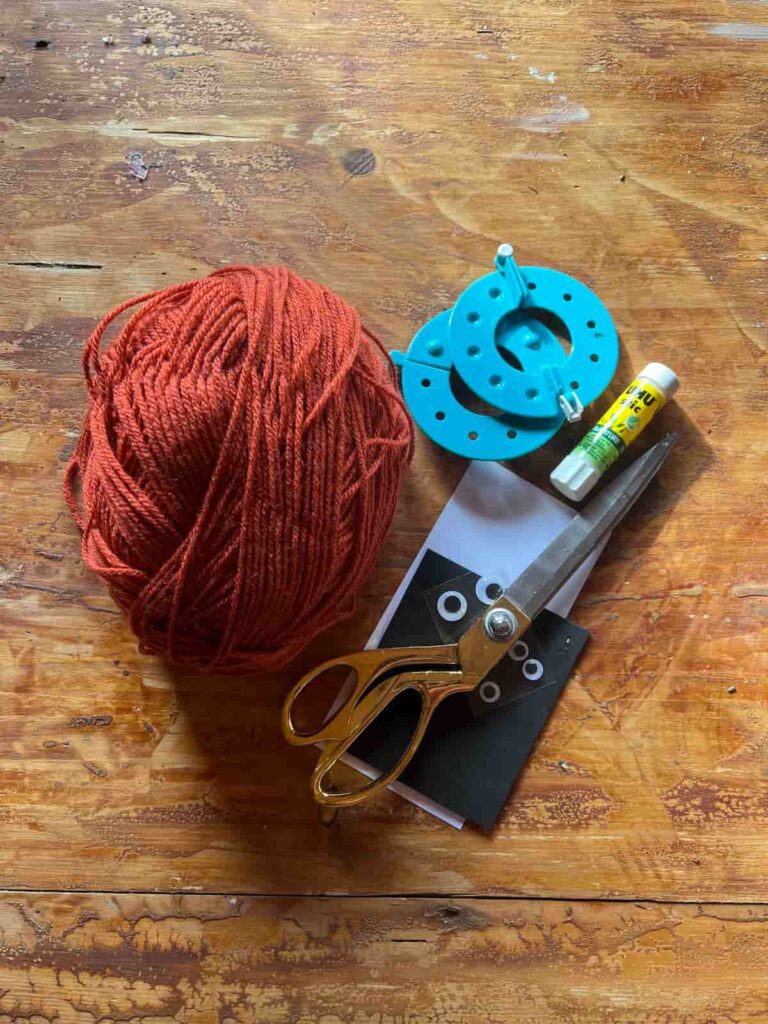
Materials you’ll need
Step by Step Instructions
Step 1: Pom Pom Monster Supplies
This is a budget-friendly craft. The most expensive supply is the pom pom maker.
However, you can make your own pom pom maker with cardboard if you haven’t got one.
Otherwise, you’ll need different colours of yarn, glue, paper and googly eyes.
Step 2: Wrap the Pom Pom
The first step is to make the pom pom. The more material you wrap around the pom pom maker, the larger the pom pom will be.
You can wrap multiple colours of yarn to create different types of monsters. You don’t have to stick to wrapping with one colour. By mixing and matching you create a variety of colourful creatures.

The fun thing is that you can play around with different designs and see what looks the cutest. Or spooky, if you want a more scary-looking pom pom monster.
This is a perfect Halloween decoration to make with children. Younger kids may need help cutting the pom pom, but otherwise, it’s a great way to get everyone involved.
Step 3: Cut and Secure the Pom Pom
Once you have the pom pom maker fully covered with yarn, you can cut it open.
It’s helpful to have sharp scissors or a craft knife for this. The more times you wrap the yarn, the harder it will be to cut the pom pom open.
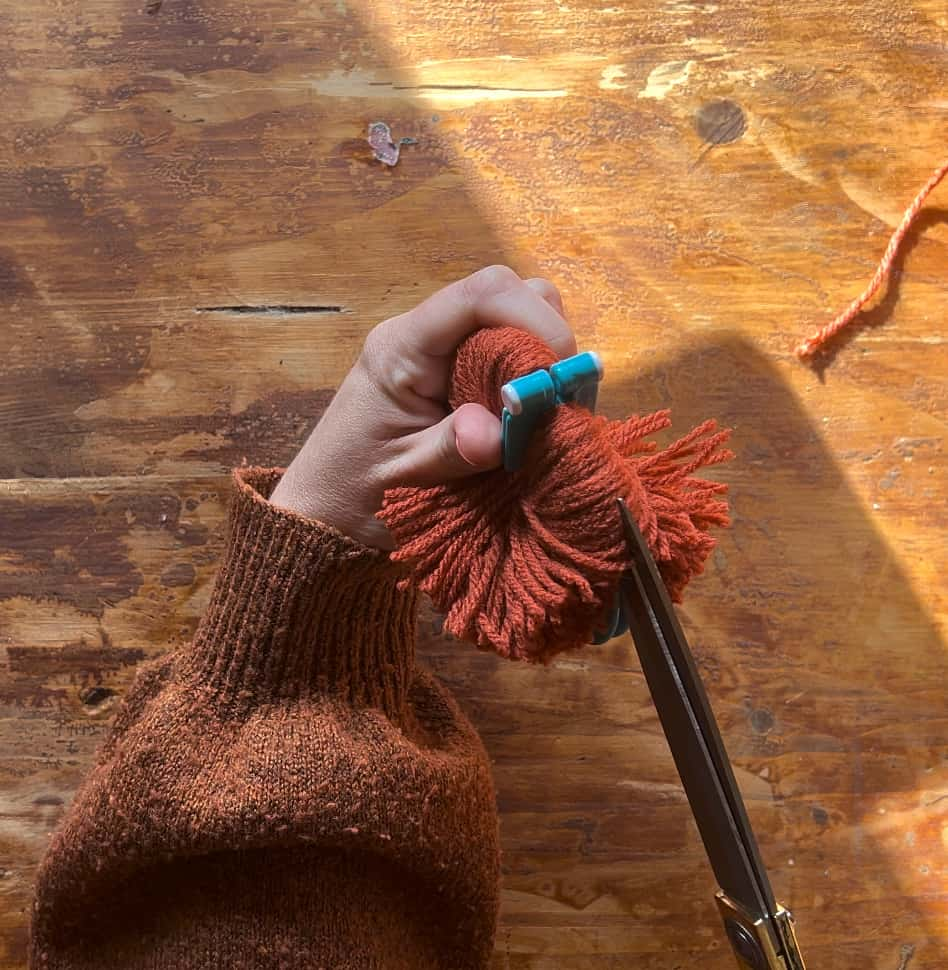
Finally, use another bit of yarn around the outside of the pom pom to secure it in place.
Do you want to use this monster to dangle from something, like a light or in an entryway? Then keep the final piece of yarn long.
If you plan to keep the fluffy yarn monsters as something to sit on a shelf, you can trim it to the same length as the other strands.
Now you have your classic pom poms, you can get on to being creative and turning this into a little monster.
Step 4: Trim the Pom Pom into a Monster Shape
You can keep the classic shape of the pom pom balls for your monster. But these monsters need a haircut.
By trimming the end of the strands, it gives the monster a more defined shape.
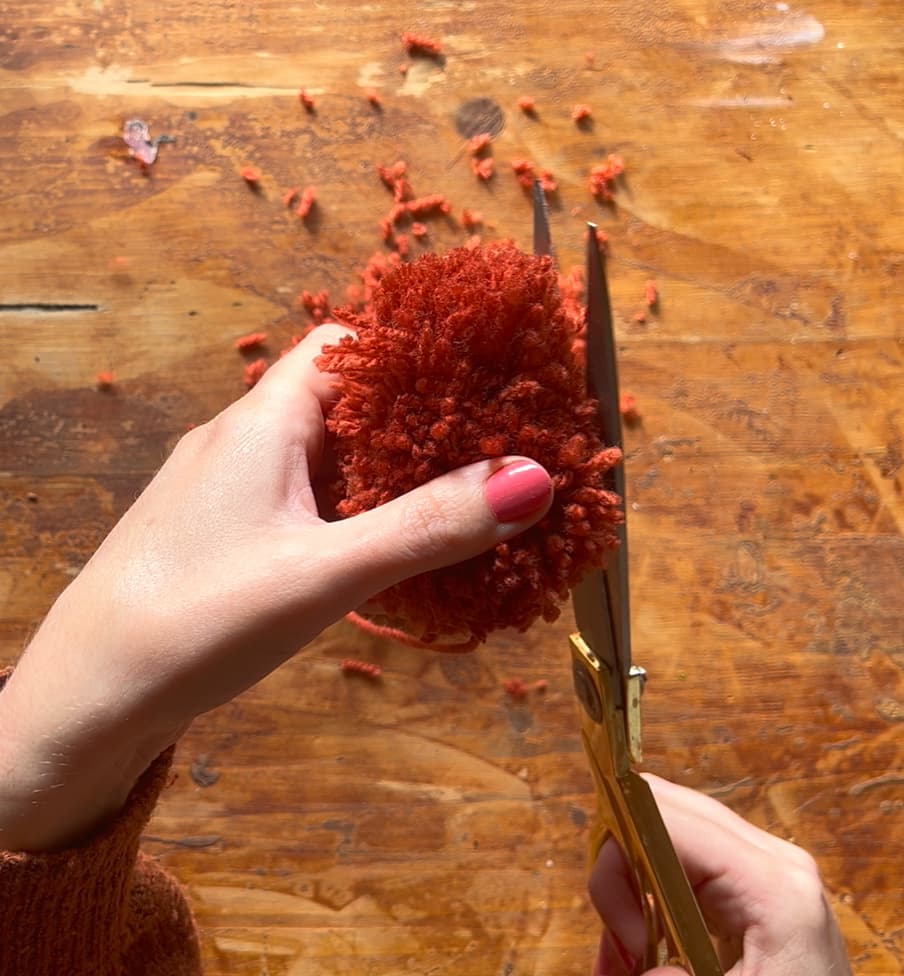
This first monster is a lovely burnt orange. It’s the perfect autumn colour.
So, if you don’t want to decorate just for Halloween, a seasonal colour will keep it looking like appropriate decor for a bit longer.
Step 5: Add Eyes to the Monster
To turn this into a monster, give it a face. You can use googly eyes or cut some out with paper. If you’re going for adorable monsters, bigger pupils make the monsters look cuter.
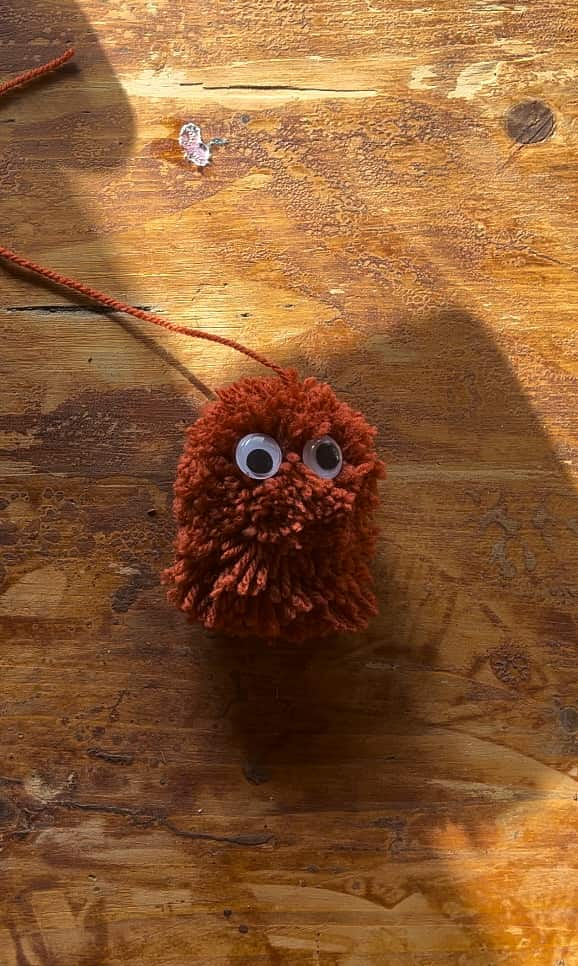
When glueing the eyes into place, it’s helpful to fluff up the strands of yarn around the eyes.
This makes it look more natural. The eyes haven’t been added on top but are part of the face.
It’s surprising just how much difference it makes as to where you place the features. They can feel very different if you leave a large gap between the eyes or the eyes to the mouth.
Before you glue them down, play around with the placement to find the look you like.
Step 6: Make the Monster’s Mouth
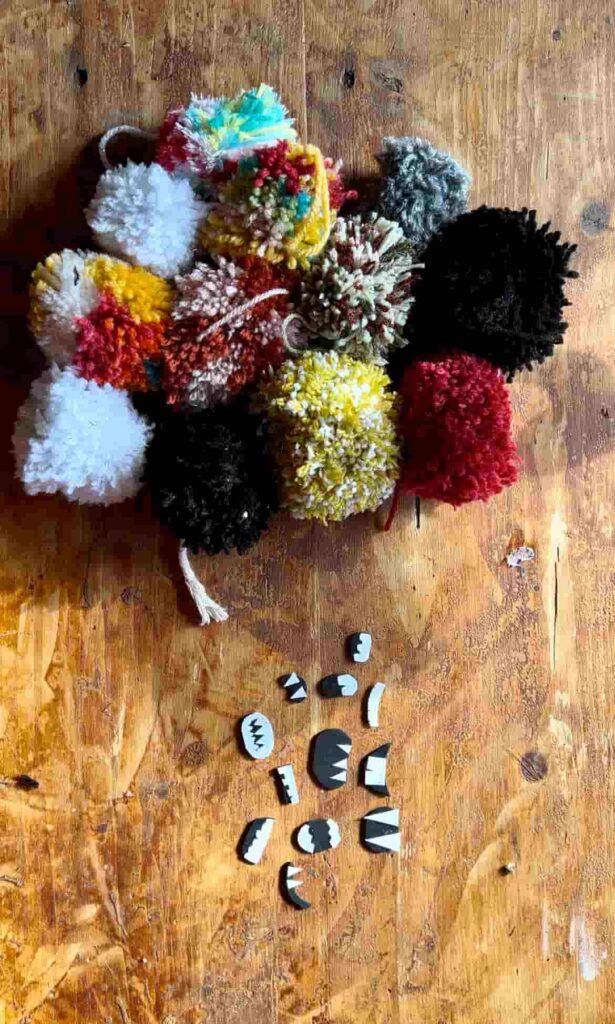
The last thing to do is create a mouth. You can choose between fangs, jagged teeth or rounded teeth. It’s a fun way to give each monster a different feel.
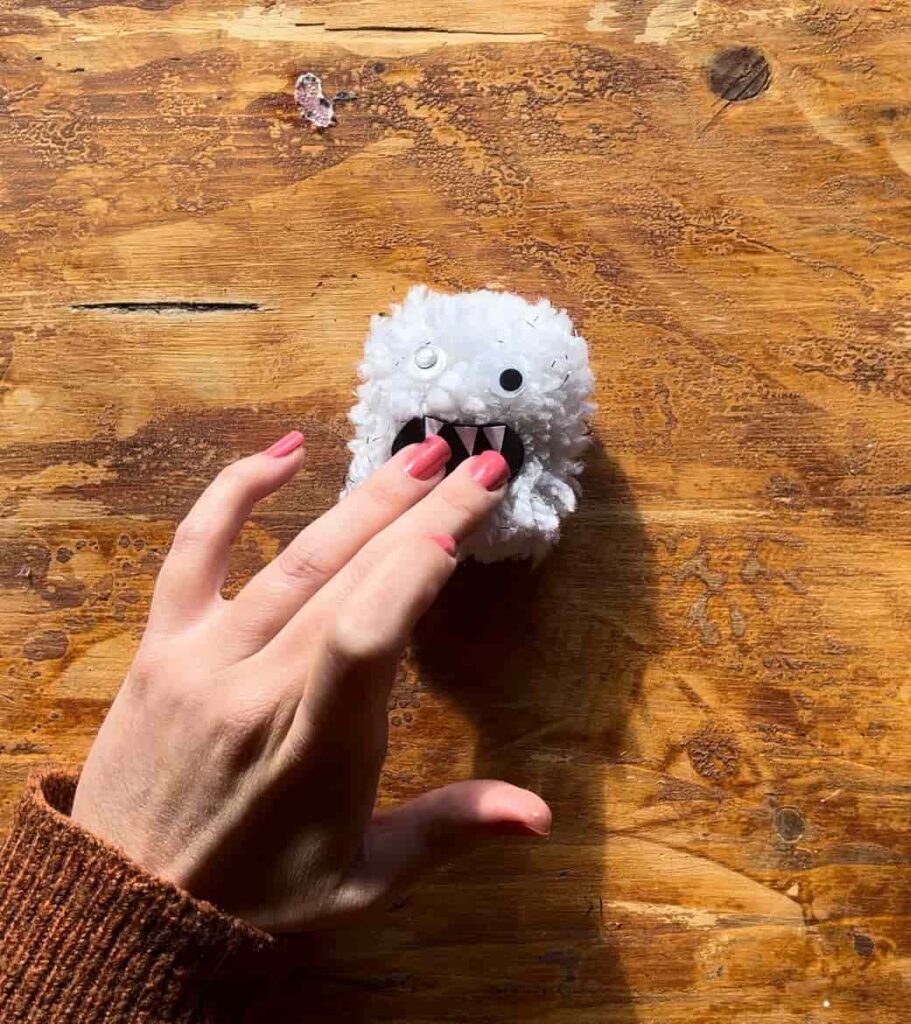
Making a mouth base with black foam creates more stability to stay in place on the pom pom.
The easiest way to make teeth is to use the black foam base as the template. Then cut the white paper to the shape you need.
To attach the paper to the foam, you can use a glue stick. Then to attach the mouth to the pom pom, something stronger like white glue or hot glue attaches securely.
Remember to fluff around the edges of the mouth to blend it in with the face. Think about the colour of the pom pom to see what mouth will work. With a white pom pom, a large black mouth helps the teeth to show well.
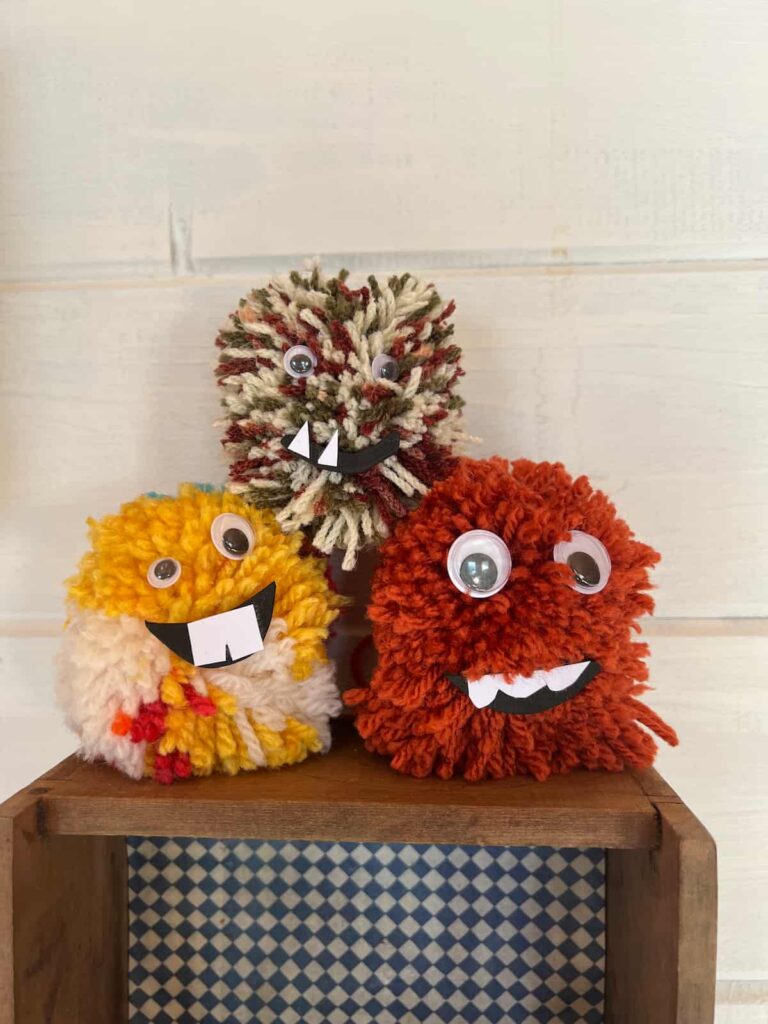
Step 7: Make Pom Pom Monster Friends
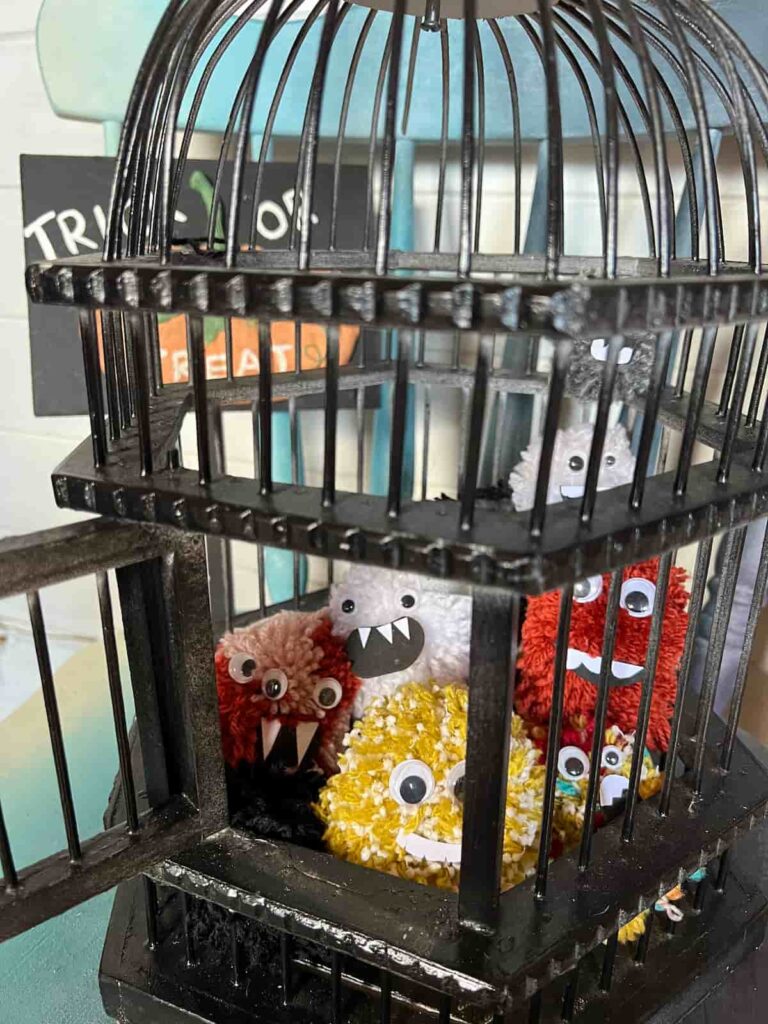
If you want some not-so-scary monsters this Halloween, this is a great starting point. It would be unfair to leave Orange Monster by themself, so we need some monster friends.
You can add other embellishments too. If you want a cute cat, add little triangles at the top for its ears. Or leave some strands of the pom pom long to create whiskers.
You could also add pipe cleaners around the back to create arms. Or antennae.
Cute Pom Pom Monster Decorations for Halloween
These cute monster crafts are perfect for beginners. These Halloween pom pom decorations are not only fun to make but are an easy way to get the whole family involved.
The spooky season doesn’t have to be scary!

These pom pom monsters are adorable. Between the goofy teeth and googly eyes, they’re just so cute.
If you want to create bunting you could have a little row of monsters welcoming you to your front door.
If you loved this project, you’ll love these projects too:
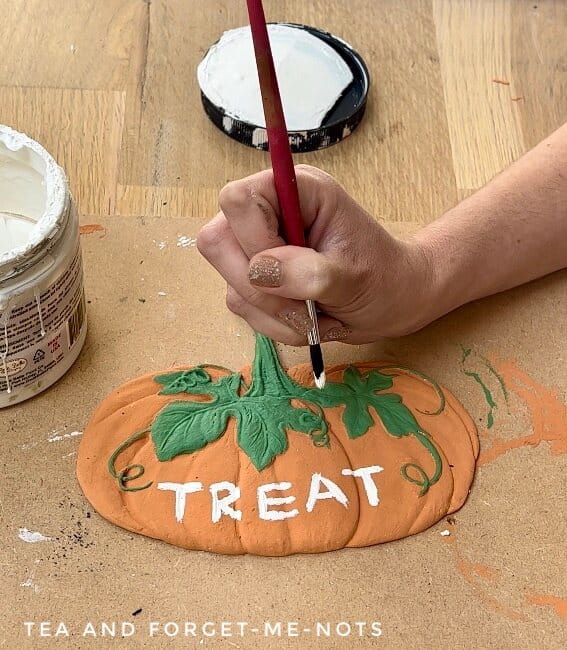
Halloween porch sign
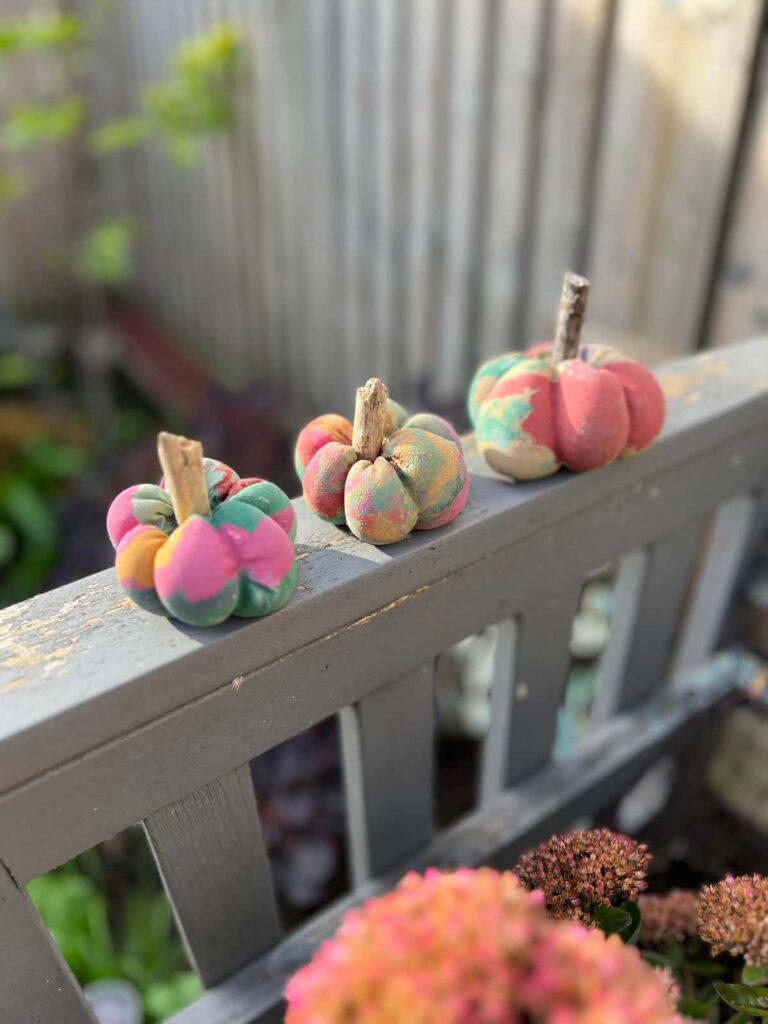
Concrete pumpkins
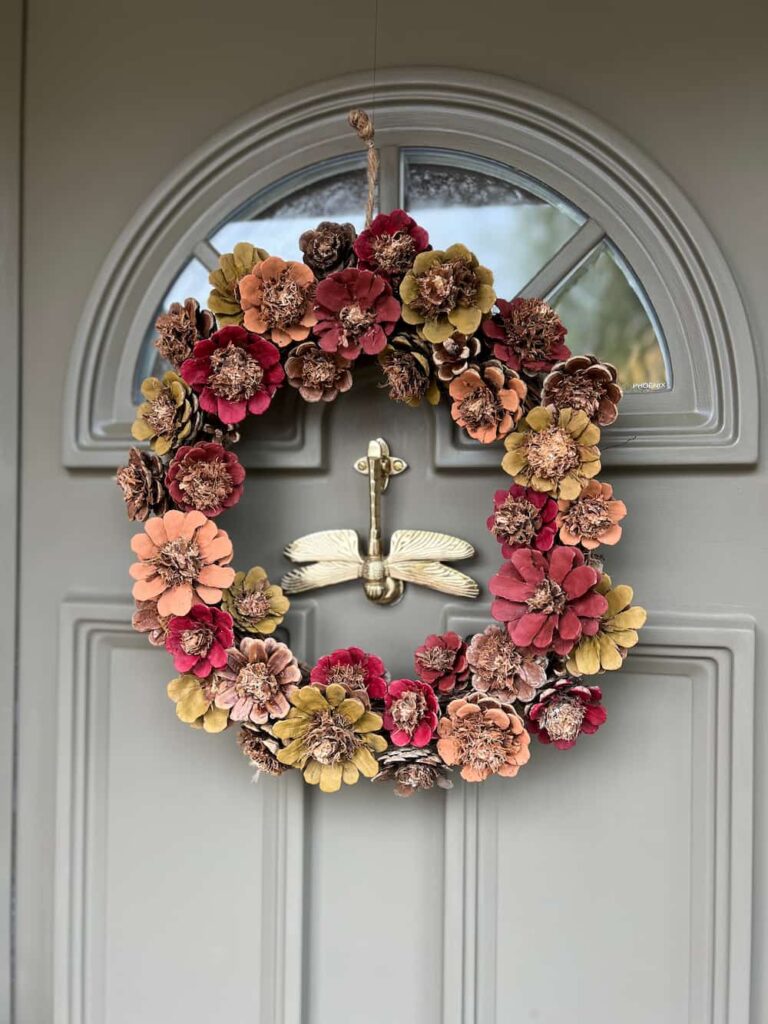
pinecone wreath
Did you make this craft?
I love seeing what you do. Please mention @teaandforgetmenots and share your creations with me!
Pin it for later – Pom Pom Monster Halloween Decorations

Hi there! I'm Rachel Bowyer, a passionate DIY enthusiast with a knack for transforming the old into something beautifully new. With a deep love for furniture painting, refinishing, and the art of crafting. I've been documenting my DIY projects and restoration journey since 2018. I specialise in techniques like decoupage, stencilling, and decor transfers. Join me as we explore the world of creativity and home improvement, one project at a time.