Toilet Paper Roll Christmas Crafts – Festive Fun on a Budget
If you’re looking for a creative way to decorate your home on a budget, I’ve got the perfect solution. Upcycling empty toilet paper rolls into stunning Christmas decorations!
Christmas is a lovely time of the year. But it’s so easy to buy new Christmas ornaments to make it feel more special each year.
So whether you want to save a little money, or just enjoy easy Christmas crafts. These 4 easy projects will bring a festive touch to your home, using materials you probably already have.
With just a few household items—paper towel rolls, paint, scissors, hot glue, and maybe a sprinkle of glitter—you can create beautiful decorations that rival store-bought options.
Plus, crafting together is a great way to make memories and entertain the kids during the holidays!
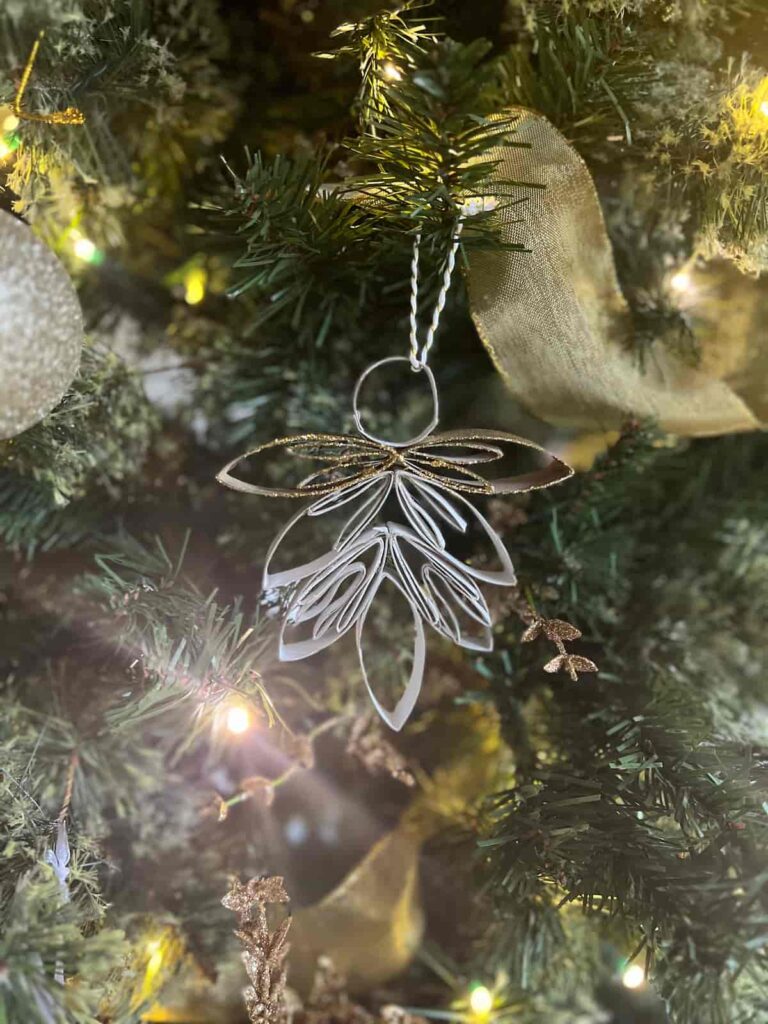
I collected so many toilet paper rolls over the months before I had my plan to craft with them. They’re one of those supplies that’s a shame to put in the recycling bin. There are always great ideas to make something fun with them.
This time it’s Christmas decorations. In these tutorials, I’ll share how to make Christmas tree ornaments (which could easily be a garland too), present toppers and a napkin holder for a festive table.
Would you rather video tutorials instead of step-by-step instructions? We’ve got a comprehensive video tutorial that guides you through creating DIY Christmas toilet paper roll crafts.

And this is where it comes to the Do It Over blog hop.
Do It Over’ Designers is a group of talented bloggers who love to recycle, upcycle and DIY. It’s about taking something old or unused and ‘doing it over’ into something new.
Check out all the ‘Do It Over Designers’ at the bottom to see their lovely do-overs too!
How to Make Easy Toilet Paper Roll Crafts Step-by-Step
Materials Needed
Step by Step Instructions
Assuming you don’t want the toilet rolls to keep their natural colour, the first thing is to paint them. Either before or after cutting them into their new Christmas shape.
There are a couple of things to consider as to whether to paint before or after cutting them.
It can be tricky to get spray paint into the crevices of a finished and glued design. But it’s also hard to use spray paint on the inside of a toilet paper roll while it’s whole.
You might want designs to be more than one colour, which is tricky with spray paint and covering up areas in another colour.
In the end, I used a combination of painting before and after. Both with spray paint and a paintbrush. If you use a kitchen paper roll rather than a toilet paper roll, it’s easiest to cut it in half while painting. This means that your paintbrush can reach the middle of the inside of the roll.
These toilet paper roll crafts are so simple, you won’t believe them.
The first step is to simply squash the toilet roll tubes flat. Then there are two sizes of rings to cut out.
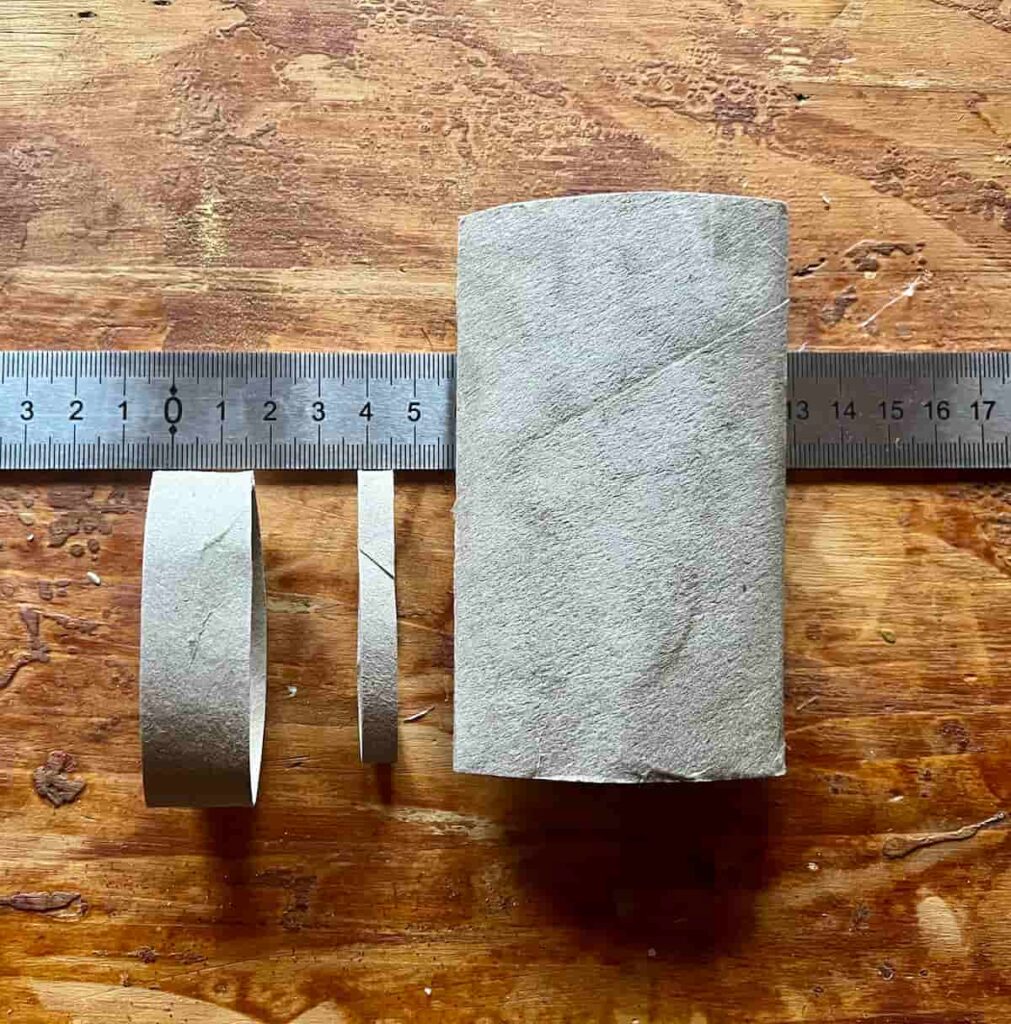
Cut the thick rings to approximately 1.5 cm (0.6 inches). The thin rings can be about 0.5 cm (0.2 inches).
The width of the thick ring and thin ring do not need to be exactly the same as mine. As long as they are consistent in each design then they will work well together.
The thicker rings make the structure of the design. In comparison, the thin rings add the decorative embellishment.
Project 1: Make Toilet Paper Roll Snowflakes
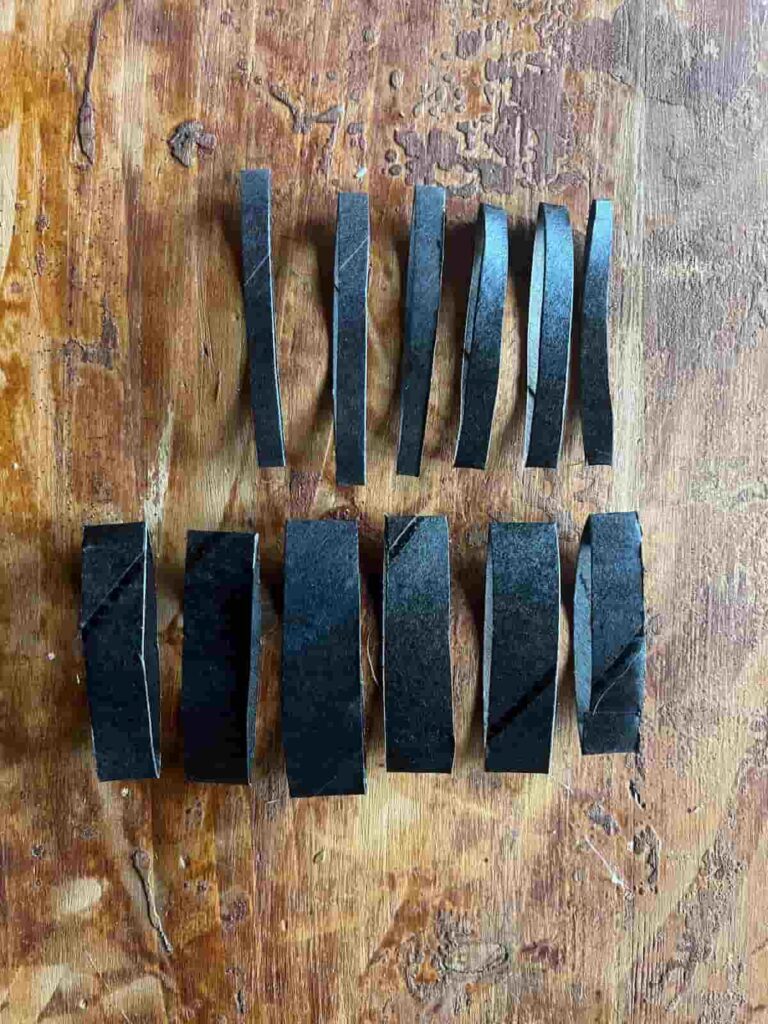
For this first design, you need to cut 6 thick rings and 6 thin rings. You’ll see various designs of the snowflakes with additional thin rings. Two standard toilet paper rolls will be enough to make one snowflake with even more thin rings for added details.
This toilet paper roll was spray-painted black before starting. You can spray-paint the final piece once assembled. The two-tone look is also quite pretty. Alternatively, if you hand-paint the tube, both sides will be coated before starting.
Step 2: Assemble Snowflake Ornament with Hot Glue
For the snowflake designs, they start with a base shape. This is 5 or 6 of the large rings attached to make a simple flower petal shape.
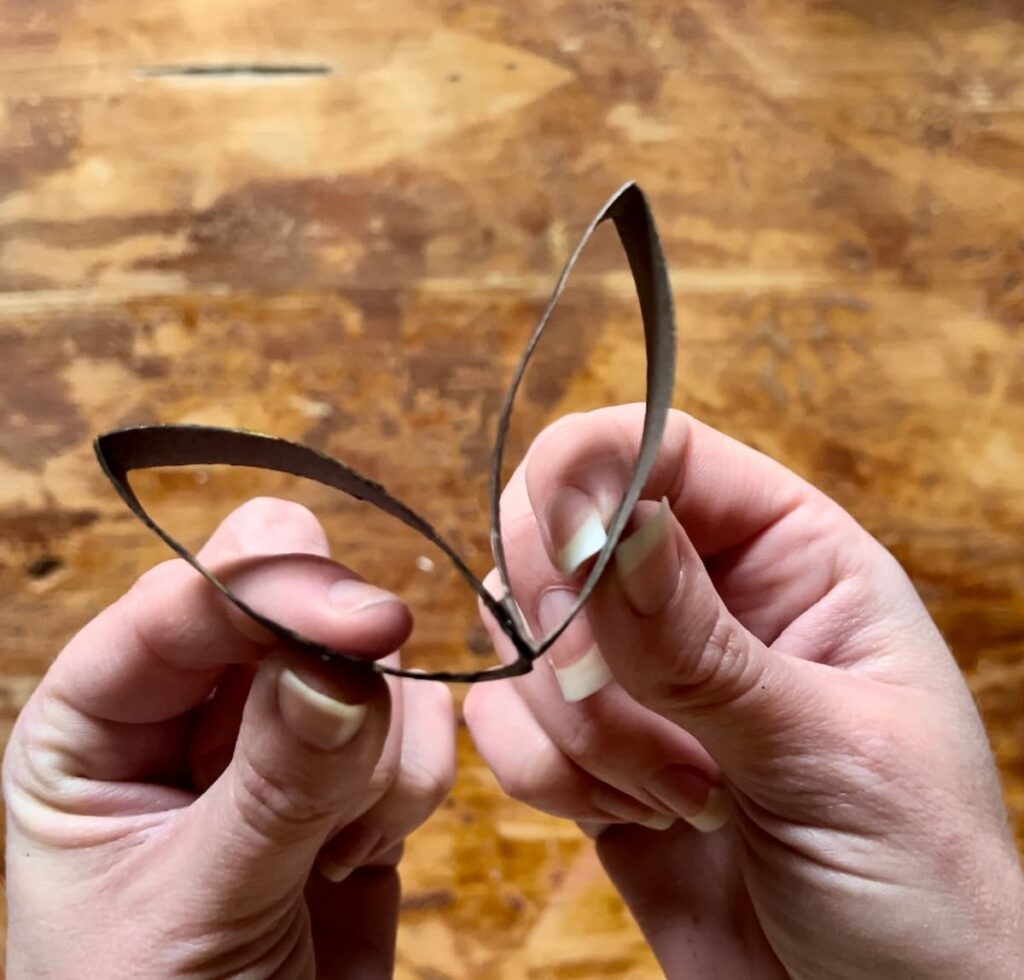
Start by gluing the far corner of one ring then attach the second ring to it. Do your best to line up the outer corners to each other.
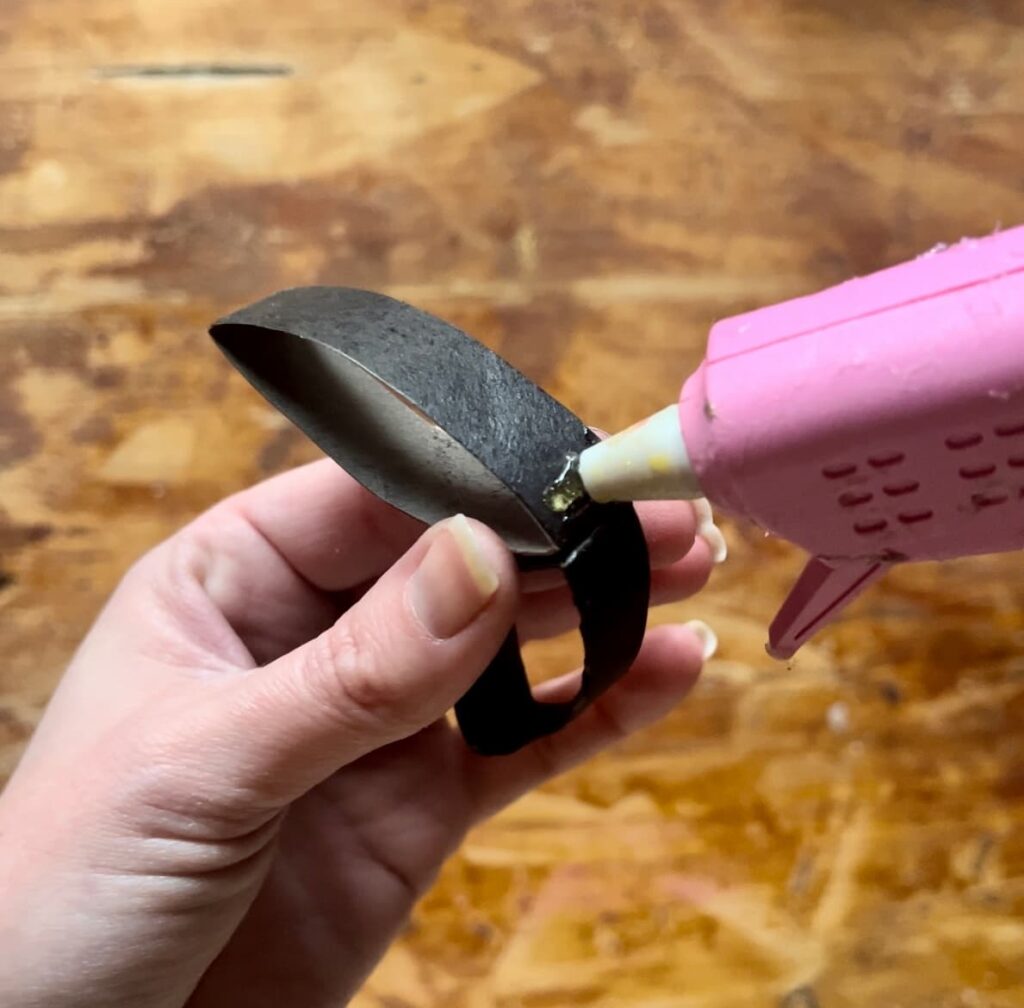
Step 3: Add Decoration with Thin Rings
Once the flower shape is completed, you can add embellishments with the thin rings.
Firstly, fold the thin rings in half to create two petal shapes. Then there are various ways you can add these to the base design to make the snowflake.
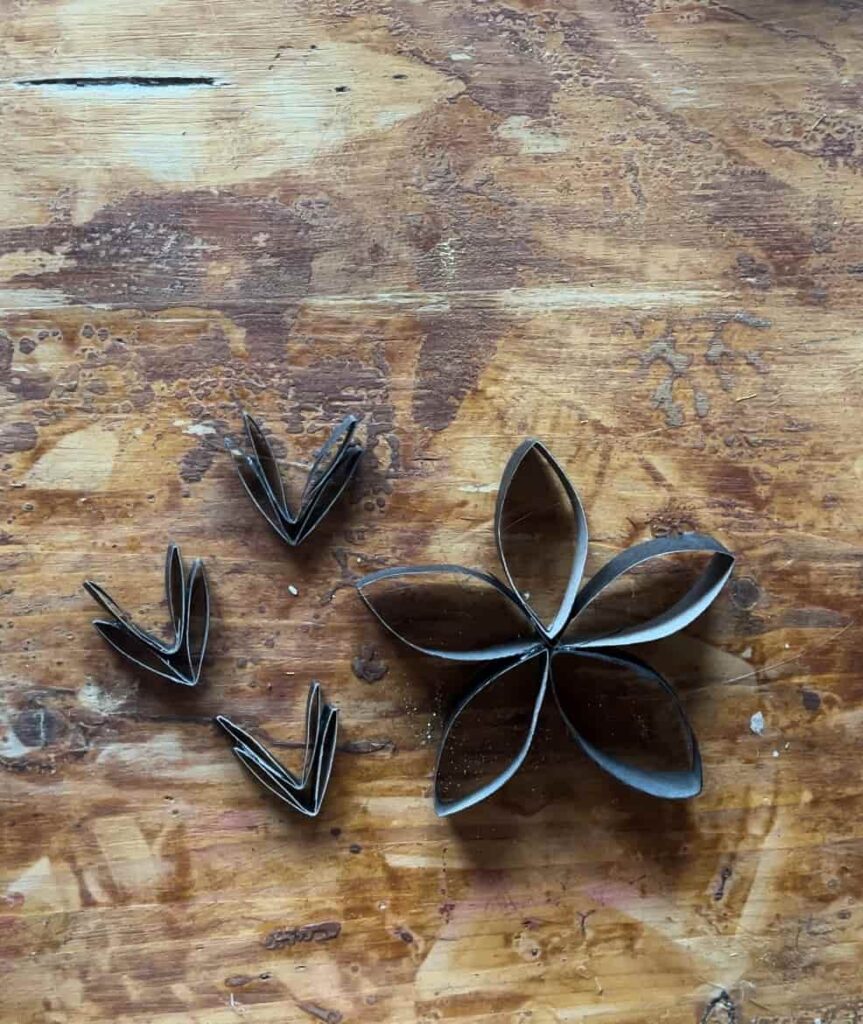
You can add a single thin ring to the inside of each petal. You can stack them and glue two together for more detail.
You can alternate the petals where you put the thin rings. Or you can add the thin rings to the outside of the base shape too.
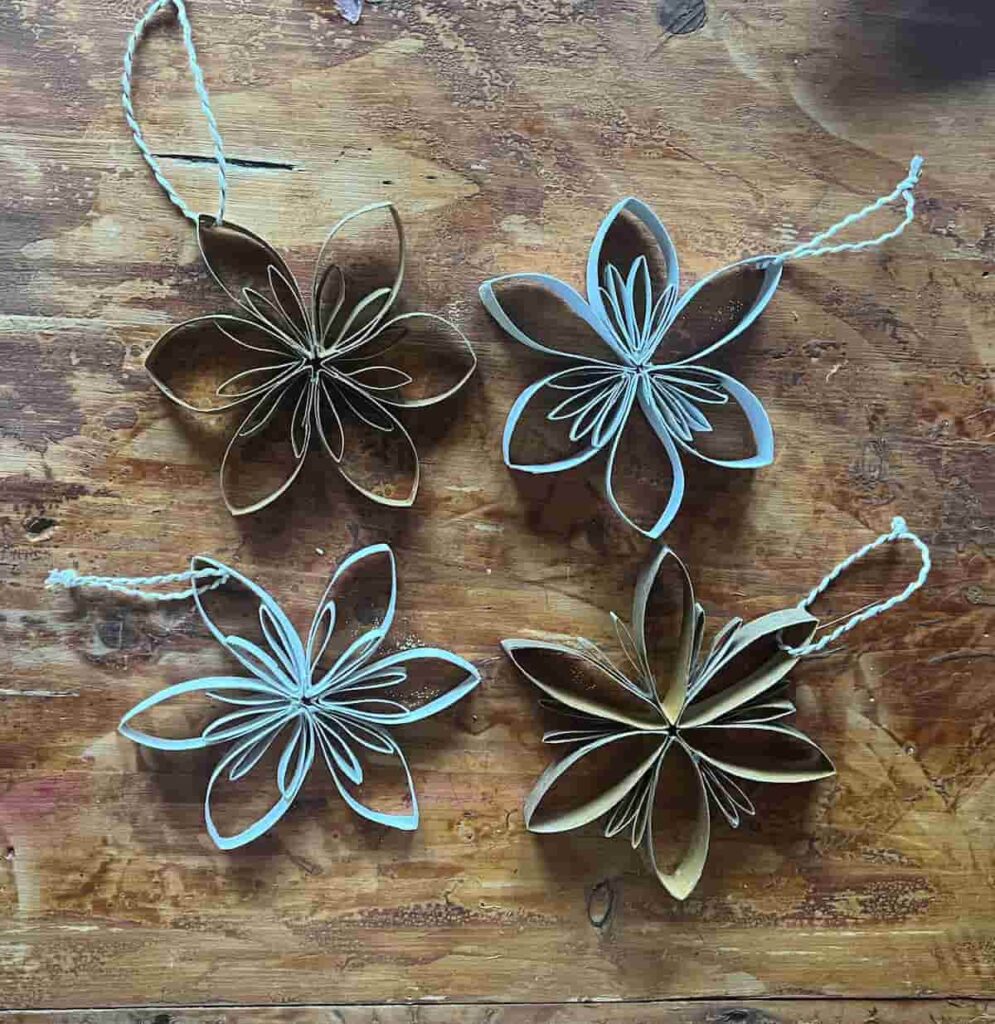
Step 4: Add Optional Embellishments and Hang on the Tree
The final extras that you might want to add include glitter and gems in the centre.
For the glitter you can decorate to outer edge, or just sections of the design. To do this, you can either use white craft glue or spray adhesive. It adds a beautiful, glistening element to the design.
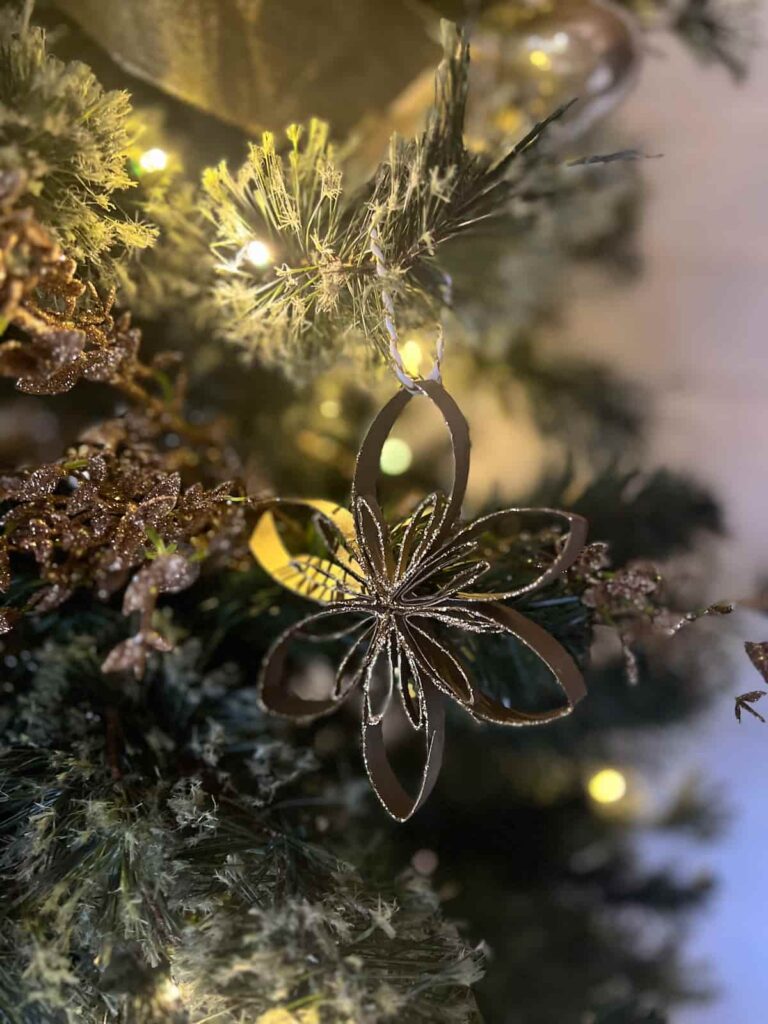
Another idea is to add a gem or something shiny to the centre of the snowflake. This pearl is from a piece of festive ribbon. It’s also useful if the middle of the rings doesn’t line up perfectly in the centre.
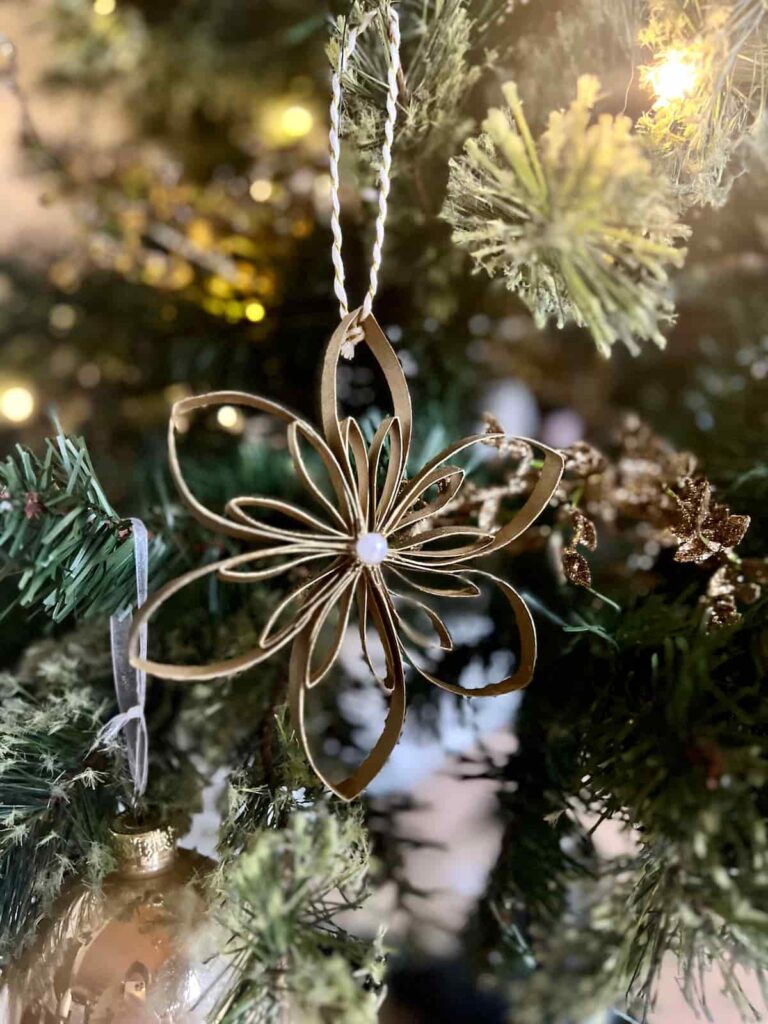
If the design feels flat or too tight together, you can fluff it up by pushing inwards on each section.
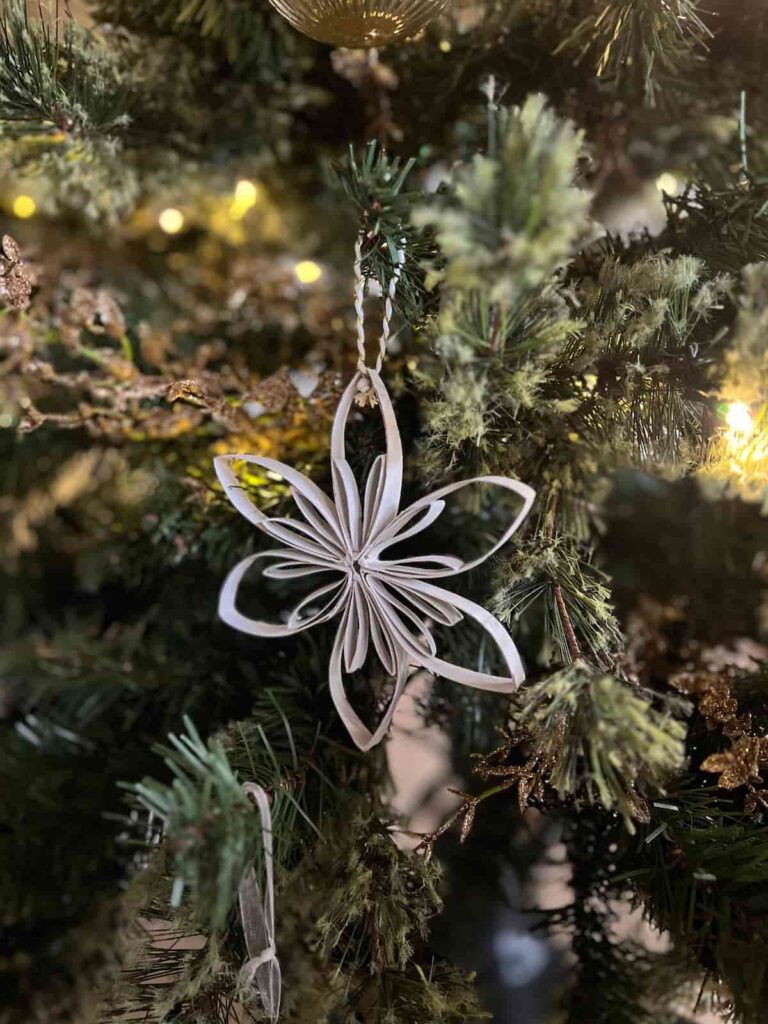
Isn’t this a great way to make simple but effective Christmas tree decorations? You could even string them together with twine or ribbon, spacing them out evenly, to make a festive garland.
And you can’t go wrong with the cost!
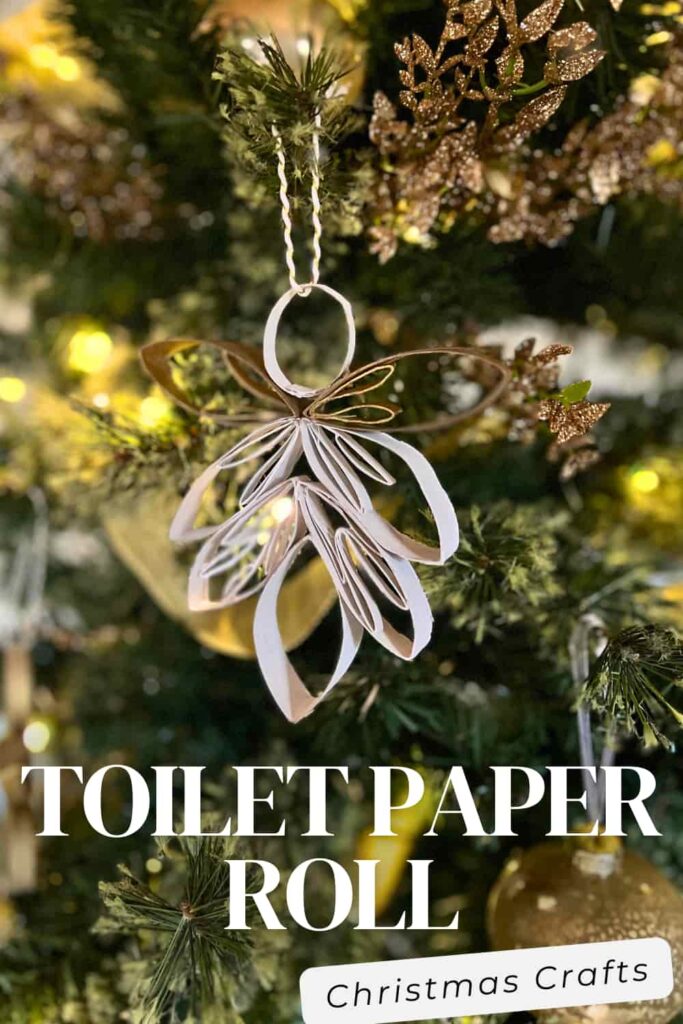
Project 2: Toilet Paper Roll Angel Christmas Tree Decoration
This angel decoration is a beautiful ornament for a Christmas tree.
These are all so simple, it’s something you could make with older children. Not really young children as we’re using hot glue.
To make it you need 5 thick white rings, 2 thick gold rings, 2 thin gold rings, and 7 thin white rings.
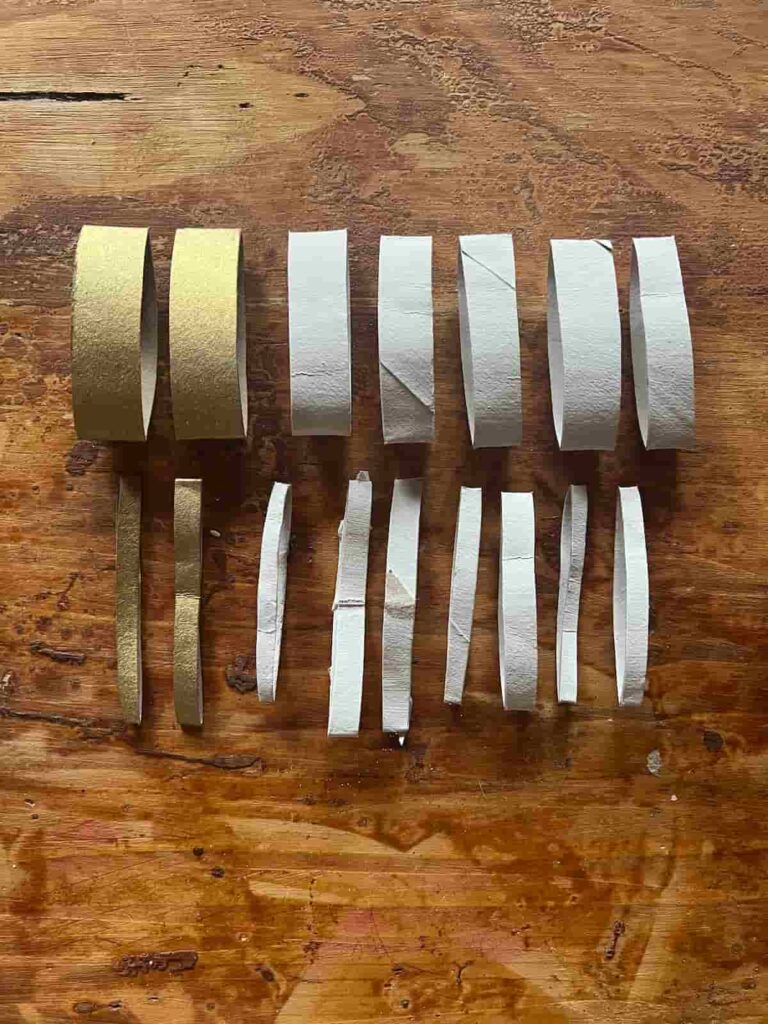
Step 2: Build the Body of the Angel Decoration
It’s easiest to start from the bottom of the decoration to make sure it is well-balanced.
Start with gluing two thick white rings together, in the same place as for the snowflake shape.
Then add a dab of glue on both upper sides to insert the bottom piece in the middle.
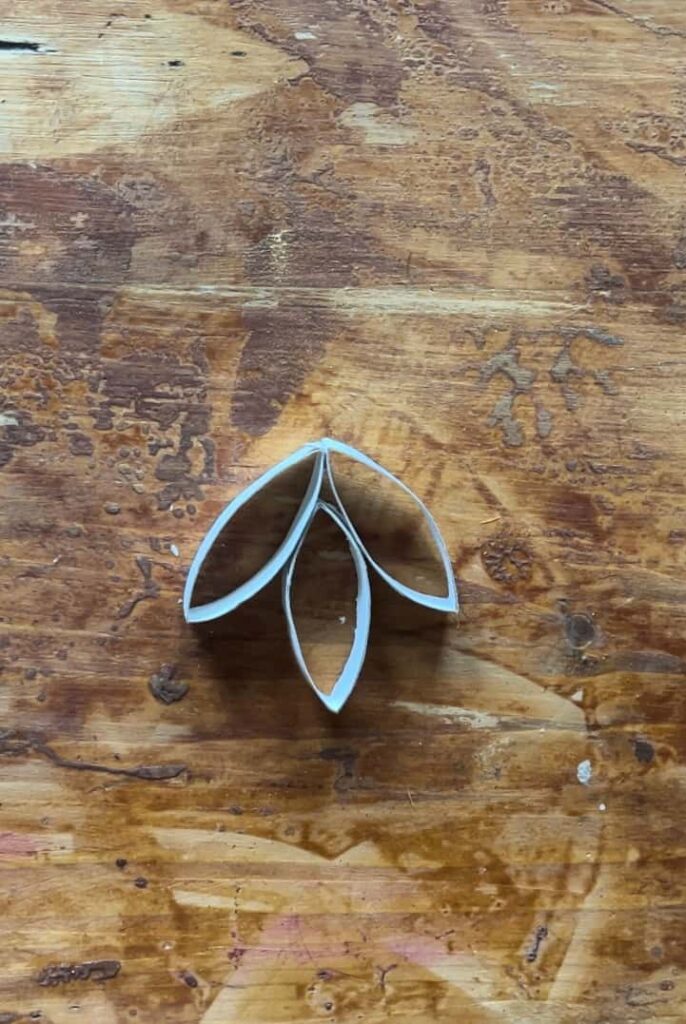
Next, attach two more layers of the body to each other. It’s the most balanced when you attach the pairs to each other before adding them to the main piece.
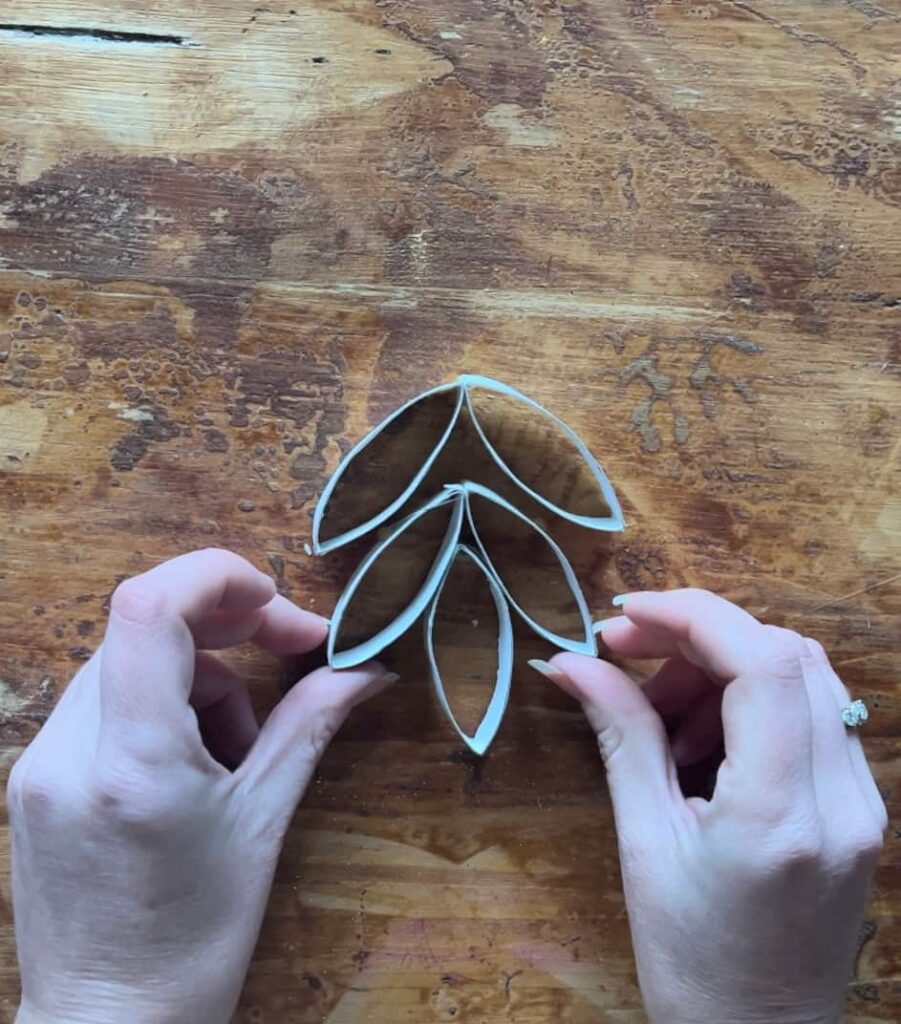
Step 3: Add the Wings to the Cardboard Angel Ornament
The next step is to attach the two thick gold rings to each other. Use the hot glue gun to attach them at the corners.
Then once dry, secure them to the white body of the angel.
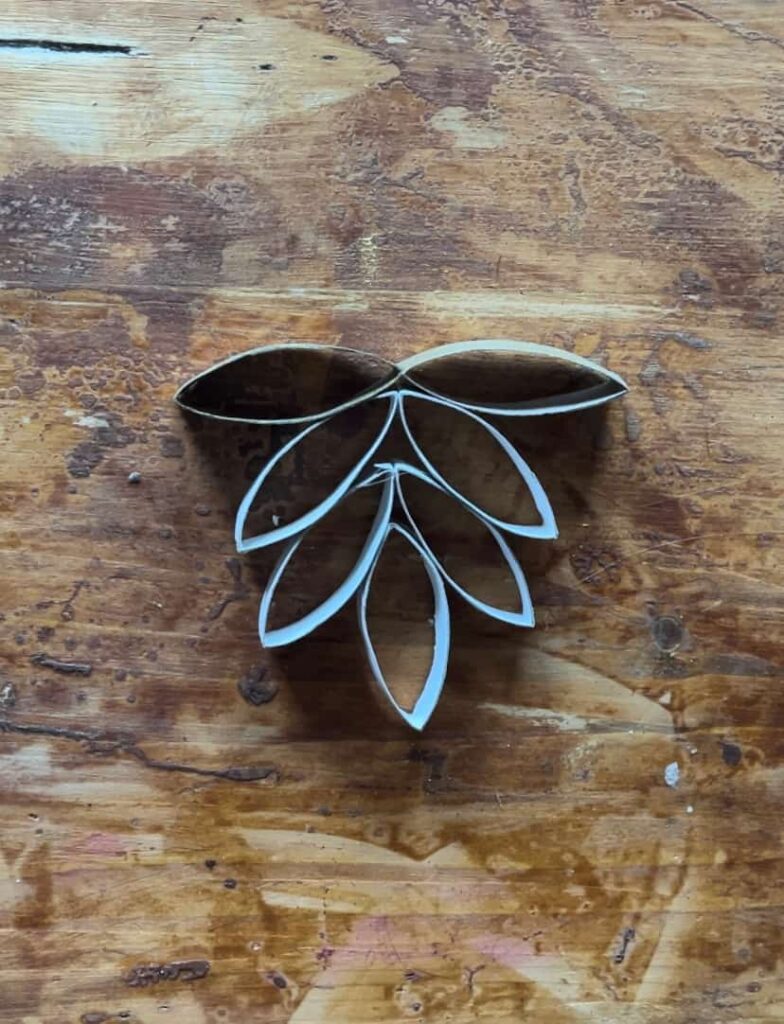
Step 4: Attach the Head of the Angel
This piece is the only time you will need to change the existing ring shape of the paper tube. This is because you want to change the petal shape to a circle to make the angel’s head.
Simply cut the ring and remove a section to make it smaller. Then use glue to turn it into a completed circle.
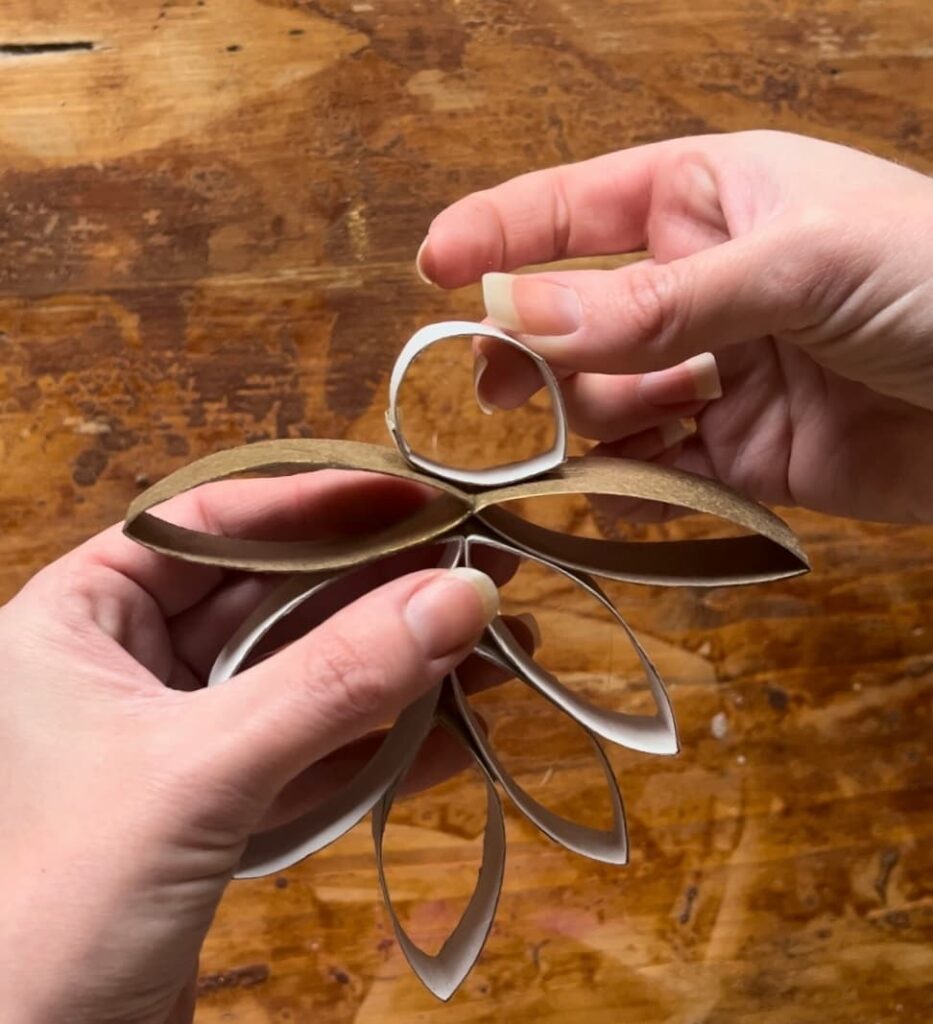
Then finally use glue to attach the head to the wings. The glue does not go at the centre of the bottom of the circle. As that part doesn’t actually touch the wings. So it’s best to glue slightly offset from the middle at the bottom to make sure it connects properly.
Step 5: Attach Thin Rings for Embellishments
Once the shape of the angel is built, how you decorate the angel is completely up to you.
For this, you can use 8 thin rings to give more detail to the wing and body.
I added a single gold ring to each wing. Then a single white ring to the next layer. Then finally a double thin ring to the next layer down.
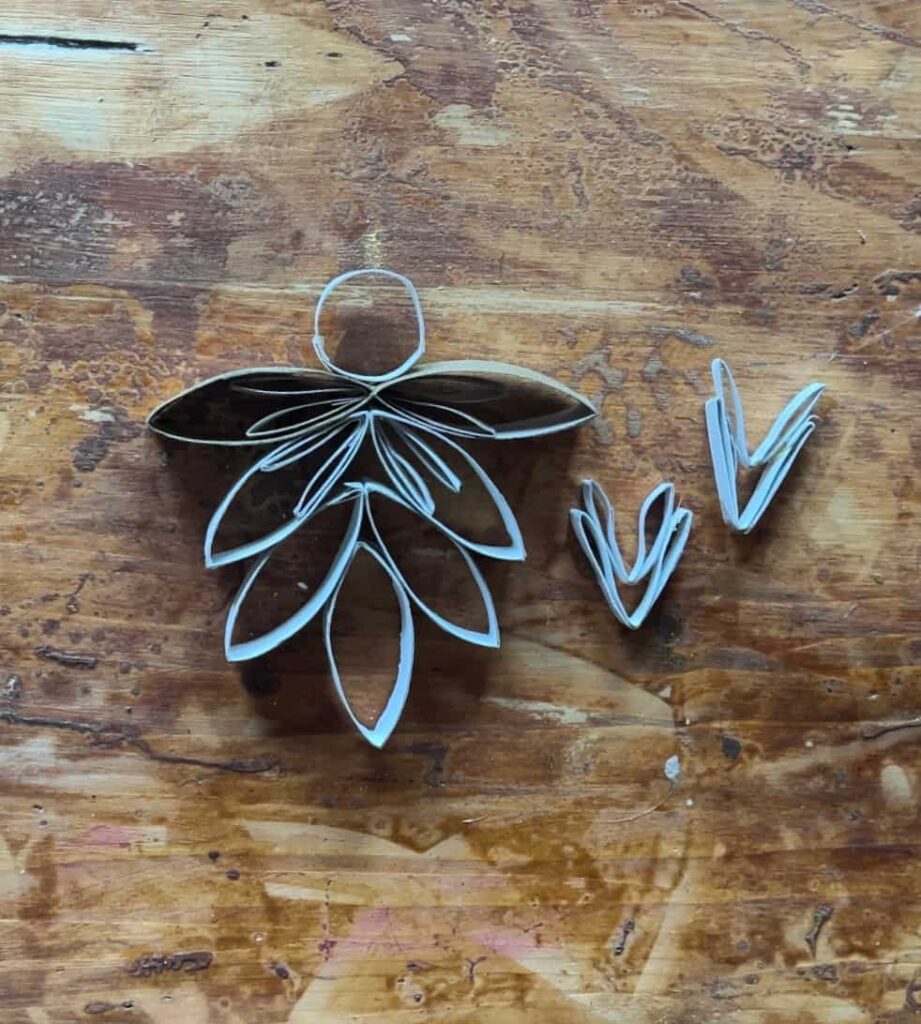
You can add final extras depending on your preference. I made some angels with glittery wings and some without.
You can see the version without the glitter in the YouTube video.
Hang the Toilet Paper Roll Angel on the Tree
I think the glitter just on the wings adds an extra bit of glitz to the design.

You could also add another ring horizontally on the head to make a halo. Or more or less detail with the thin rings.
It’s quite a versatile design to play around with.
Project 3: Present Topper from Toilet Paper Rolls
There are two present topper designs that I’m going to share with you. A simple gold star shape and a sprig of holly.
For the holly, start by painting a cardboard tube green. Then cut it into a dozen thin rings.
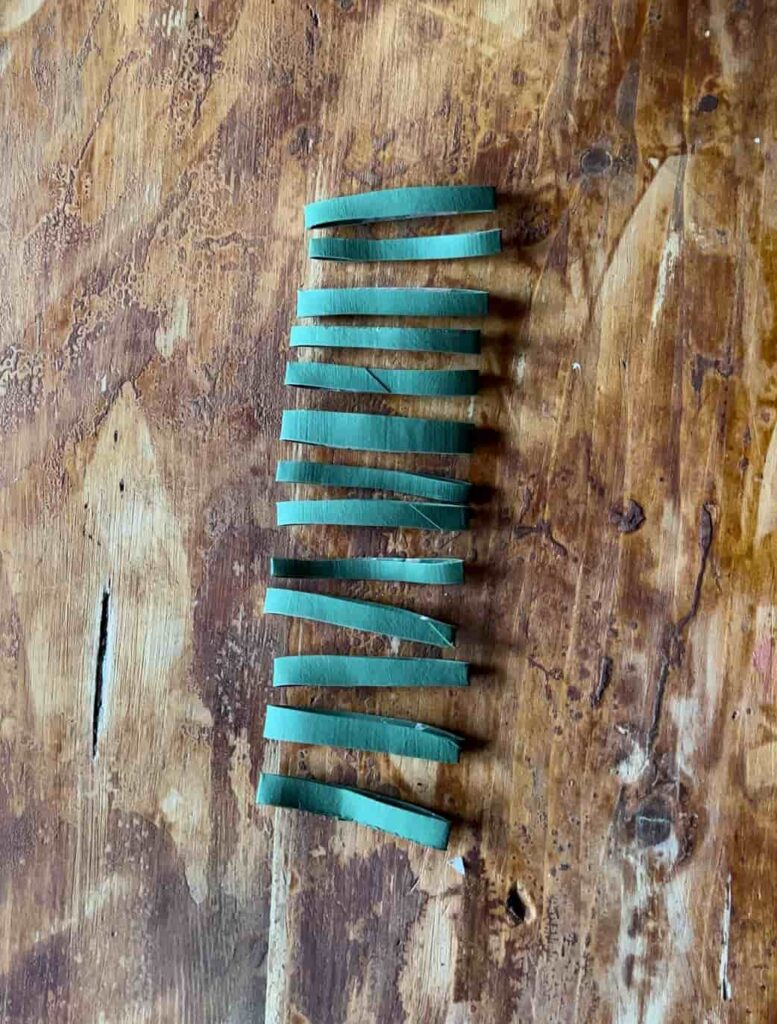
Step 2: Fold Thin Rings In Half
Next, fold each of the thin rings in half.
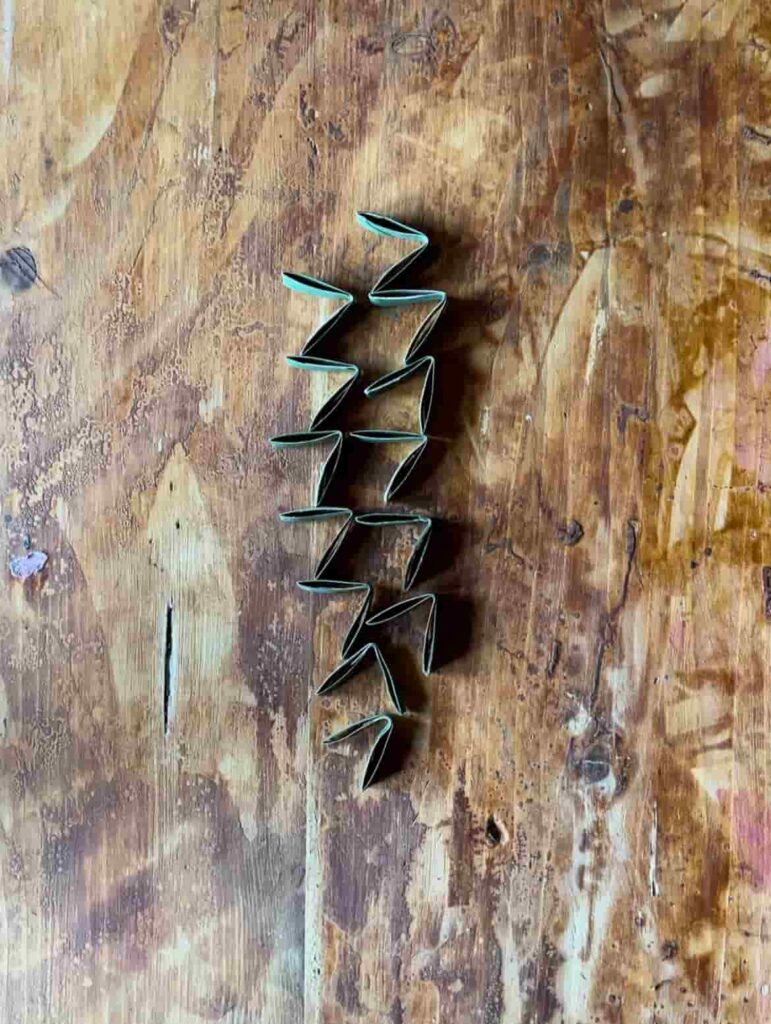
Step 3: Glue Thin Rings Together to Make a Sprig of Holly
Take half of the folded rings and attach them to each other to make a sprig of holly. For this, add glue to the outer sides before inserting it into the next piece.
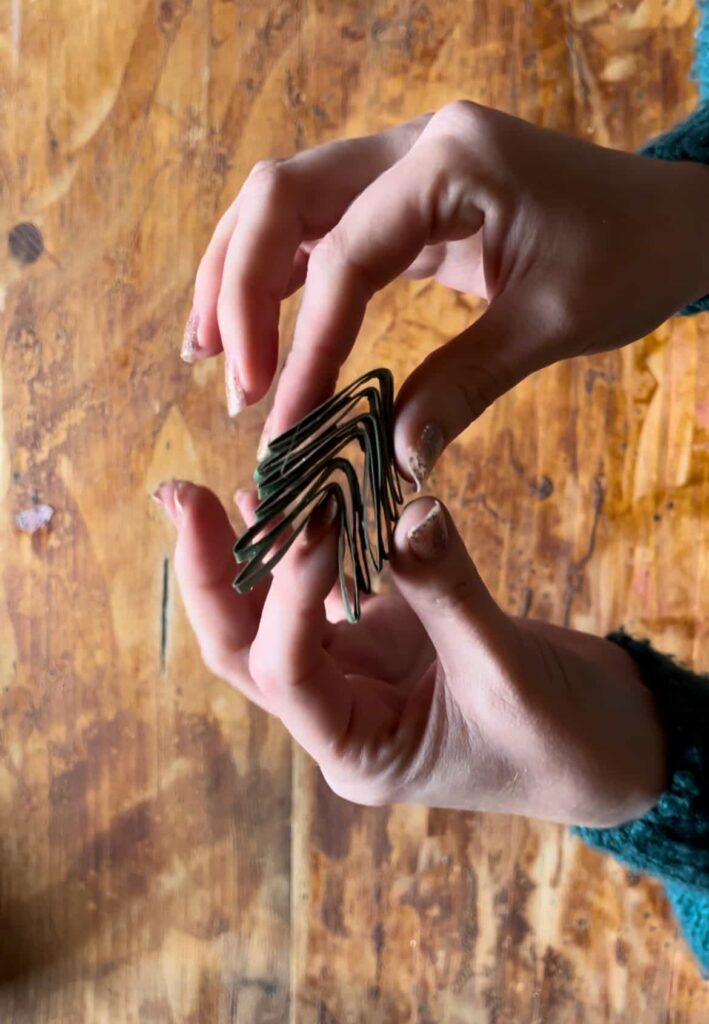
Meanwhile, cut out some red circles, this will make the berries.
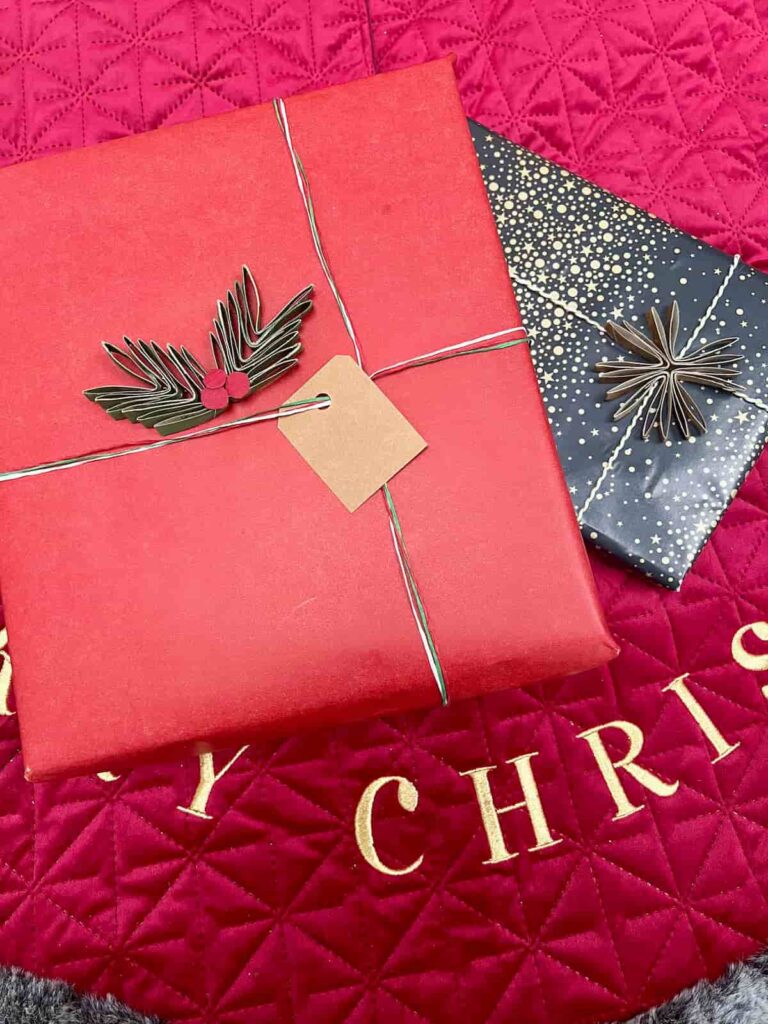
Finally, attach two of the sprigs to the present. Then add the red cardboard circles where the two sprigs meet.
For the star present topper, simply connect four sets of two folded thin rings.
Present Toppers Made from Toilet Paper Rolls
Don’t these look so effective? A great way to make a present look more considered and with extra love and care has gone into it.
Project 4: Napkin Holder made with Toilet Paper Tubes
A napkin holder is a simple way to add something a little special to a festive table.
This napkin holder is made with 6 thick gold rings and 4 thin gold rings.
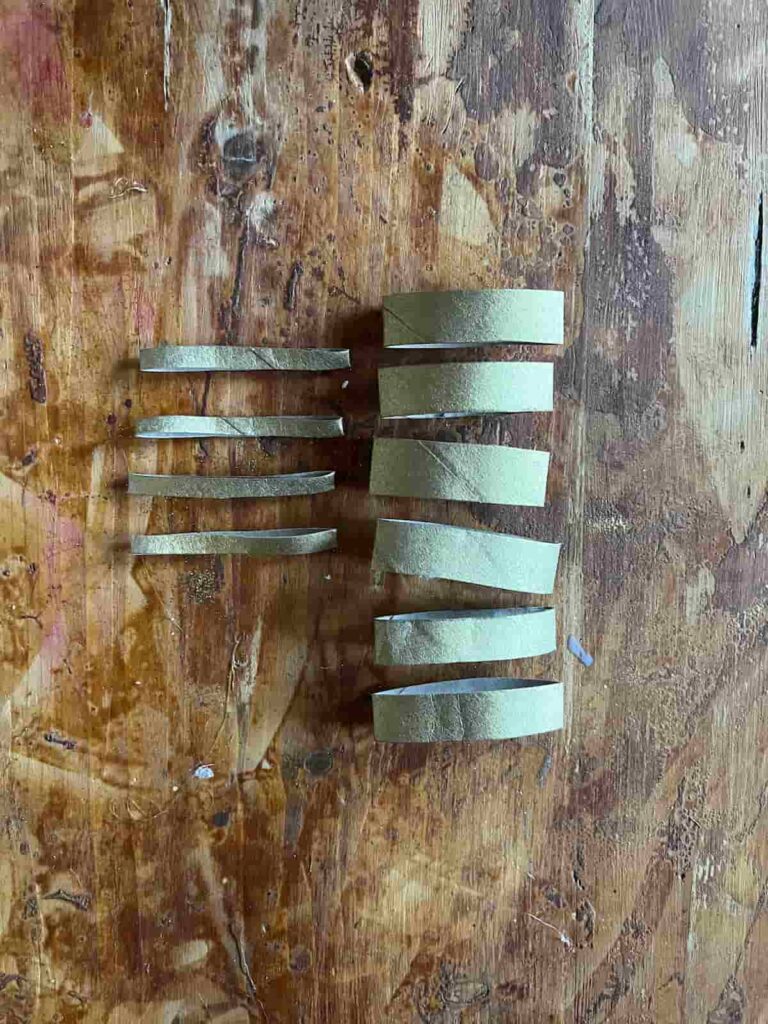
This is the least involved of all of these Christmas crafts. And will make a place setting look all the more thoughtful.
Step 2: Make the Base of the Napkin Holder
For the napkin holder to work, it needs a stable base so that it can stand up on the plate.
To start, attach two of the large rings together at the corner but slightly pointed upwards.
Secondly, glue two large rings together but touching at the corners.
Then finally attach them together, building upwards.
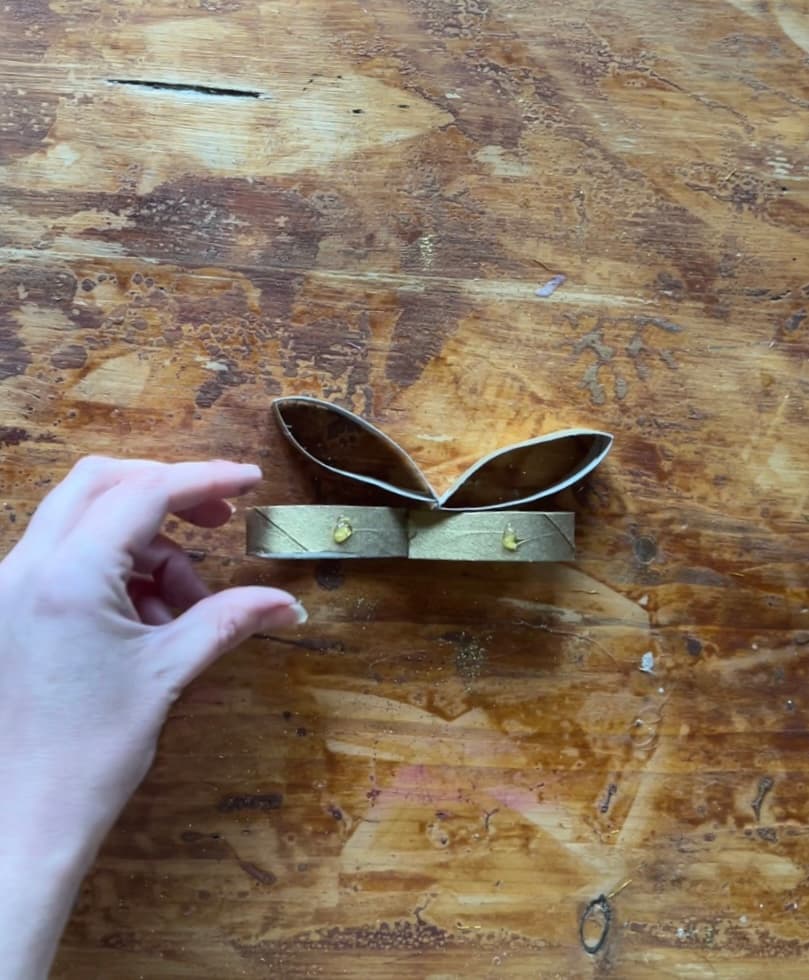
Step 3: Continue Building the Napkin Holder Design Up
Next, add the final set of large rings to the top layer. This gives it extra height to make it feel more substantial.
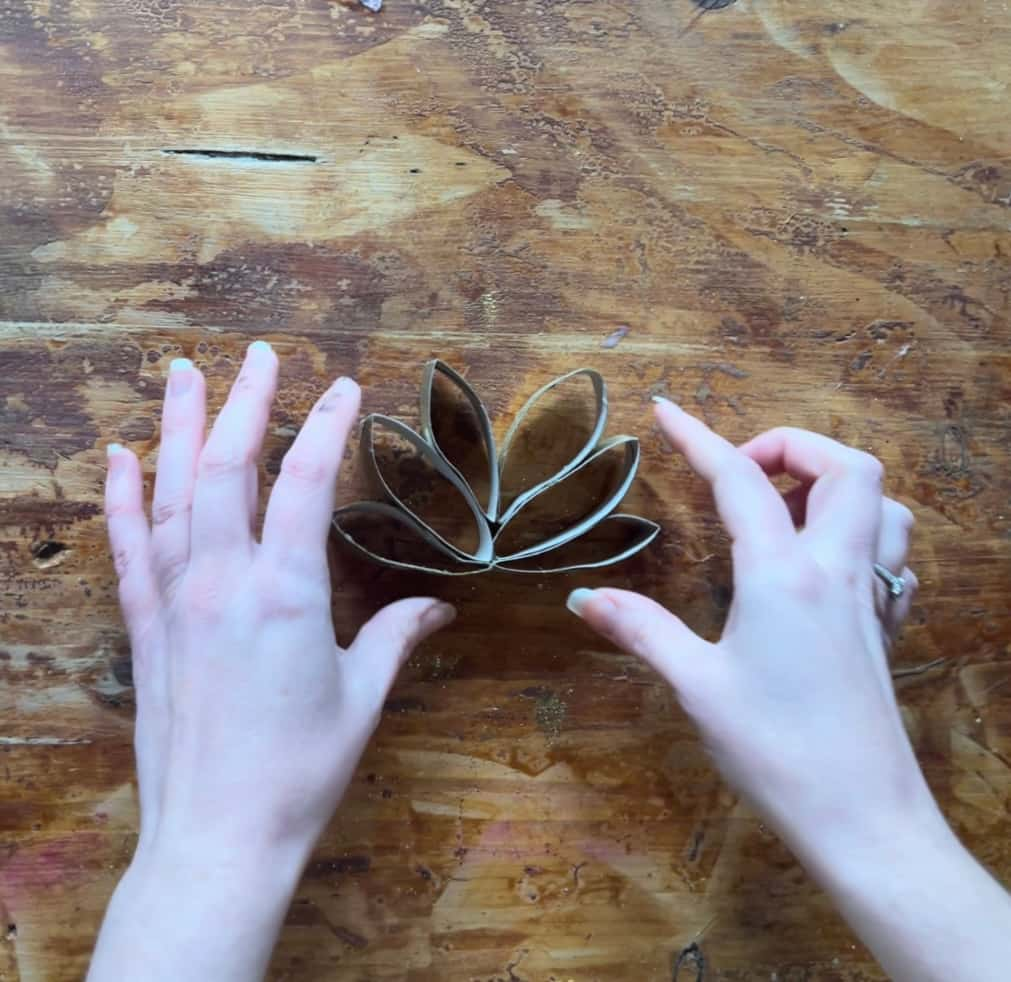
Step 4: Add Thin Rings as Embellishments
For the final bit of decoration, add the thin rings to the top 4 rings. This creates a pretty fan look.
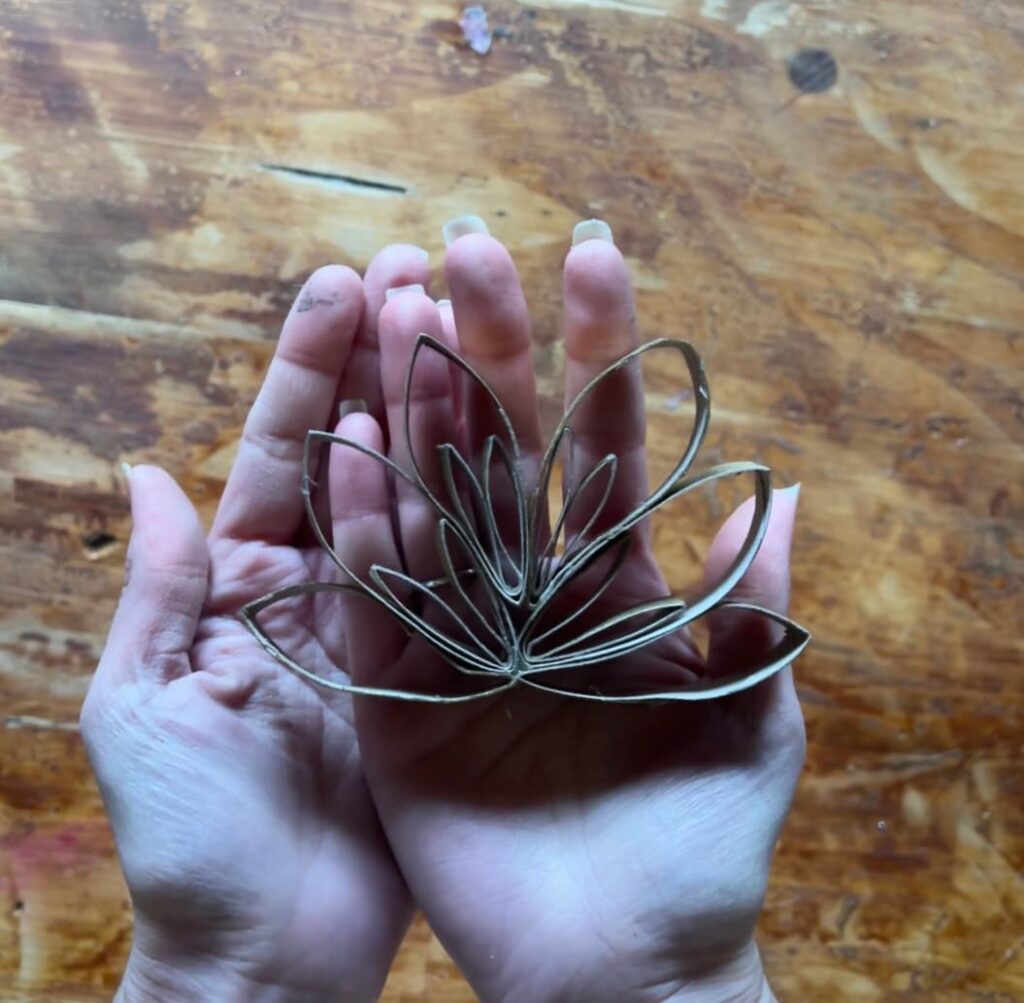
Napkin Holder Make From Cardboard Tubes
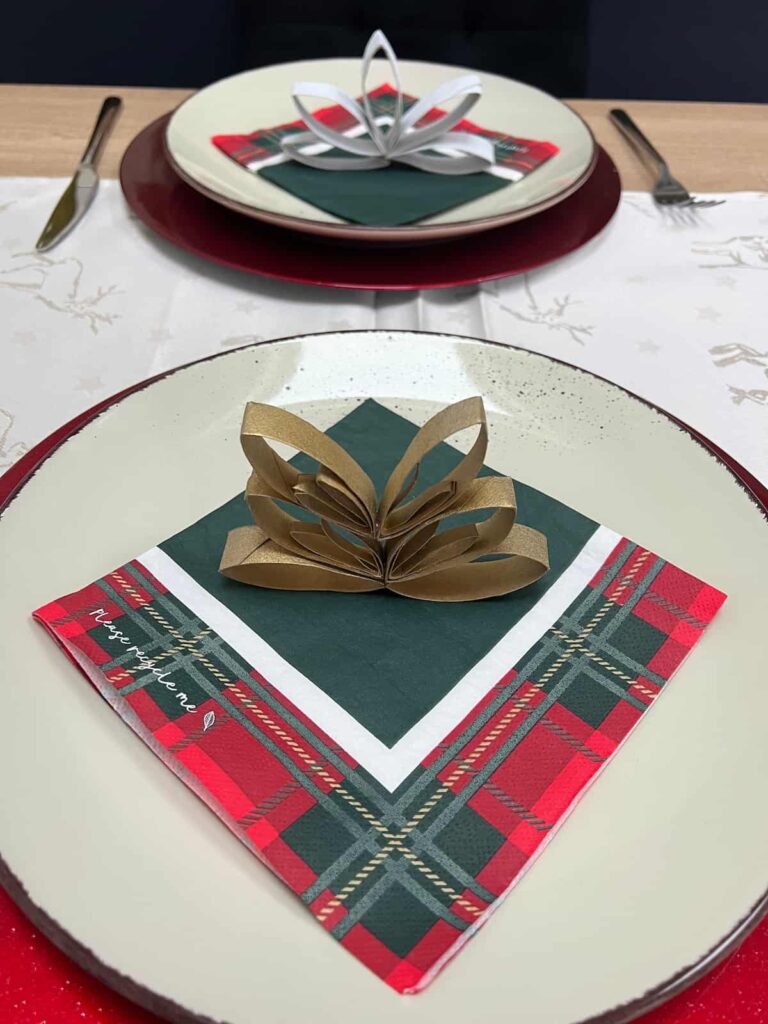
Here is how the design works with a napkin going through the rings at the bottom. This is why we didn’t add the thin rings to the bottom of the design.
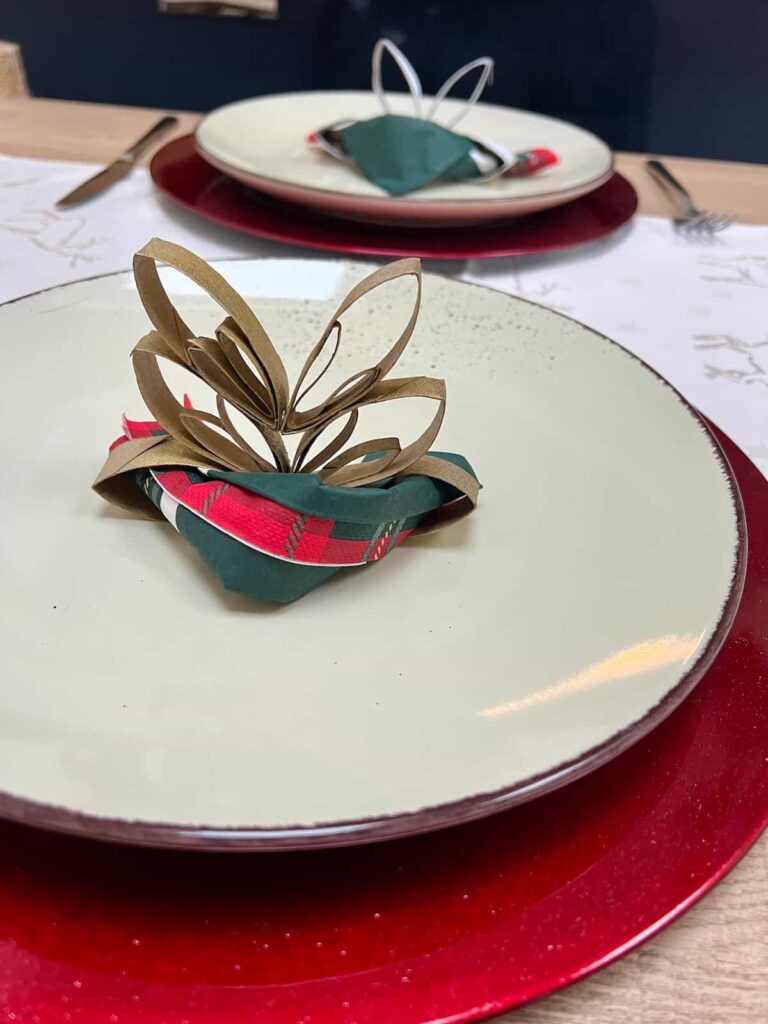
Alternatively, you could do the same design but as a name holder for the place setting. Simply slit the top to hold a card with your guest’s name.
What’s to love about these simple toilet paper roll crafts
- Eco-Friendly: Give a second life to something that would otherwise be thrown away (but hopefully recycled).
- Budget-Friendly: Save money by using materials already in your home.
- Fun for All Ages: These crafts are simple enough for older kids but can be elevated with more detailed designs for adults.
- Unique Decorations: Your creations are one-of-a-kind and add a personal touch to your holiday decor.
These toilet roll Christmas decorations are proof that you don’t need a big budget to create something special. So, start saving your tp rolls for pretty toilet paper Christmas crafts.
How to Make Toilet Paper Roll Christmas Crafts Instruction Video
You can find more video tutorials on our Youtube Channel
Did you make this craft?
I love seeing what you do. Please mention @teaandforgetmenots and share your creations with me!
Pin it for later – DIY Christmas Decorations with Toilet Rolls
Do It Over’ Designers Blog Hop
Check out all the Do It Over Designers to see their lovely do-overs too!
Hi there! I'm Rachel Bowyer, a passionate DIY enthusiast with a knack for transforming the old into something beautifully new. With a deep love for furniture painting, refinishing, and the art of crafting. I've been documenting my DIY projects and restoration journey since 2018. I specialise in techniques like decoupage, stencilling, and decor transfers. Join me as we explore the world of creativity and home improvement, one project at a time.



What a great upcycle! I love all the ideas, but I think the angels are my favorite. Adorable!
Thanks Kim.
What great ideas Rachel! They’re all so pretty but the glitter on the ornaments really takes them over the top. Well done!
Thanks Sara, yes I love the glitter too.
I love how un toilet-paper-tube-ey these ornaments finish up. You’d not guess what they started out as unless you already knew. The holly gift topper is my favourite but the angel is a close second.
Thanks Julie. Exactly my thoughts, makes me wonder what things we buy from recycled materials in the shops!
Oh my goodness, Rachel! So many options – snowflakes, angels, holly, napkin rings, and they’re all beautiful. I think my packages are going to have holly on them this year. Thanks for the inspiration!
Thanks, Ann. Yes I think the gift toppers make them really look extra special.
It’s amazing what you can create out of toilet paper rolls, Rachel! All are so beautiful! I have a monthly craft class and these would be fun to make! Thanks for sharing! Enjoy the holidays!
That would be the perfect quick craft for a class.
Yay! I love TP tube crafts and yours are so cute Rachel! I made some red poinsettia ornaments years ago and still put them on my tree each year. I especially loved the package decorations you created.
Thanks Tania. Poinsettia ones sound adorable!
Oh my goodness Rachel, these are wonderful ideas. It just so happens I have been saving my rolls all year. I had an idea, but I think I am going to abandon it for these ideas! I can’t pick a favorite, they are all perfection. I cannot wait to get started. Thank you for sharing your inspiration.
Aww thank you so much Cara. That’s so funny that you’ve been saving yours too.
Making Christmas crafts are part of the fun of the holidays. All of these are fabulous. I think the angel is my favorite too but they all look so good.
Thanks, Donna.
I love seeing TP roll crafts, but I’ve never made one myself. Such great ideas! I especially love the gift topper, and the angels are super cute. There’s so much room for customization with a craft like this. Such fun!
Thanks Tuula, yes they’re a very versatile craft.