DIY Lamp Makeover – High End Decor on a Budget
Are you looking to give your home a high-end look on a budget? One way to do this is a DIY lamp makeover. In this post, I’ll show you how to transform a second-hand lamp into something that looks high-end, all while keeping costs low.
From updating the base to choosing the right lampshade, you’ll learn how to give a lamp a brand-new look. This DIY lamp makeover is easy to customise to your taste and home decor style.
See the full step by step video tutorial
You might be surprised at just how stunning your budget-friendly makeover turns out by following these simple steps!
If you’re looking for supplies, I’ve included affiliate links to the right tools, from Amazon. If you make a purchase, I may earn a small commission at no extra cost to you.
DIY Lamp Makeover Step by Step
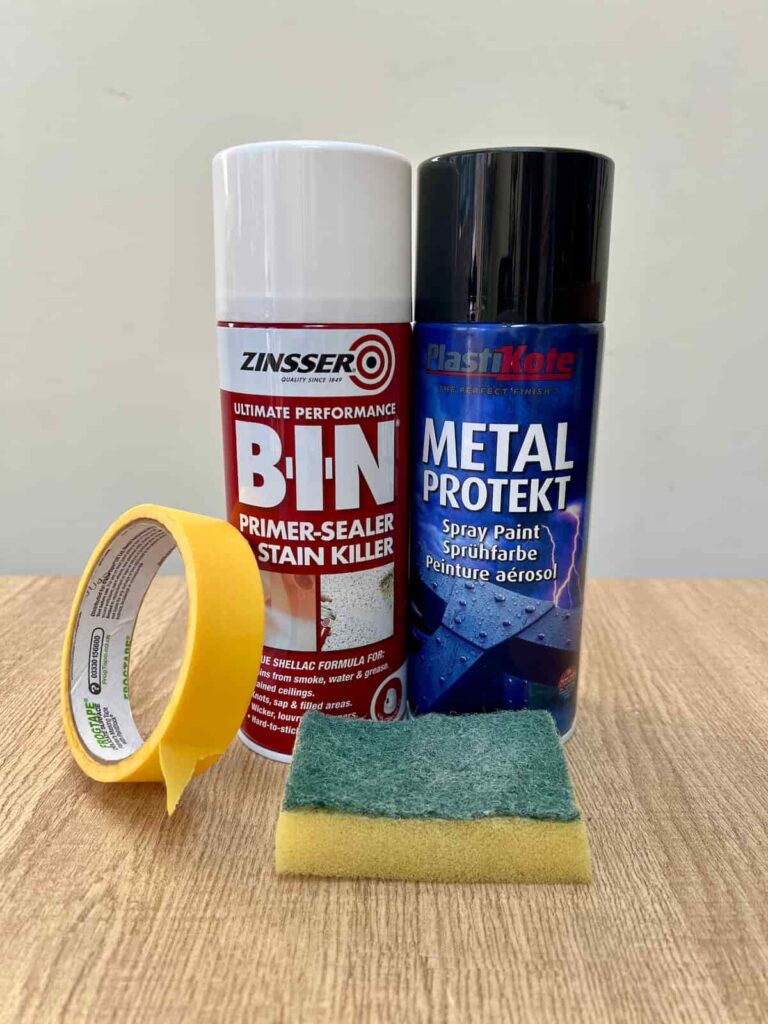
Step 1: Supplies for Lamp Makeover
Step 2: Find the Perfect Lamp Base
When finding the perfect lamp for your makeover, don’t worry too much about the existing finish. Look for a lamp with a great shape and size that will work for your needs.
You can always give an ugly lamp new life with a fresh coat of paint.
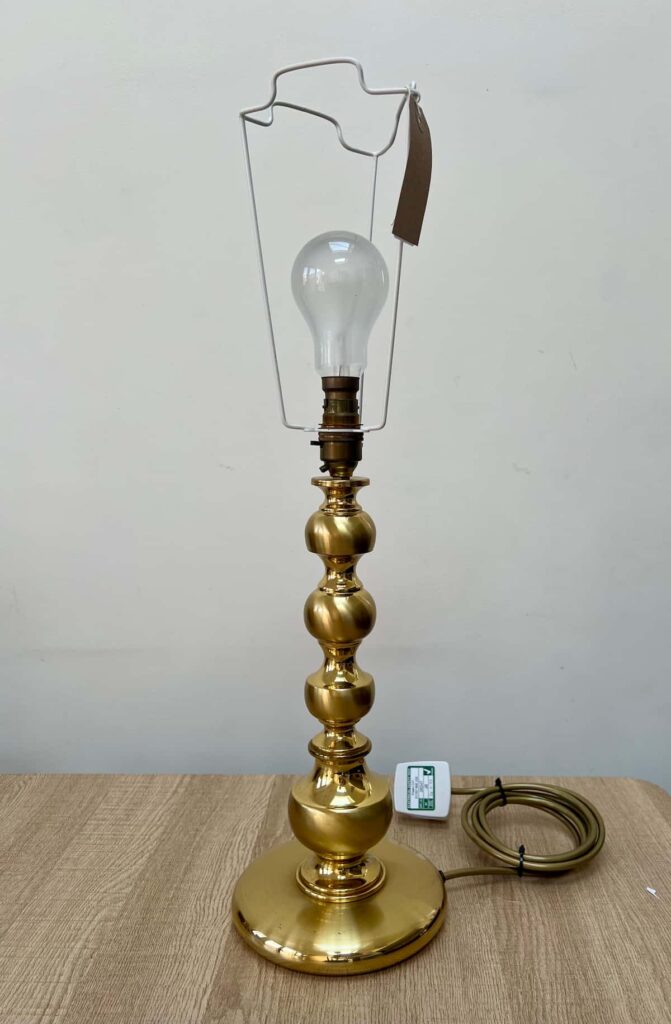
I found a cheap brass lamp for £10 at a local charity shop. It was the perfect candidate for a makeover. It was a great price and a good size and would make a statement in a room.
This style of lamp base with bobbles is popular in high-end shops like Anthropologie. Although their inspiration lamp is more colourful.
I wanted a quick DIY lamp makeover to create a neutral look that will suit any room.
Step 3: Clean the Lamp Base
The first thing to do is to give it a good cleaning. This helps to remove any dirt or oil that may be on the surface.
The easiest way is to use washing up liquid and water, as it is designed to remove grease.
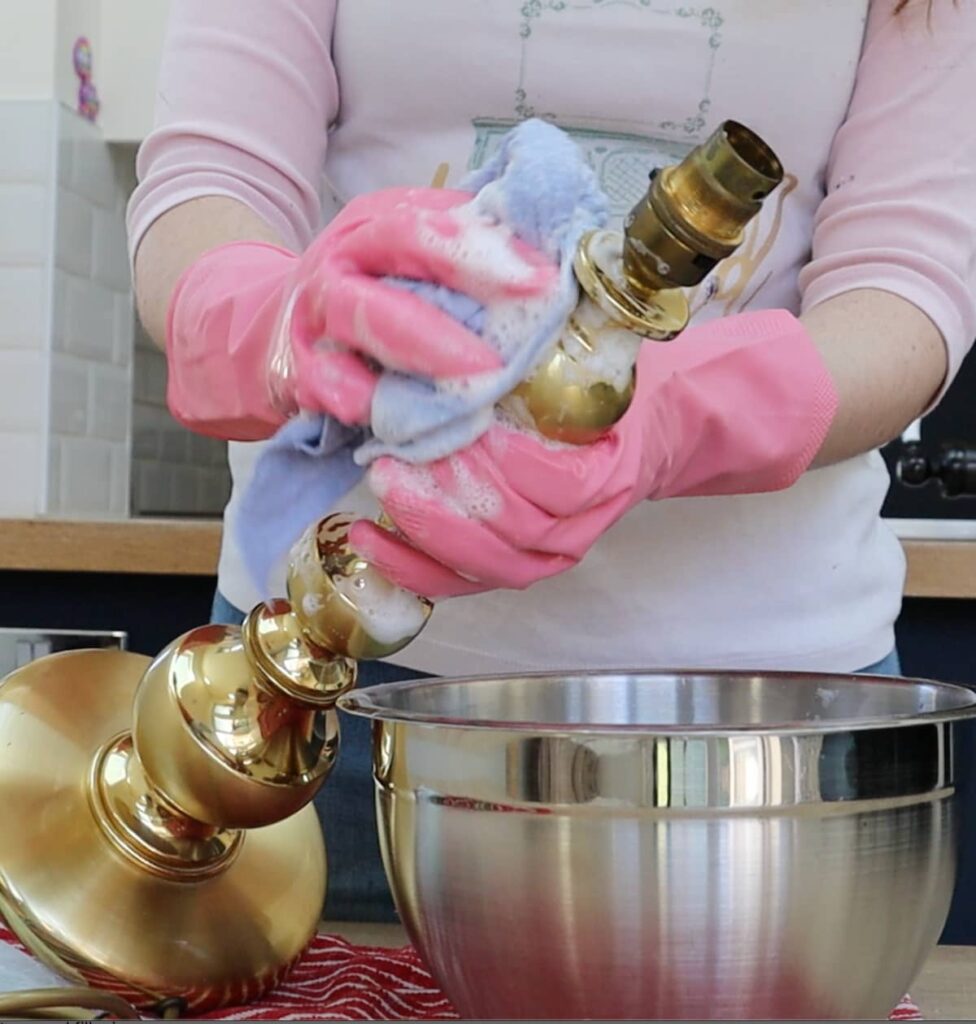
Alternatively, acetone or white vinegar works well. It’s always helpful when being able to use supplies that you likely already have at home.
Once you have degreased the lamp, it’s important to use gloves while touching it. As oil from your fingers would go straight back onto it when you pick it up again.
Step 4: Scuff the Surface of the Lamp Base
Normally, you wouldn’t use anything on metal that would scratch it, like sandpaper or wire wool. But as this is being painted, you’re not looking to keep the original shiny finish.
Roughing up the surface with 150-220 grit sandpaper or a rough sponge creates a bit of texture to help the paint grip.
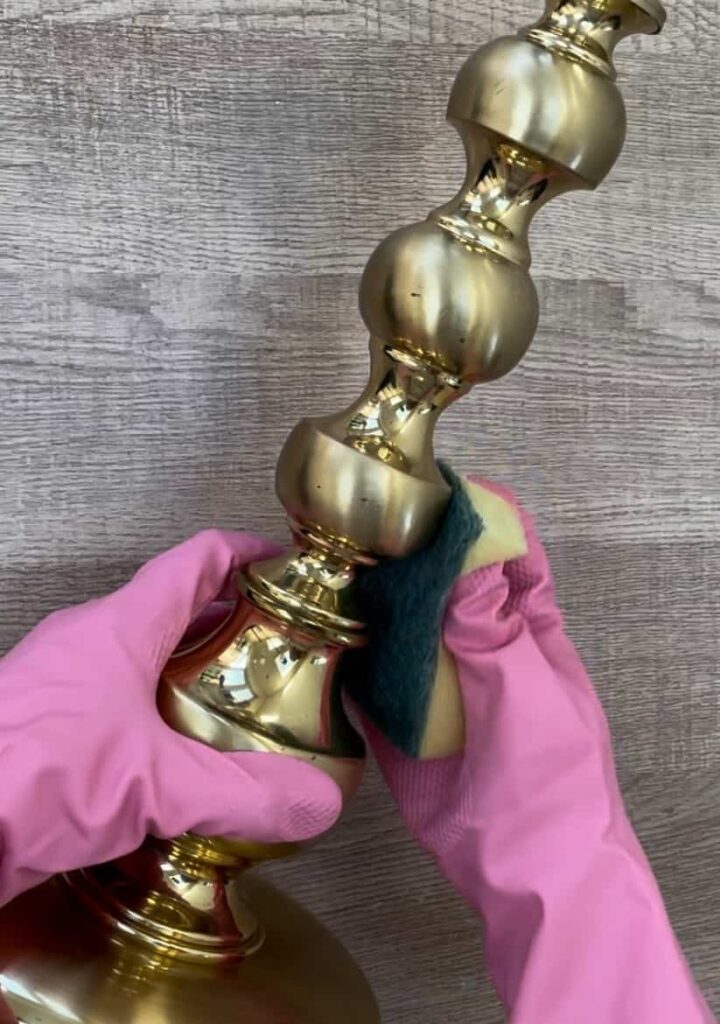
This textured washing sponge works well as it lightly scratches the metal to dull the surface.
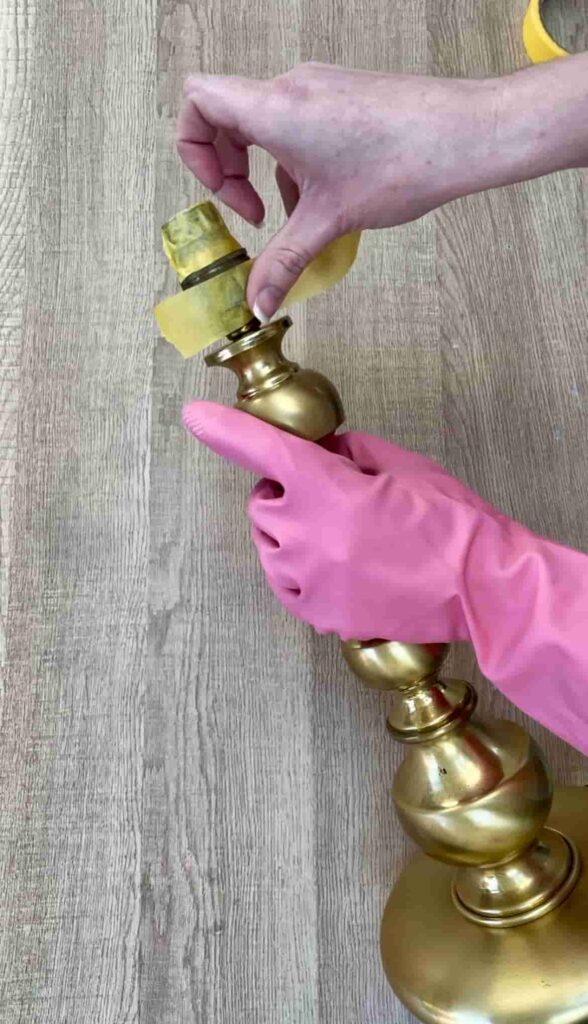
Step 5: Protect the Lamp Base before Painting
The final step to prep the lamp base is to cover anything that you don’t want painted such as the socket and lead.
You can do this by either wrapping them in painter’s tape or placing them inside a plastic bag.
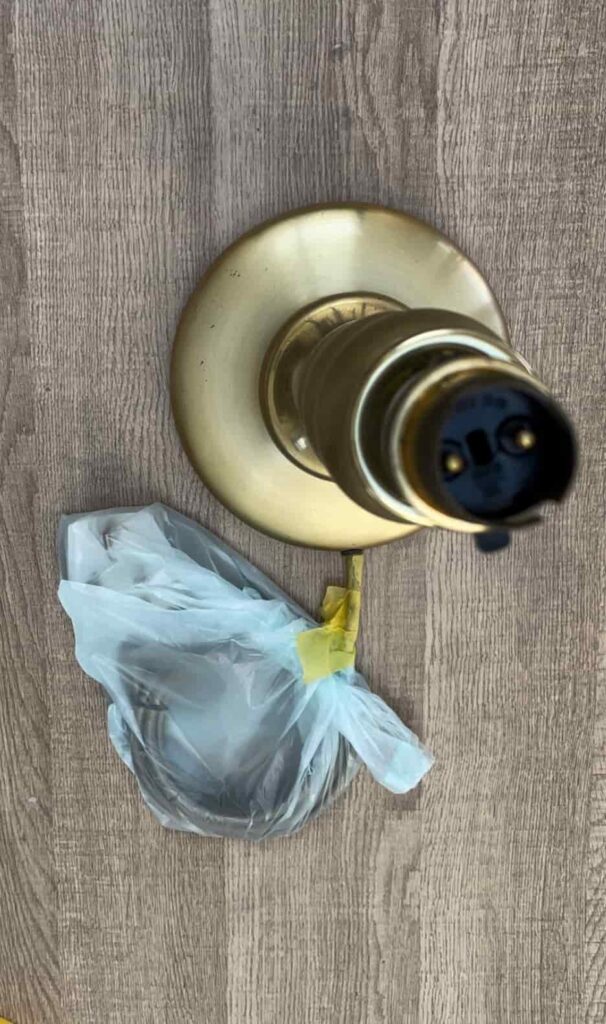
Another benefit of masking off the socket of the lamp is that you can hold on to it to move the base of the lamp around without gloves.
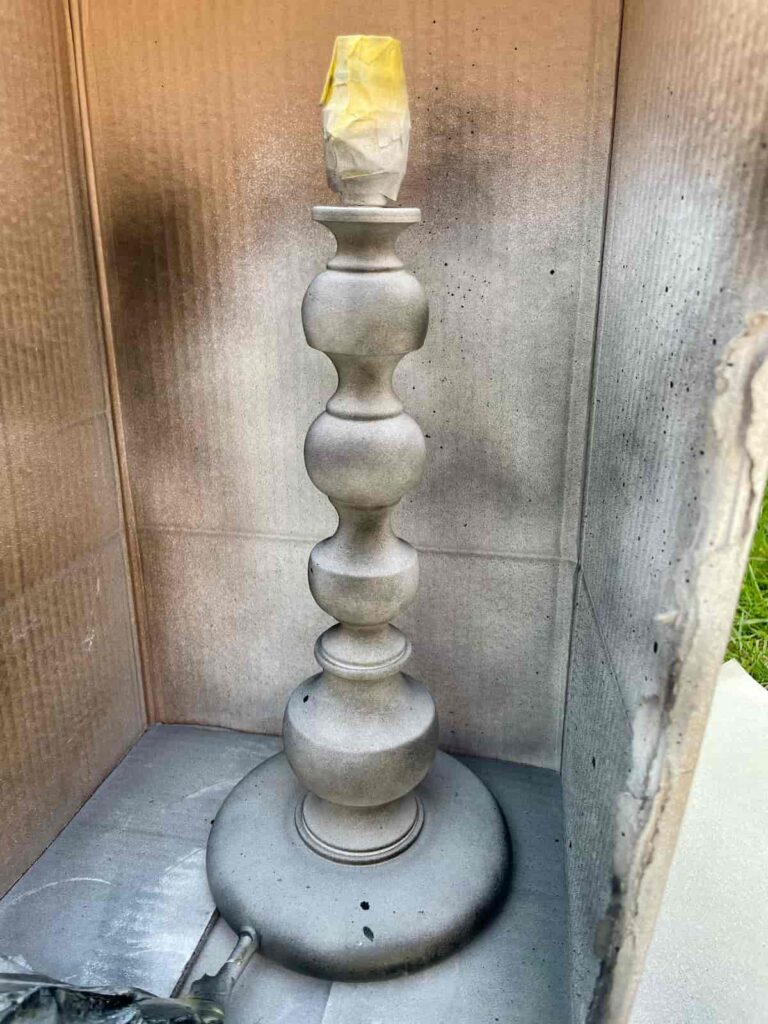
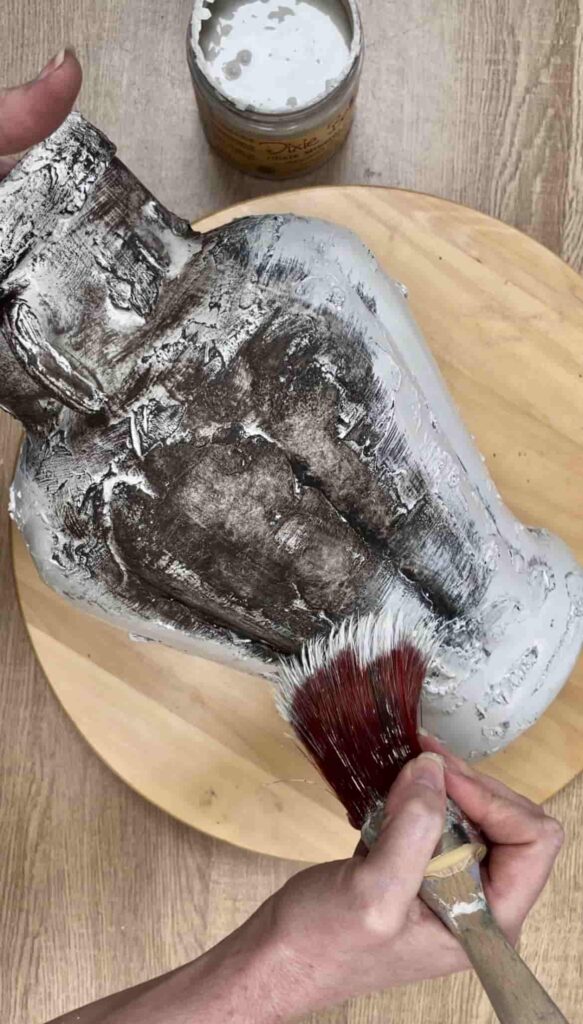
Step 6: Prime the Lamp Base
Even after sanding, brass still doesn’t have an easy surface to paint, so using a metal primer is important.
BIN is a great first step to prime surfaces. I’ve used BIN on many projects over the years. It’s great for hiding knots in pine and evening out the surface.
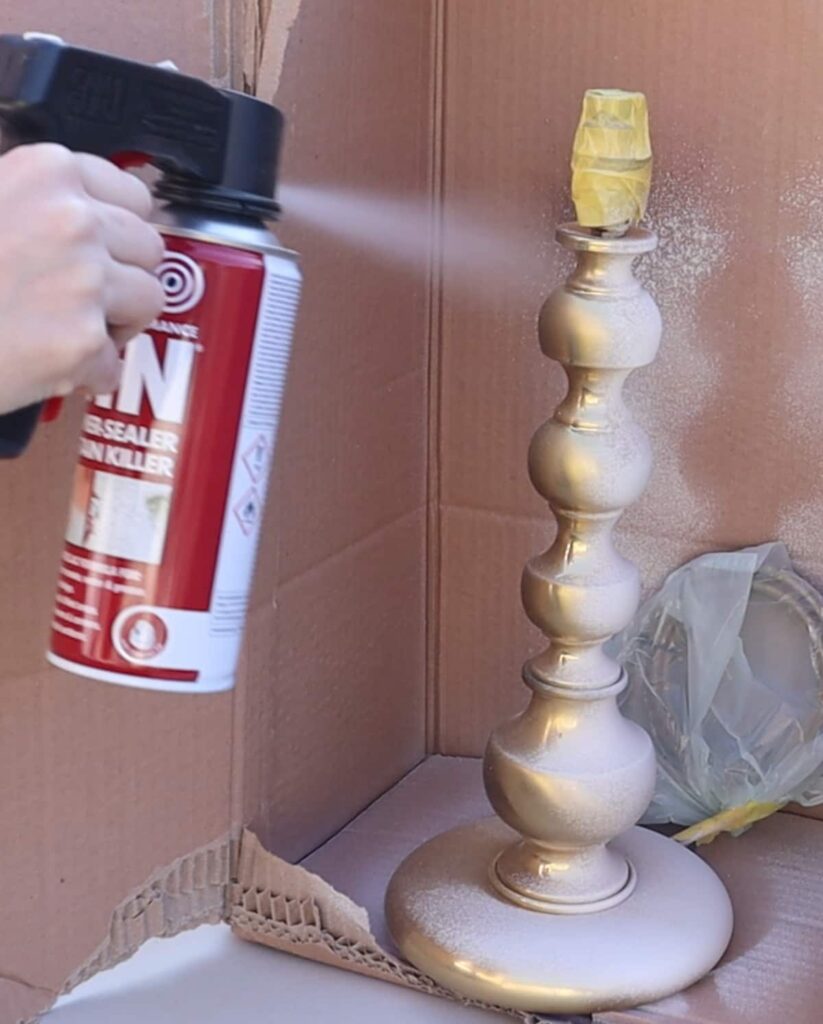
This version also works well on metal. But it can have a strong smell so it’s good to spray it outdoors where it’s well-ventilated.
Wait for a non-windy day though otherwise, you may end up wasting a lot of the primer, or spraying your fence!
It’s always best to do a few light coats of primer and paint rather than a heavy coat. As tempting as it might be to get it covered quickly. A thick coat of spray paint is more likely to leave drips and chip off once it is dry.
This lamp needed two coats of primer. The second just filled in the gaps where there wasn’t full coverage yet.
Step 7: Paint the Lamp Base
After the primer has dried, it’s time for the lamp base makeover. Use a high-quality metal black paint and apply a thin layer to the entire surface of the lamp.
To achieve a smooth finish when spray painting a lampshade, spray about 25cm away from the lamp. If you’re too close or spray too much at once, the paint will drip or not dry evenly.
I did about 5 thin coats of black spray paint until the lamp base was covered. Fortunately, this black spray paint could be recoated within an hour. If you want the finish to be smooth and long-lasting, thinner coats will serve you better.
The spray can shouldn’t be held at an angle. With a lamp base with lots of ridges, you need to tilt the lamp, rather than the spray can.
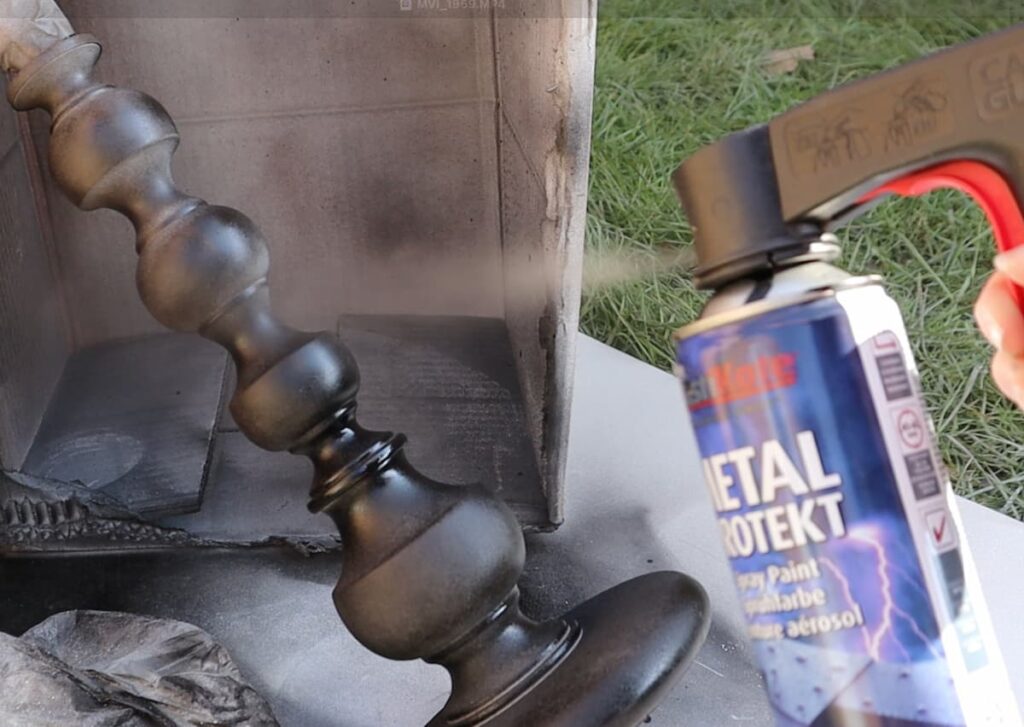
You’ll see the handle attachment I use with spray cans. This is more comfortable than holding down the nozzle and helps to get more consistent coverage.
Did you know that decor experts recommend having one piece of black decor in every room? This is why I chose black for the lamp base.
Step 8: Find the Perfect Lampshade
Once the paint is dry, the next step is to add a new lampshade. Choose a shade that works well with the style and colour of the lamp.
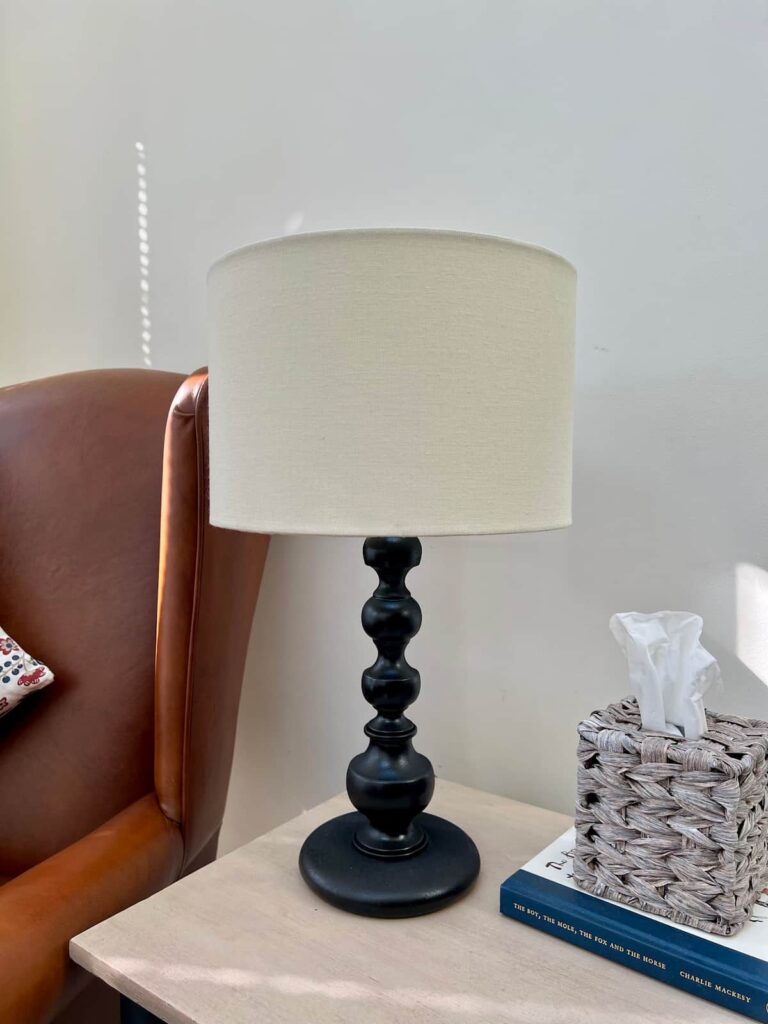
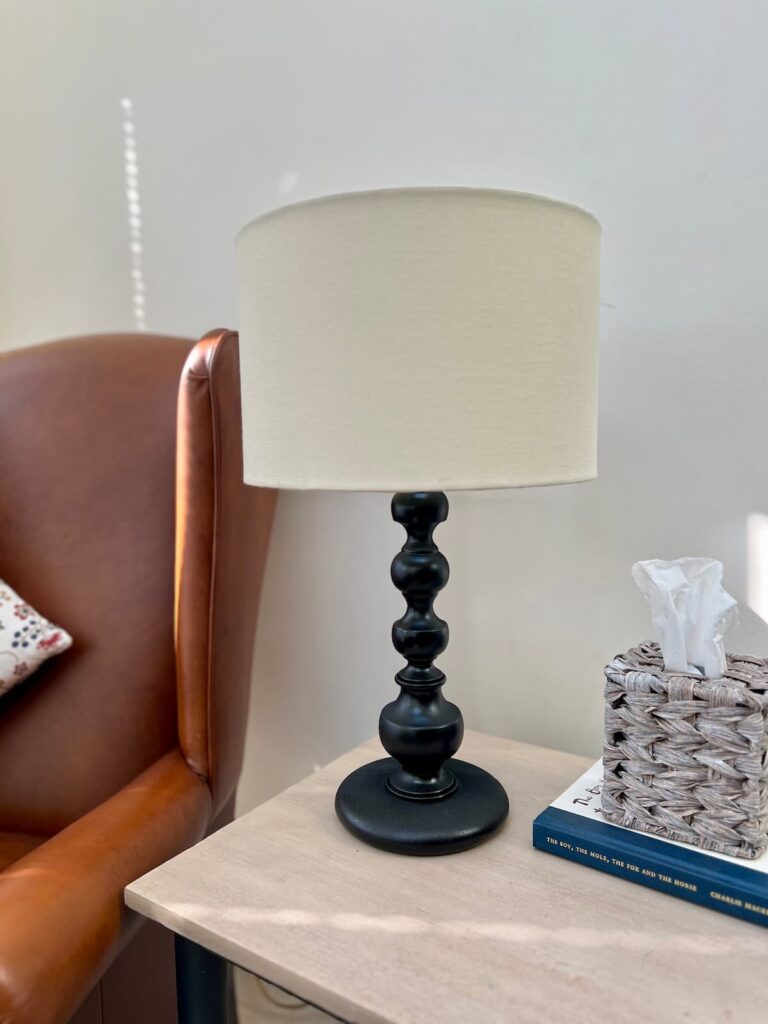
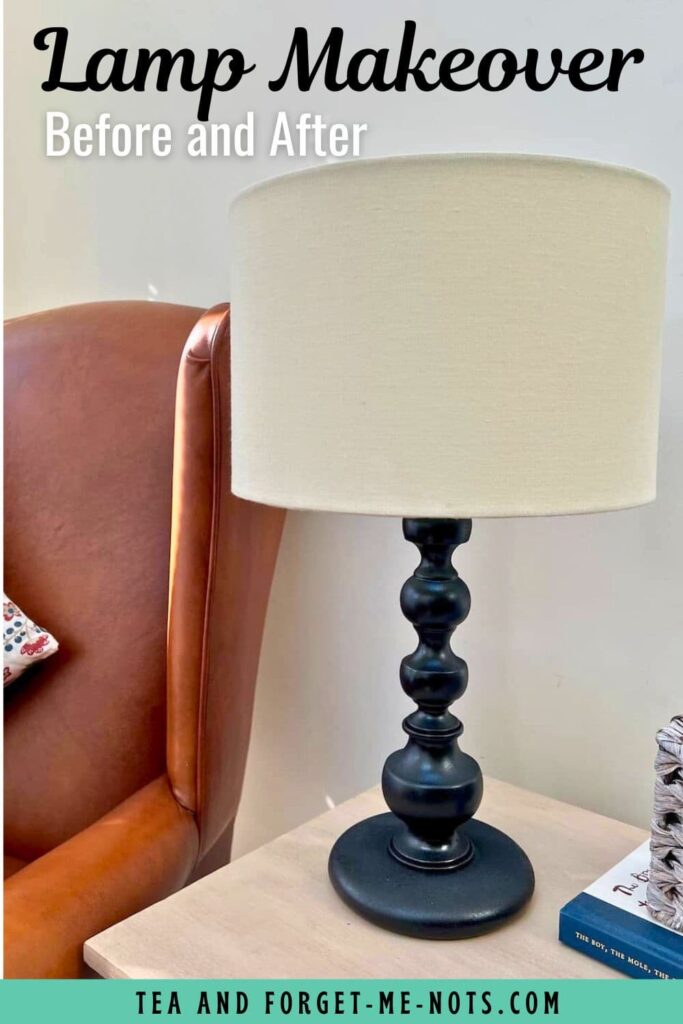
I paired the black base with a fabric cream-coloured lampshade. The simple shade adds a nice contrast to the black finish and a touch of elegance to the overall design.
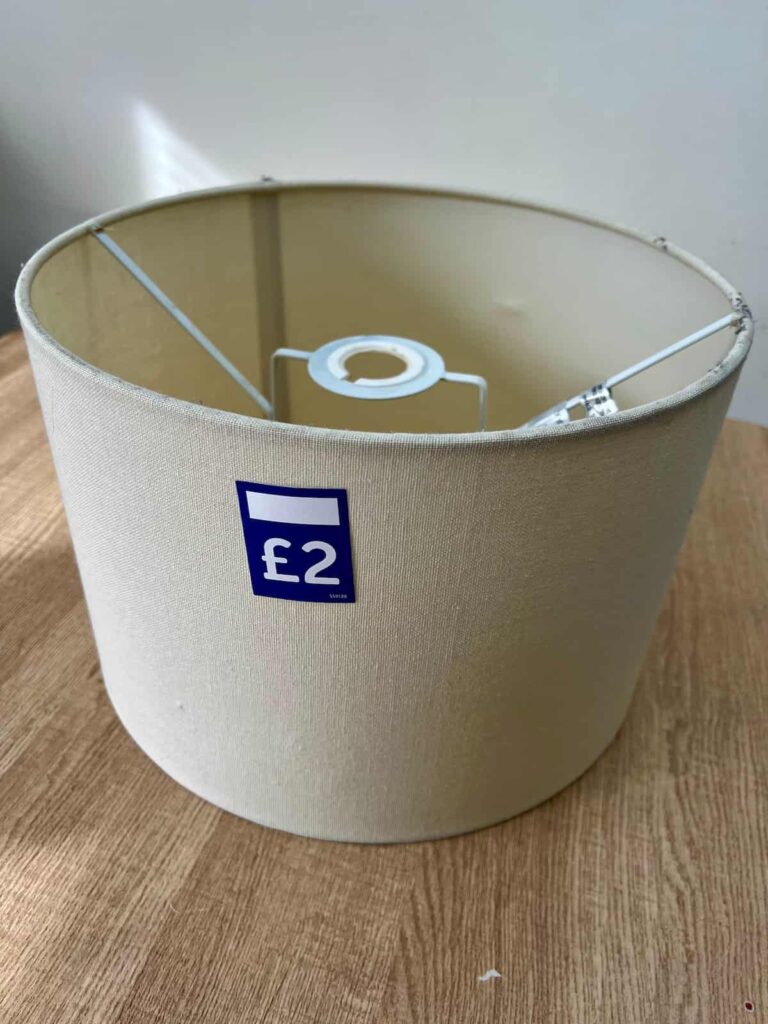
I was fortunate to find the perfect size and colour lampshade in a charity shop. The best part is that this old lampshade cost only £2.
A beautiful lamp shade can make or break the overall look of your lamp. Here’s how to find the perfect one for balanced proportions:
- The shade diameter should be around equal to the height of the lamp base.
- The shade’s height should be about two-thirds of the base height.
- The widest part of the shade should be wider than the lamp base.
While the size and shape of the lampshade do need to work with the lamp base, the colour can be changed. So don’t look at the colour when trying to find a good lampshade as that can be changed.
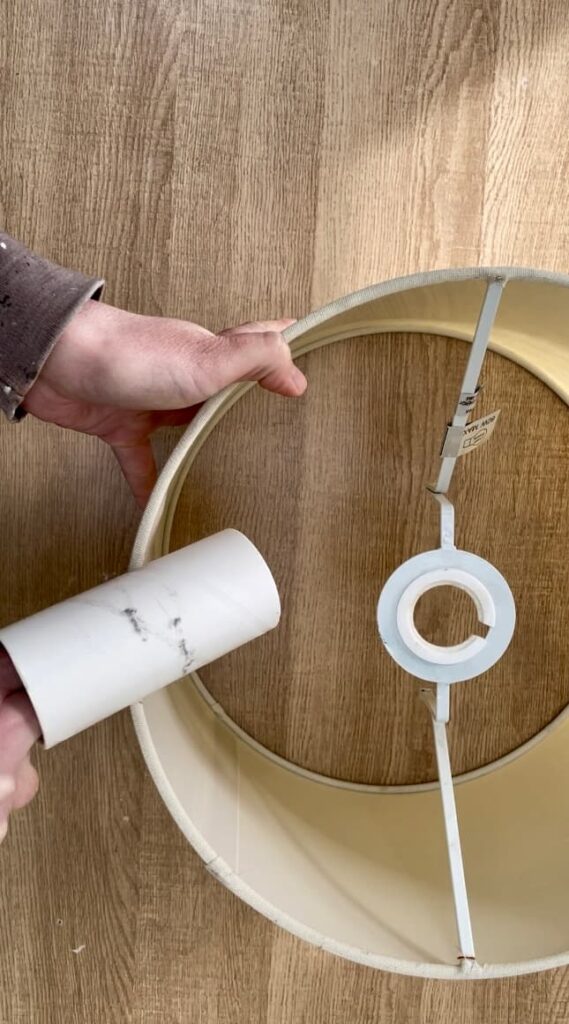
If you want to change the colour, spray painting a lampshade is often a better option than using a brush. When the light bulb is on, a lampshade painted using a brush may show brush strokes.
DIY Lamp Makeover
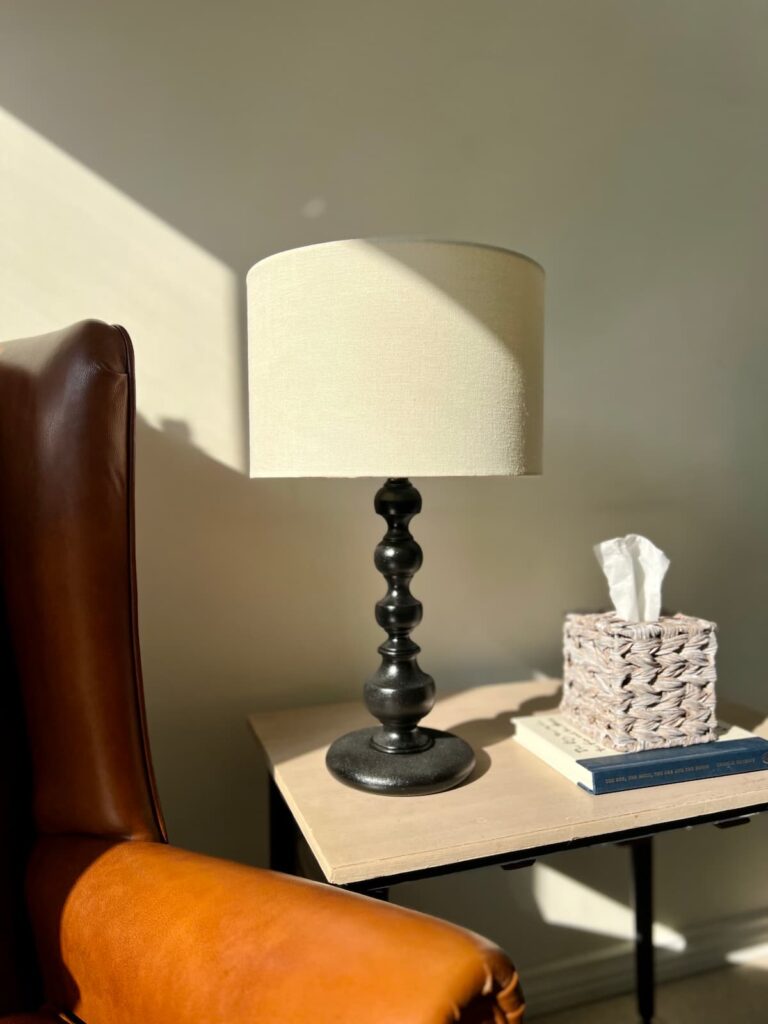
When placing a lamp in a room, consider where you are placing it. It should fit well with the surrounding furniture and be too large or small for the space.
You should also put it near a chair or sofa to create a cosy feel with warm lighting. Also, the bottom of the lamp shade should be at or below eye level to avoid looking at the bright light.
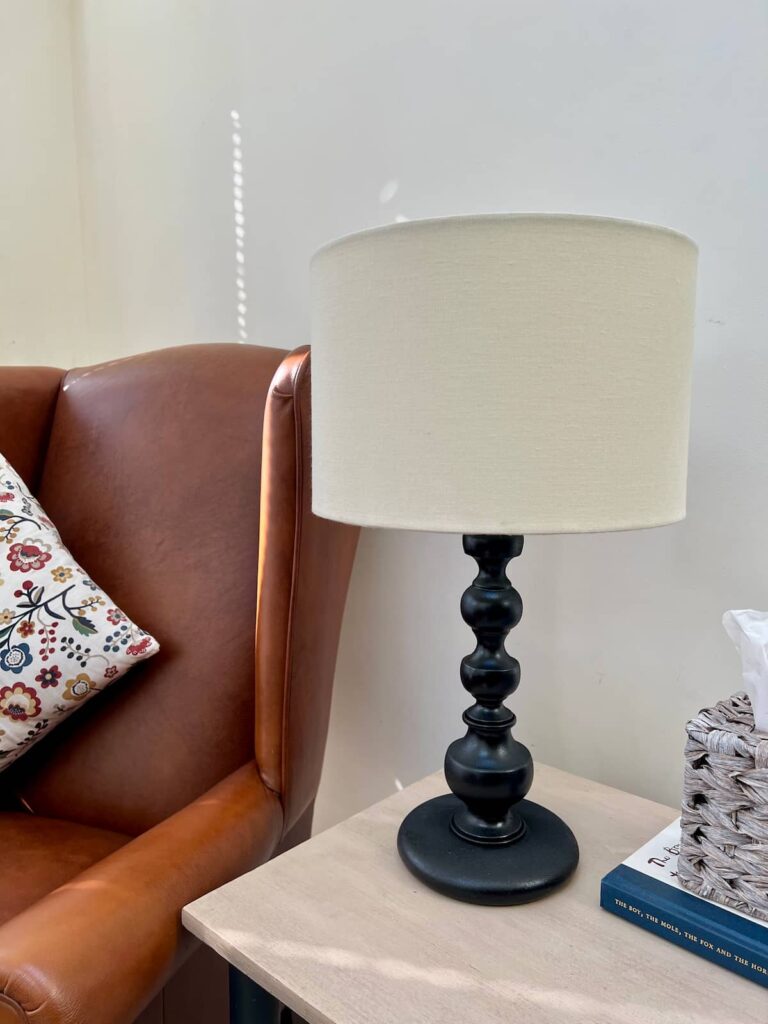
As you can see, with this simple makeover you can completely transform the look of a lamp base.
The total cost of the charity shop lamp base and plain lampshade was just £12. Not a bad price tag to give a table lamp a whole new look.
Have you done your own lamp makeover? If so, how did it go? I’d love to hear about your experience.
If you loved this project, you’ll love these projects too:
paint a glass vase
remove scratches from wood
fun flying keys
Pin it for later – DIY Lamp Makeover

Hi there! I'm Rachel Bowyer, a passionate DIY enthusiast with a knack for transforming the old into something beautifully new. With a deep love for furniture painting, refinishing, and the art of crafting. I've been documenting my DIY projects and restoration journey since 2018. I specialise in techniques like decoupage, stencilling, and decor transfers. Join me as we explore the world of creativity and home improvement, one project at a time.
Looks great; I have a very similar lamp base and haven’t decided the colour yet. I think black is the way to go 🙂
I’d love to see it when you do!