Easy DIY Tissue Box Cover From Repurposed Plant Pot
Tired of boring cardboard tissue boxes cluttering your coffee table during the flu season? For under £5 (and under 30 minutes), you can upcycle a faux plant pot into a DIY tissue box cover.
Don’t spend lots of money on a tissue box, head to a charity shop to make your own classy DIY tissue box.
Follow these simple steps to create your own!
Why This is a Great Project:
Sustainable style: Give a forgotten charity shop find a new purpose.
Functionality in Flu-season: We all need tissues. Keep them on hand without the ugly box.
Budget-friendly: Skip the £30+ designer versions – this costs pennies!
Plus, when you’re feeling under the weather, there’s something satisfying about reaching for a tissue from something you’ve made yourself.
Would you rather opt for video tutorials instead of step-by-step instructions? We’ve got you covered with a comprehensive video tutorial that guides you through creating a tissue box cover.
How to Make a DIY tissue box cover Step by Step
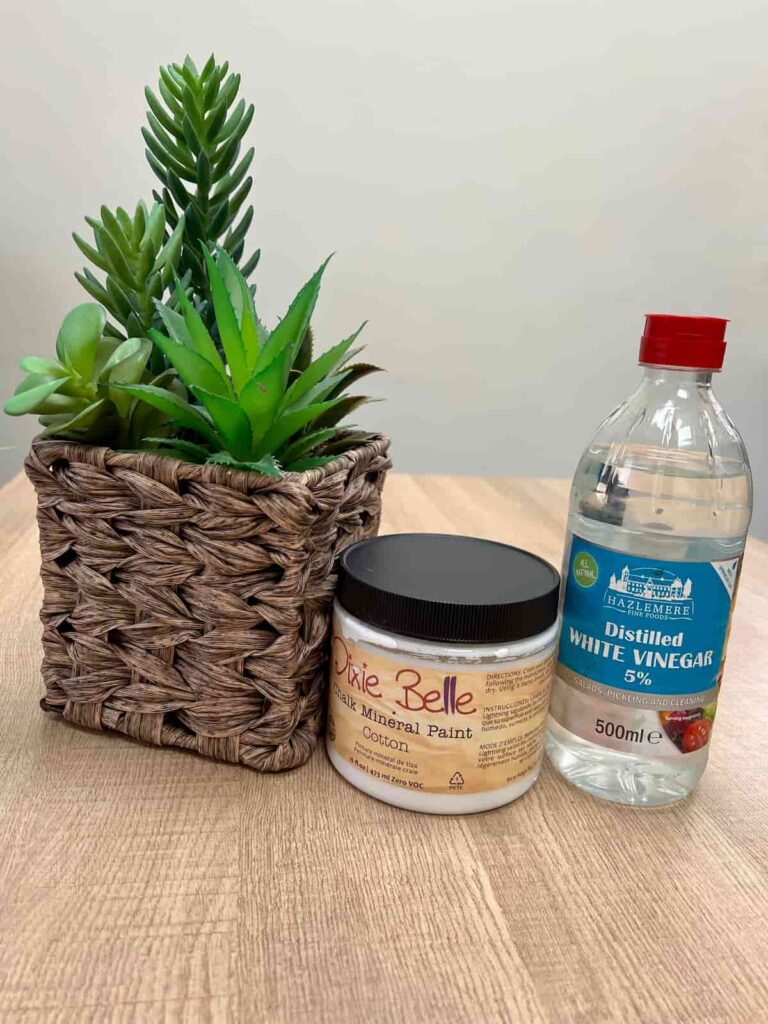
Materials Needed
Step by Step Instructions
Step 1: Find the Right Container
The first thing you need to make this project is the right container.
Look for a square or rectangular container at your local charity shop. The goal is to find something with a sturdy structure and a size that can fit a standard tissue box.
Wooden, rattan, or neutral-coloured materials work best for achieving a high-end look.
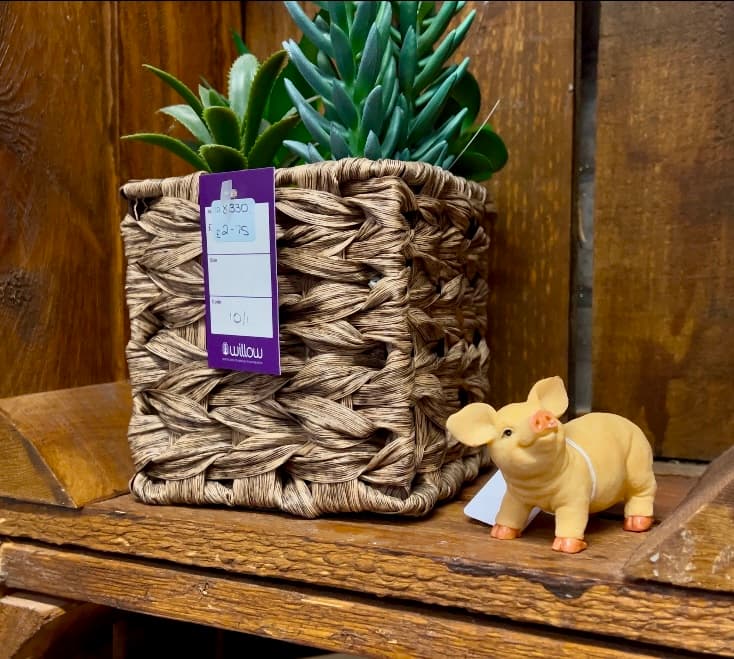
Don’t overlook pots with ugly fake plants – you’re after the container!
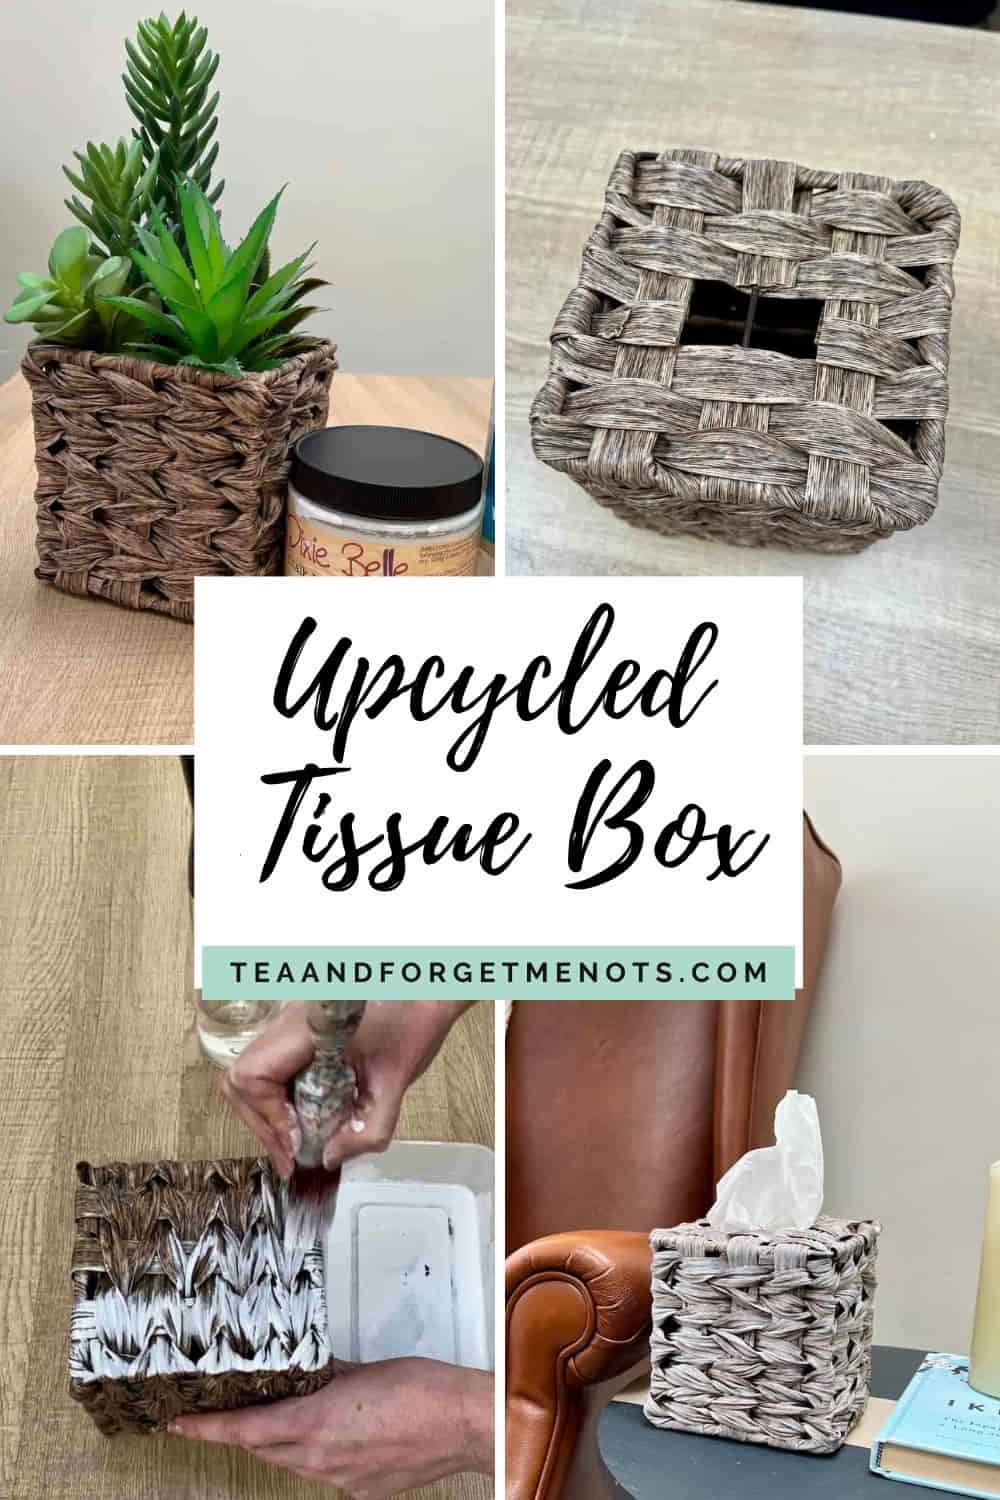
This faux plant and pot cost £2.75 in a charity shop. A good price as the faux plants can be reused for something like a wreath at a later date.
Step 2: Remove the Faux Plant
If you’re using a faux plant in a pot, carefully remove the plant and any foam or filler inside.
This polystyrene was a snug fit but fortunately not glued in place. So despite needing a vacuum to remove all the balls, it was easy to clear out.
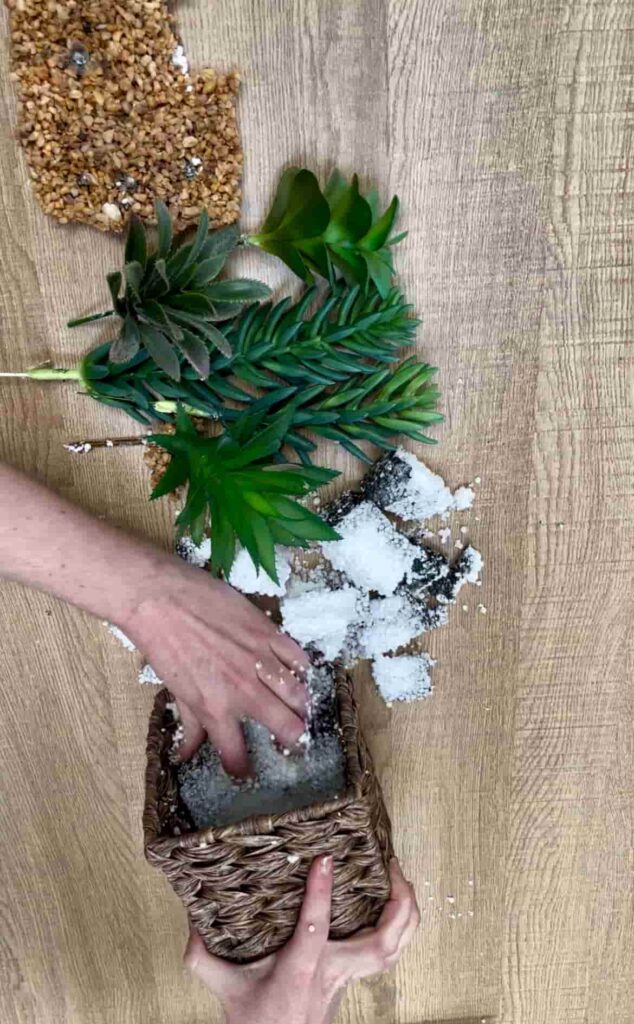
As a bonus, those four fake plants can be repurposed for another project.
Step 3: Clean the Box
A vinegar and water solution is a good way to wipe down the container to remove dust and dirt.
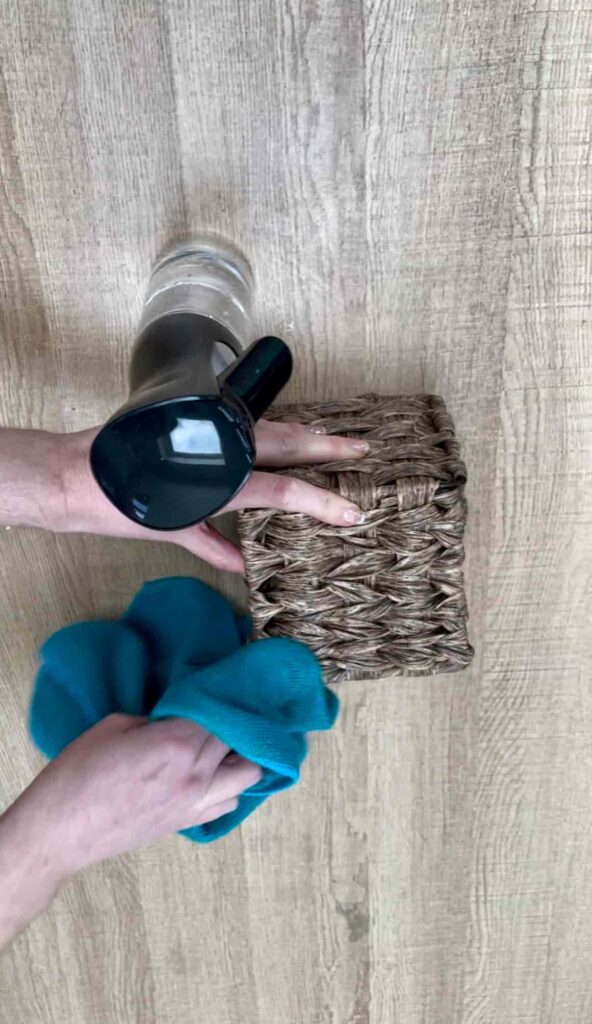
As with anything that has been on charity shop shelves, you don’t know what condition they’ve been in, so a quick clean will make all the difference.
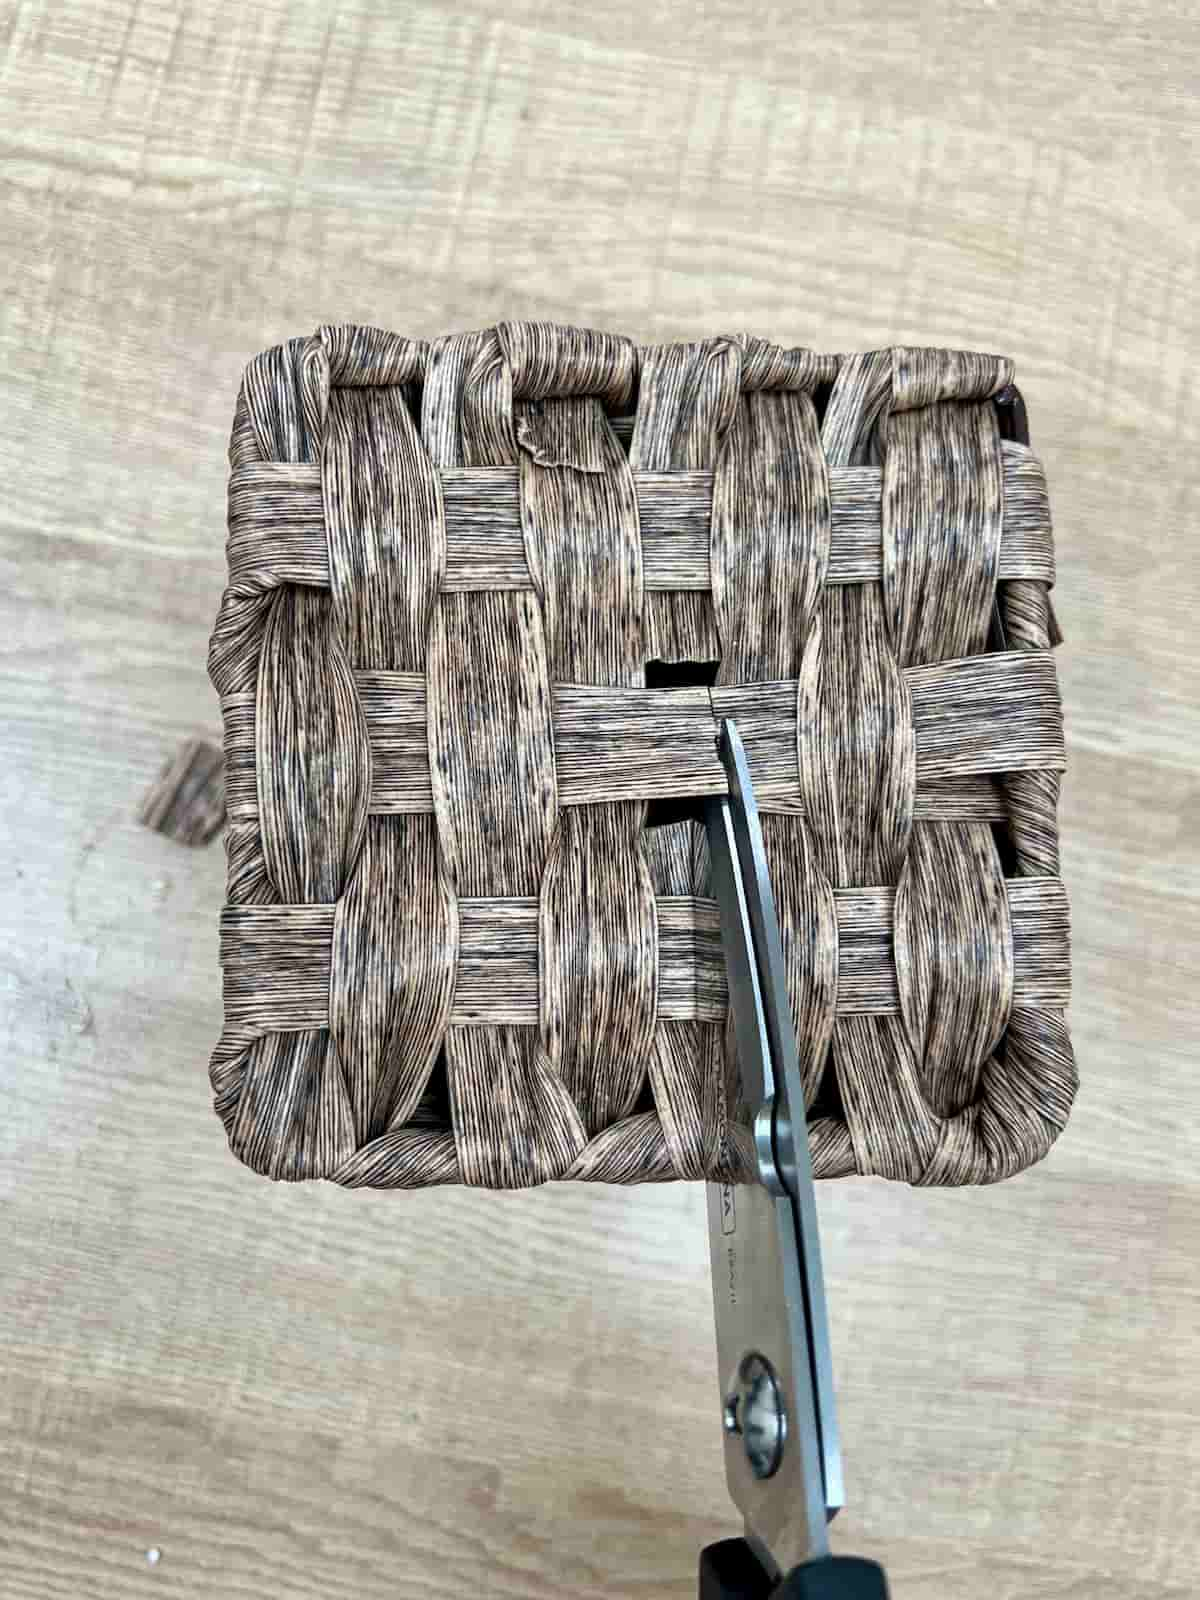
Step 4: Cut the Tissue Opening
The next step is to turn the container over to cut the hole in the bottom. This is the side of the box where the tissues will come out from.
You can mark the centre or the shape you want to cut with a pencil first. The hole needs to be large enough to pull tissues through easily.
You can either make this a square or a rectangle. The material of your box might make this a simple choice depending on how the strands are woven together.
This faux plant pot is probably made from water hyacinth. Which is thin enough to cut with scissors. If you have a thicker material such as seagrass, you may need to use a craft knife to cut through.
Under the outer material was a surprise metal pole. I hadn’t expected one to be in the way of the opening. But it must be there to give structural stability to the plant pot.
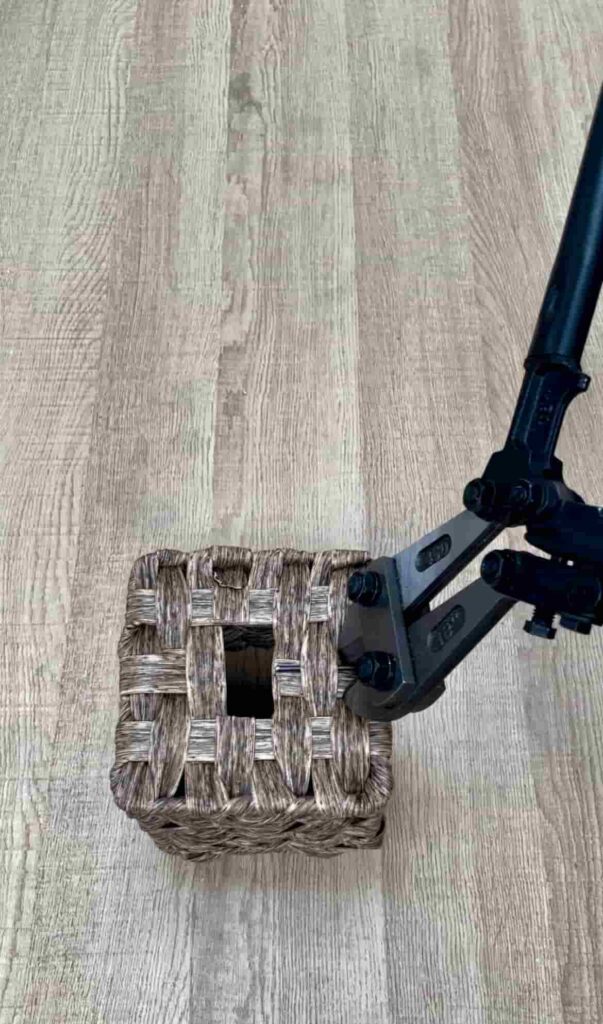
Fortunately, this was easy to fix with bolt cutters. If your box has the same problem, trim the pole as far from the opening as you can. Otherwise, the tissues may snag on the metal.
Finally, as some strands of the water hyacinth were loose, I glued them down with a hot glue gun. This avoids tissues pulling the strands up when coming out of the tissue holder.
Step 5: Whitewash the Box
If the look of the tissue box matches your home decor then you can stop here. To add more visual interest, you could also paint or whitewash the box.
Whitewashing looks the most effective on texture or wood grain as it highlights the variation in the surface.
To whitewash, you add water to paint and mix it. A spray bottle with water is perfect so you don’t add too much too quickly. A 50/50 ratio of paint to water works well.
The more water you have, the more translucent the look will be.
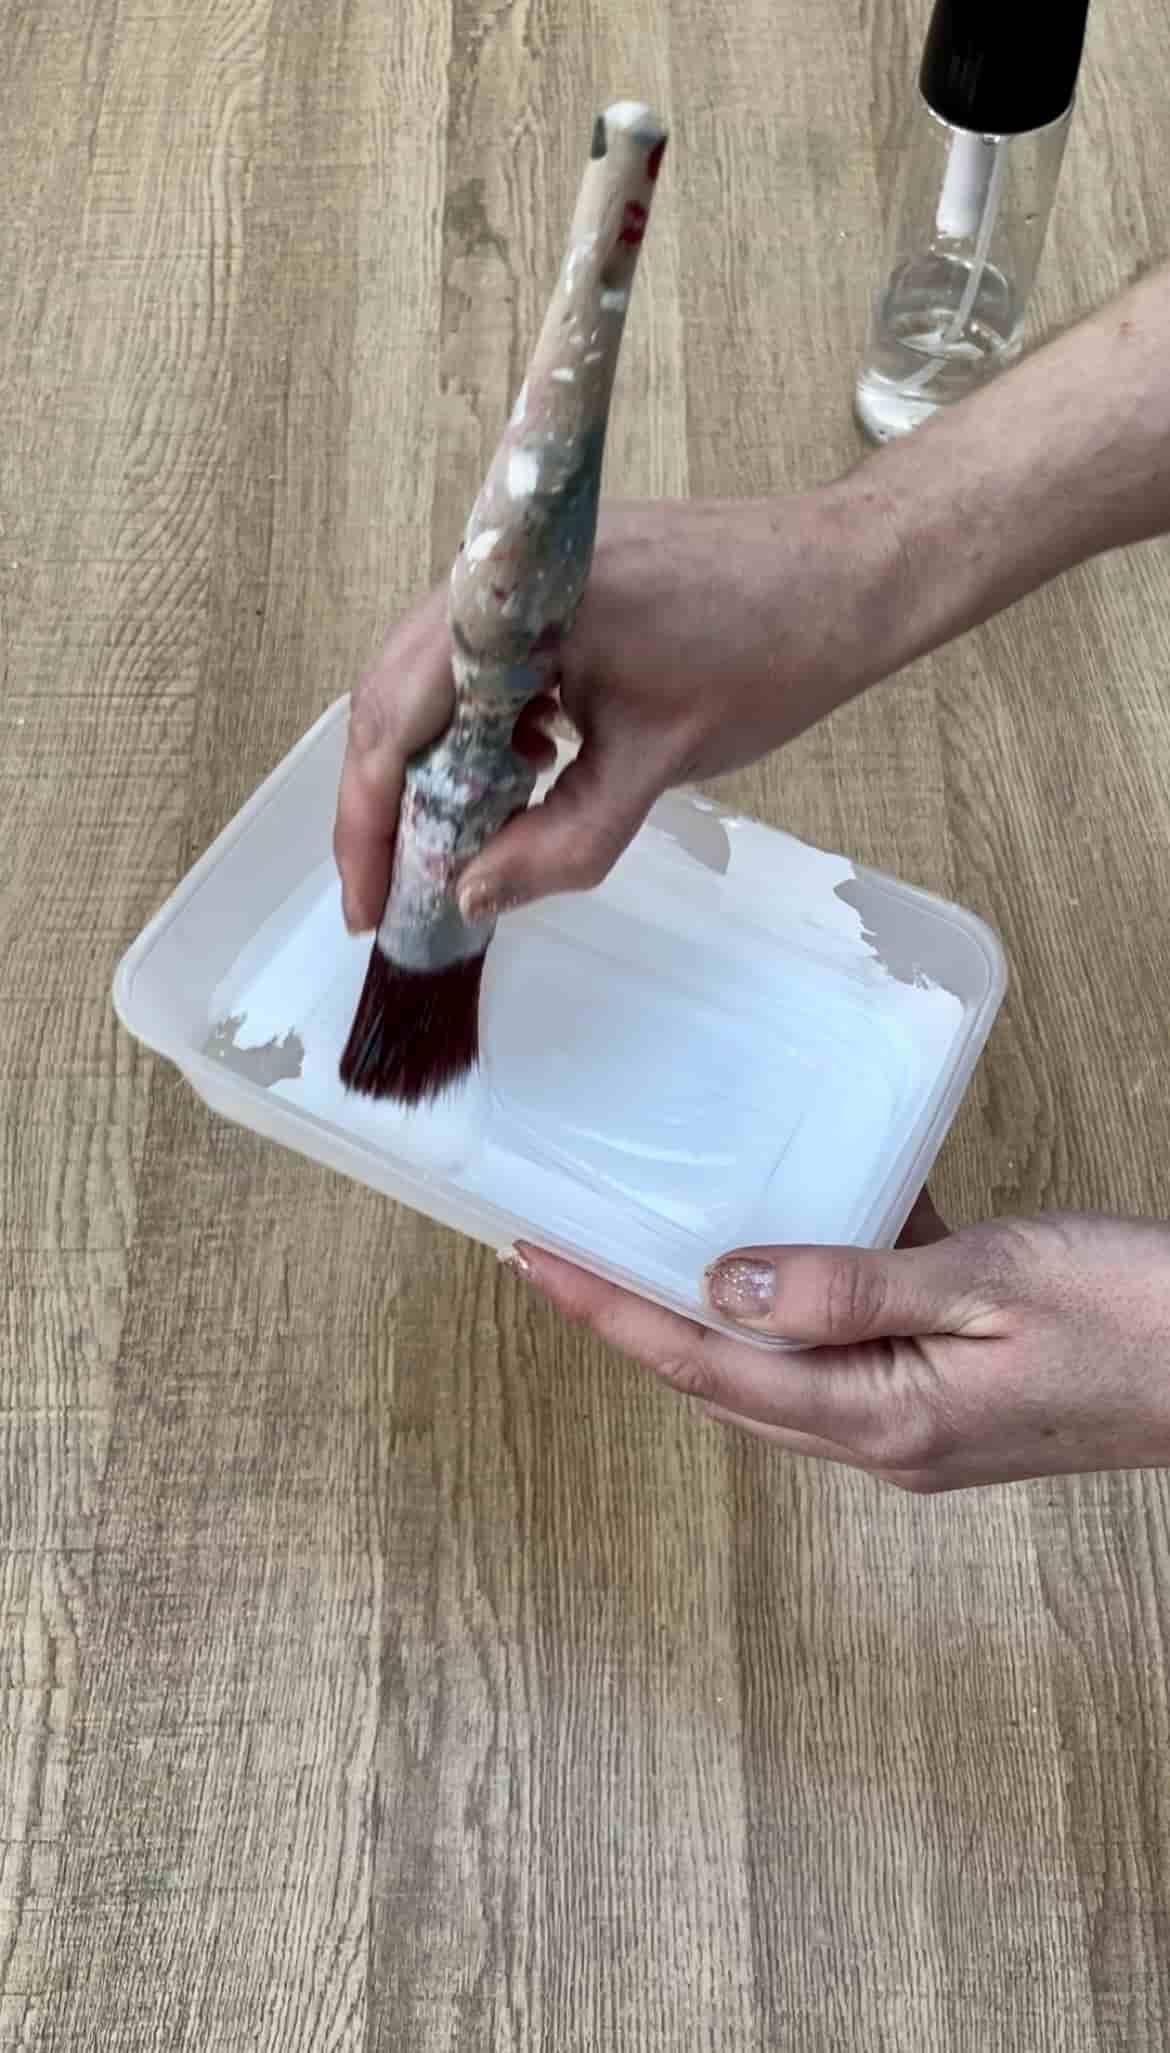
Chalk paint is a great choice for whitewashing as it blends well with water. I continued to add a little spray to the painted box to help the paint run to get the effect I liked.
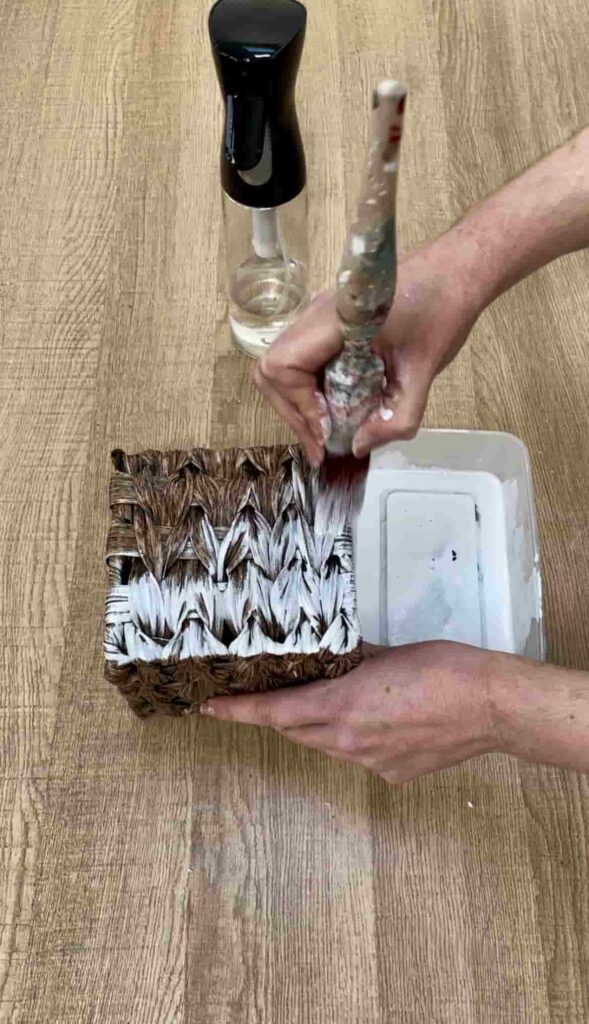
Whitewashing is very forgiving. You can add more layers, and spray it back with water. Play around until you get the look you like.
You can dab away any excess with a dry cloth which helps the paint to settle in the ridges. This creates a more subtle, weathered look.
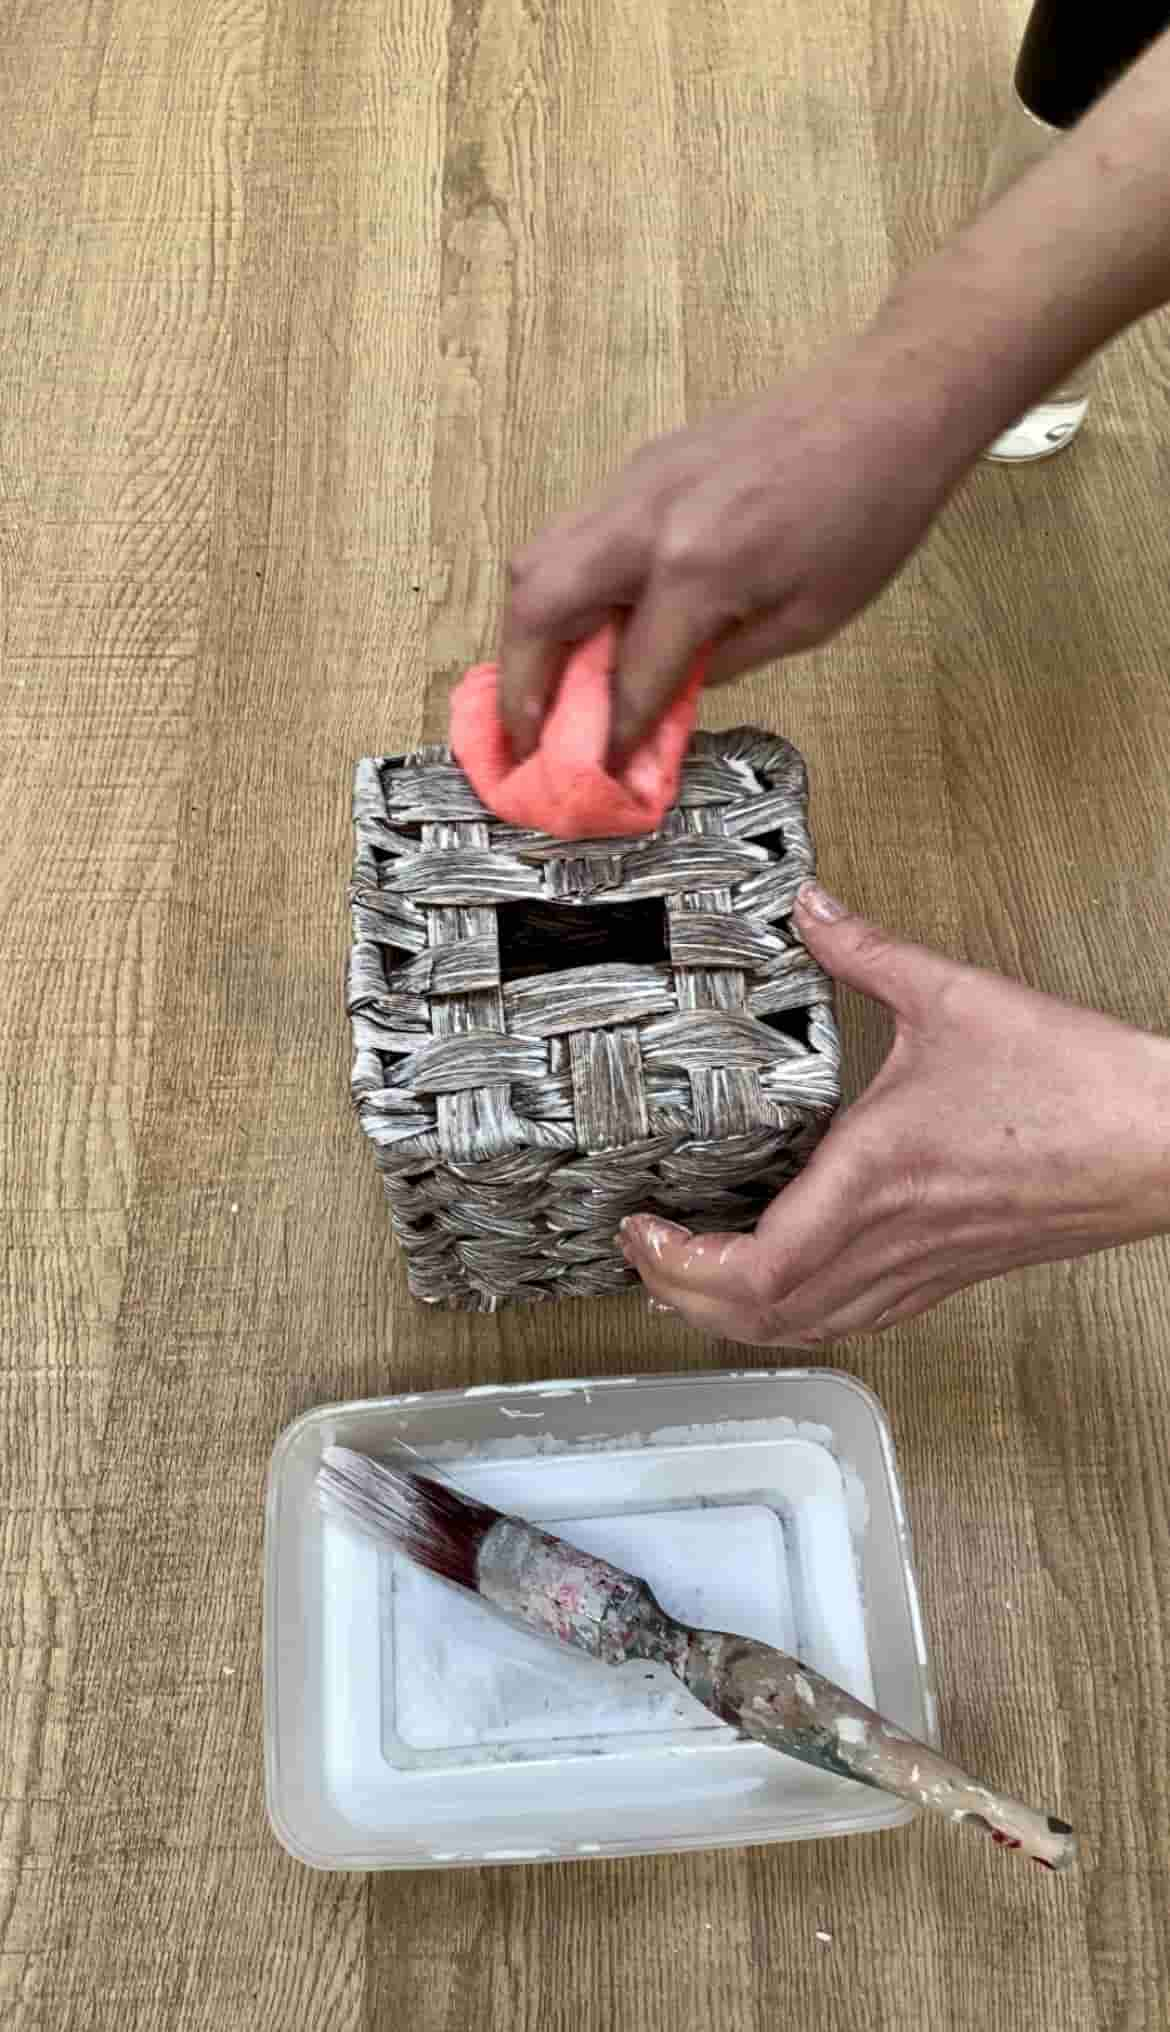
If your container is already a nice neutral tone, you can skip this step.
And if you prefer warmer tones, you could start with a richer-coloured brown plant pot. Or paint the plant pot a warmer colour before whitewashing.
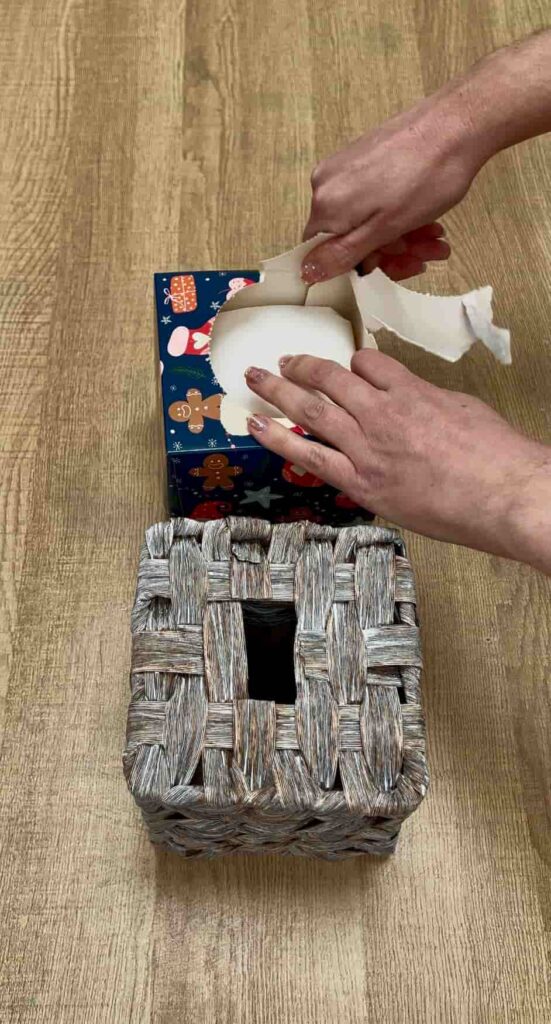
Step 6: Insert Your Tissue Box
Once the paint is dry, pop your tissue box inside and pull the first tissue through the opening.
If like me, your tissue box is the same size as the plant holder, you can tear the edges of the box slightly so it fits inside. You can scrunch it in so it fits – no perfection needed!
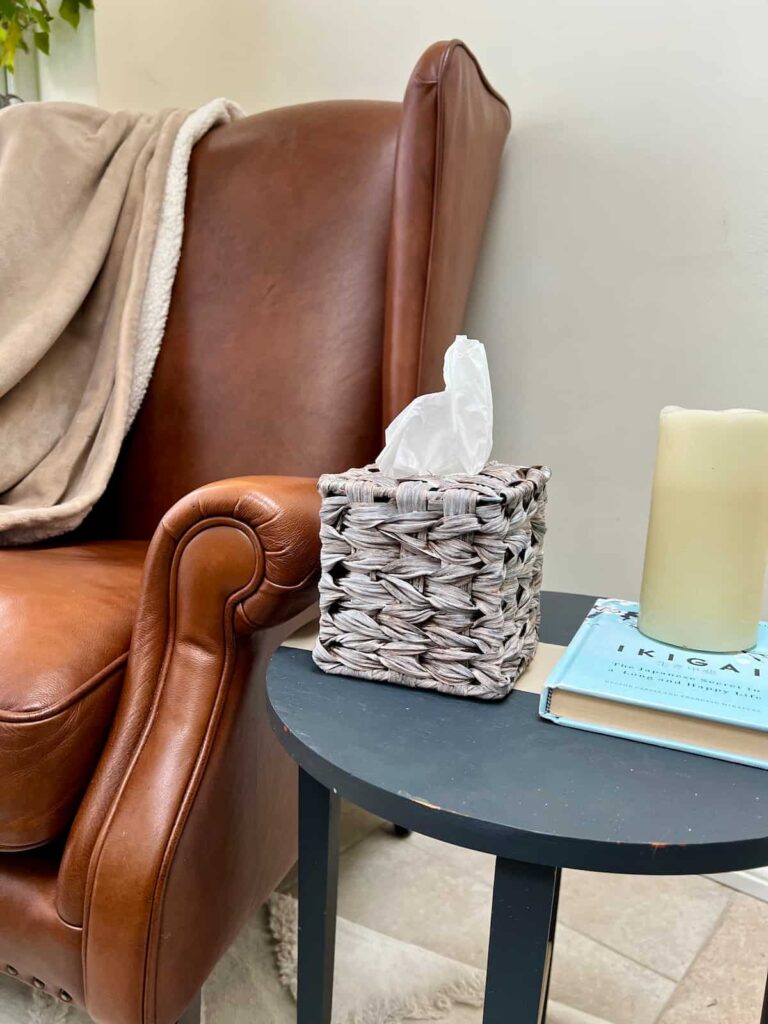
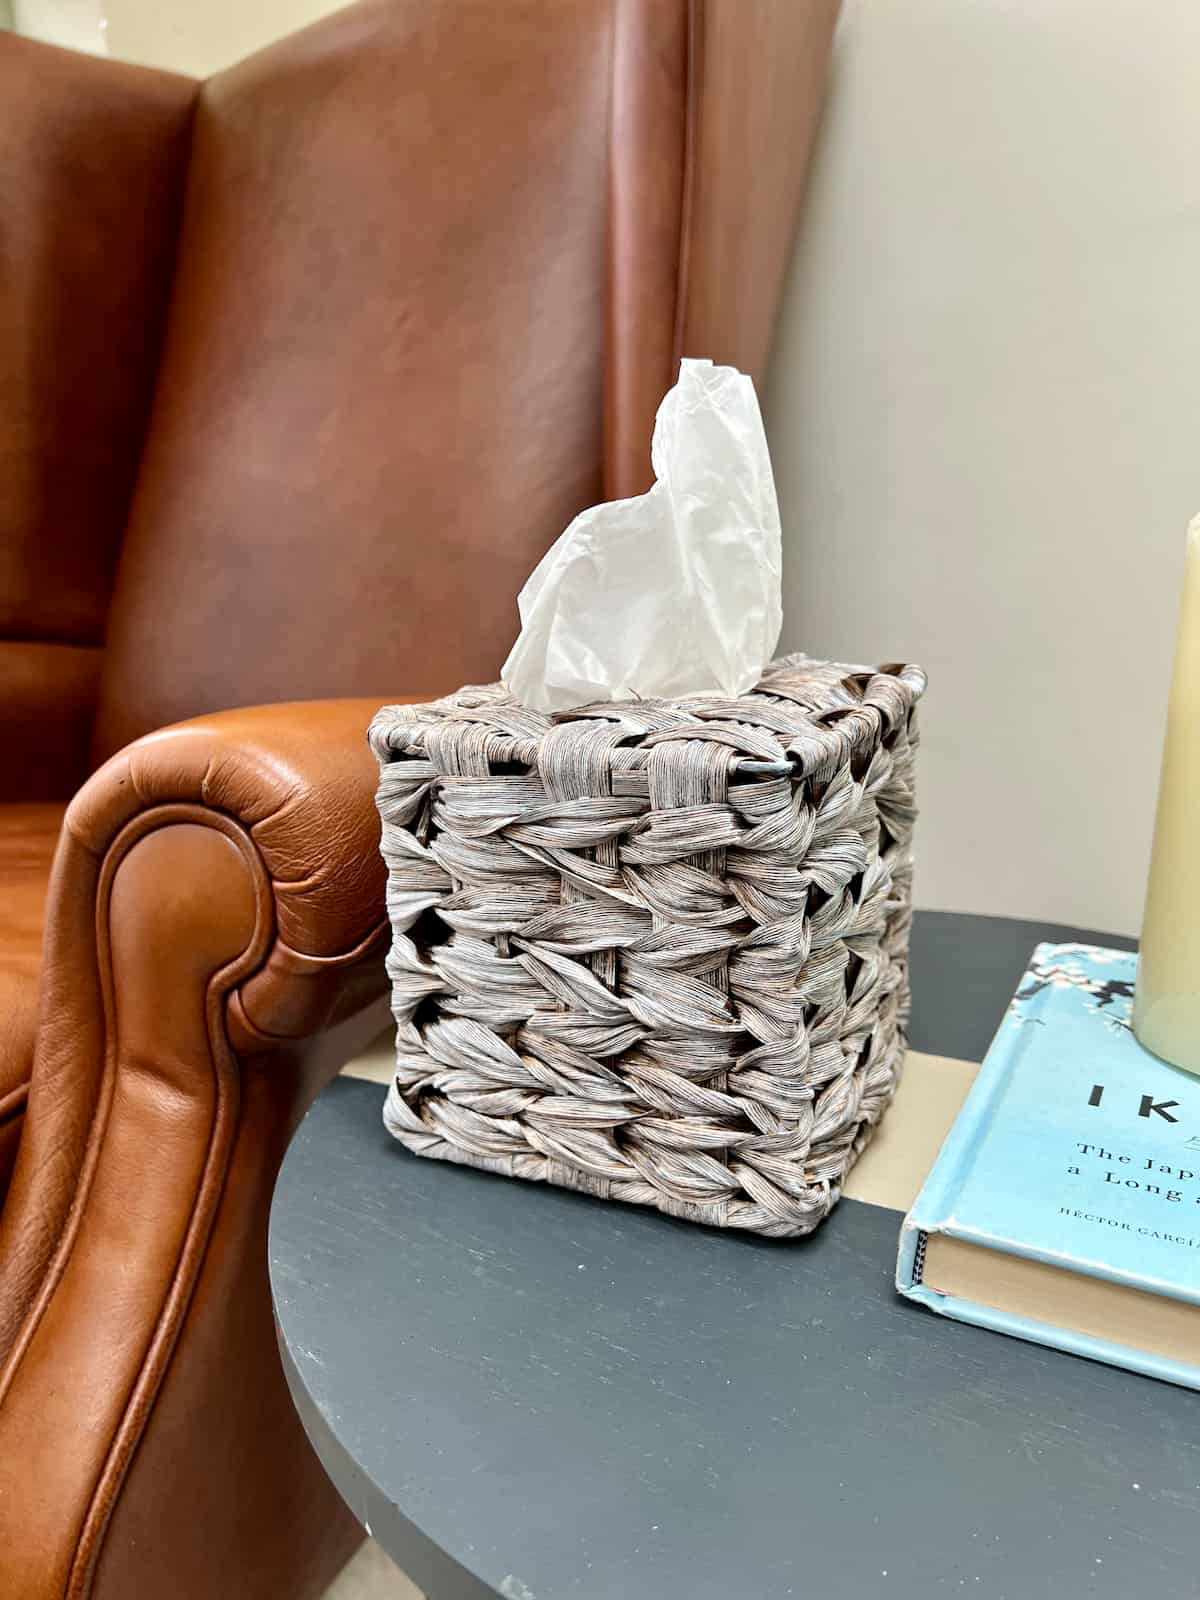
That’s it! You’ve just created a high-end look for a box of tissues for a fraction of the price.
DIY Tissue Box from a Repurposed Plant Pot
This simple DIY proves that you don’t need to spend a fortune to achieve a designer feel.
Keep an open mind while going to charity shops or thrifting, there are endless ways to upcycle everyday items into interesting home decor.
This isn’t just craft therapy – it’s upcycling with purpose.
My total cost was £2.75 for the pot and leftover paint. It’s also a quick win, perfect for time-starved crafters.
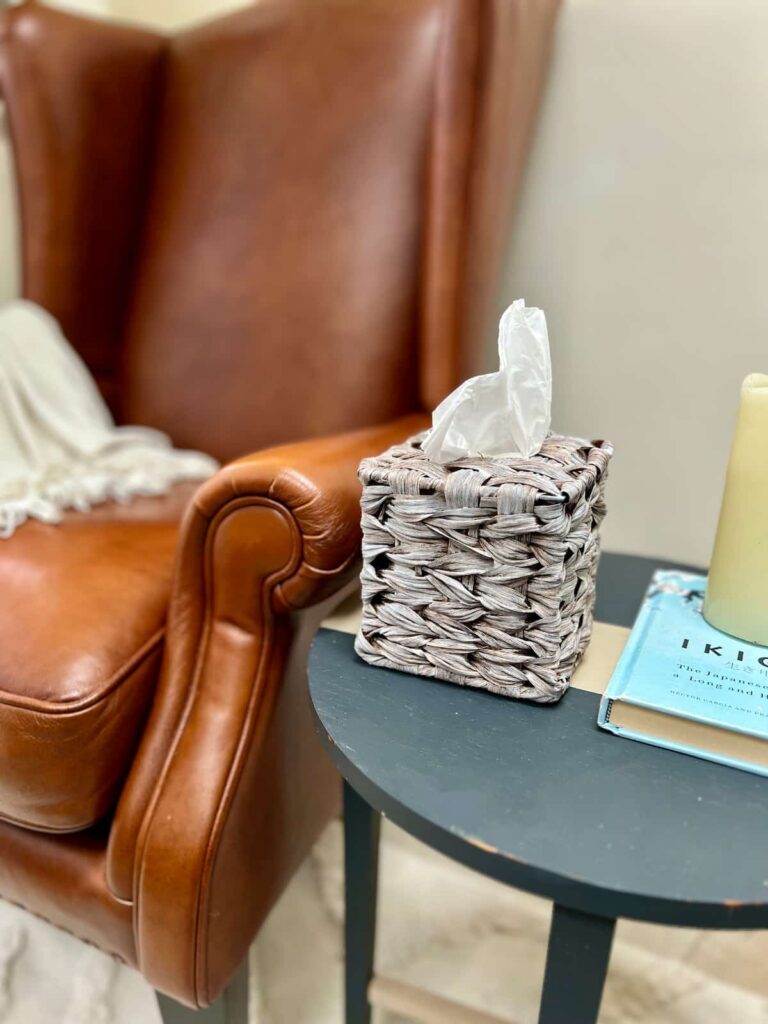
Doesn’t this seem like a better way to display tissues in a living room rather than a plain tissues box?
Have you done a similar project? If so, I’d love to see it! Sharing craft projects with our creative community is a great way to get inspiration.
Happy crafting!
How to make a DIY Tissue Box Instruction Video
You can find more video tutorials on our Youtube Channel
If you loved this project, you’ll love these projects too:
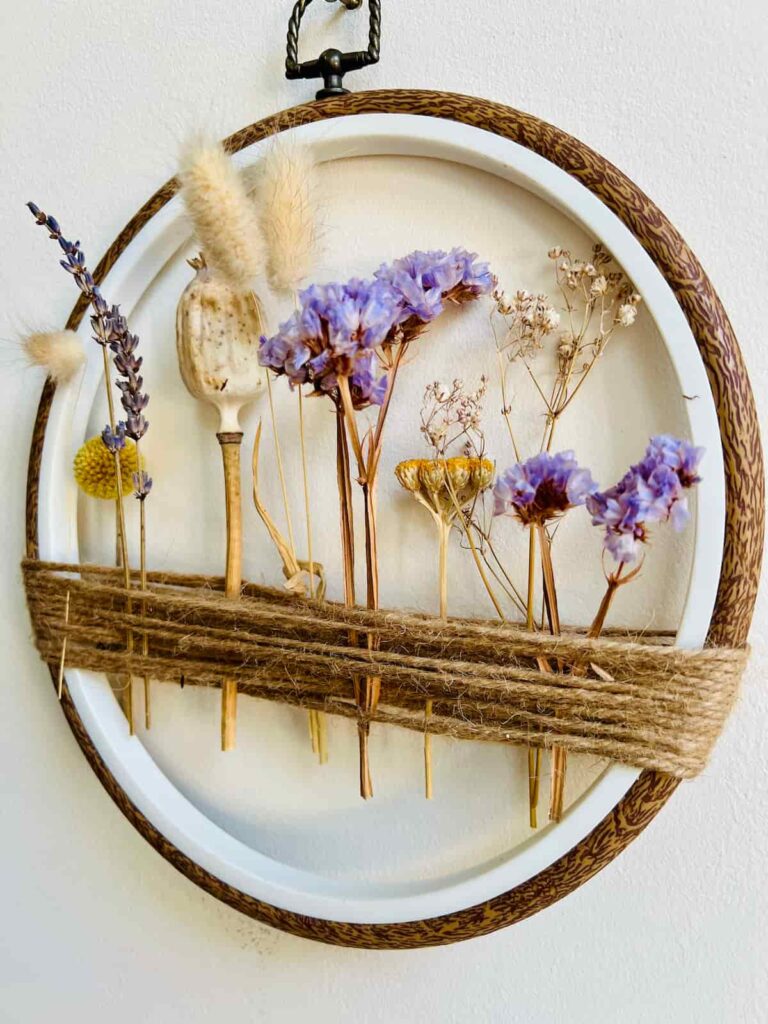
embroidery hoop decor
repurposed cabinet door
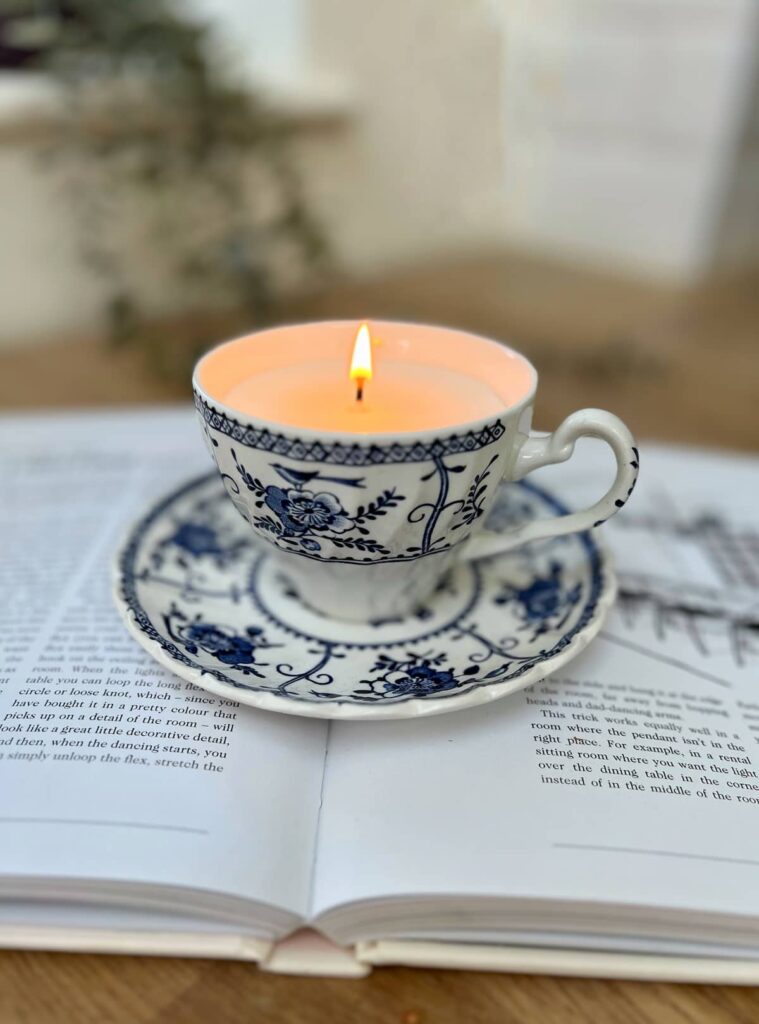
upcycled tea cup
Did you make this craft?
I love seeing what you do. Please mention @teaandforgetmenots and share your creations with me!
Pin it for later – DIY Tissue Box Cover

Hi there! I'm Rachel Bowyer, a passionate DIY enthusiast with a knack for transforming the old into something beautifully new. With a deep love for furniture painting, refinishing, and the art of crafting. I've been documenting my DIY projects and restoration journey since 2018. I specialise in techniques like decoupage, stencilling, and decor transfers. Join me as we explore the world of creativity and home improvement, one project at a time.
Great idea Rachel; I love the new use!
Thanks, Sara.