How to use black wax on furniture for impact
Black wax on furniture can have a dramatic impact. It takes something monotone and plain and gives it dimension and character.
This footstool was £5 from a charity shop. It was something my parents spotted for me. It’s always great to have family and friends on the treasure hunt too!
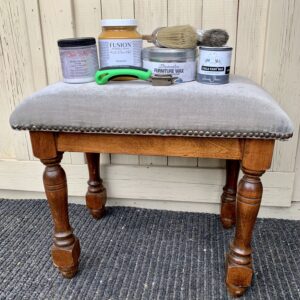
As I mentioned in my how to find free furniture post, telling friends and family about your hobby/interest/business, multiplies the eyes for finding bargains.
This post may include affiliate links so you can easily find the products I love and use myself. If you purchase these products, I may earn a small commission at no extra cost to you.
How to use black wax on furniture for impact
Preparation
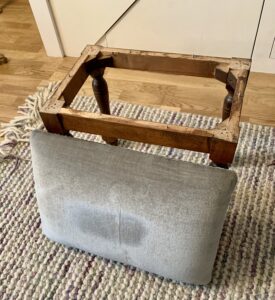
I separated the cushion from the base using an impact driver.
I won’t go into the process of reupholstering the footstool because you can check that out in this post.
Needless to say, there were hundreds of staples and pins keeping it all together!
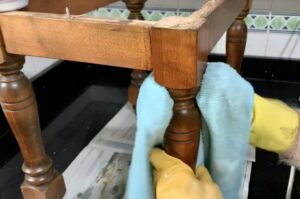
With the base now on its own, I gave it a thorough clean with Dixie Belle’s White Lightning. I added some to a tub of warm water and used a cloth to get into the nooks and crannies.
I then gave it a second rinse with clean water to remove any leftover cleaner.
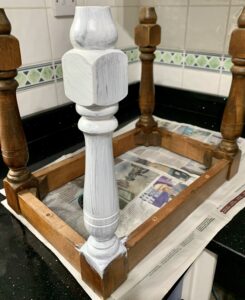
As the wood was dark, there was a risk that tannins would bleed-through the paint and make it look stained. Sometimes stains won’t show for weeks or months so it’s best to avoid and just use a primer at the start.
I used one coat of water-based primer by Zinsser. I’ve recently converted to the water-based version because it’s so easy to clean up after rather than dealing with chemicals that you can’t put down the sink.
A pop of colour
I had a craving to use this beautiful mustard colour by Fusion Mineral Paint. It was only after I dressed my son one day when I was working on it, that I became suspicious as to why I had chosen it!
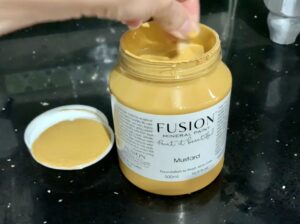
I ended up painting two full coats with a couple of small touch-ups. Yellow quite often has poor coverage, similar to white, so I was pleasantly surprised by how dense it was.
A world apart from how many coats went into the white bird cabinet transformation!
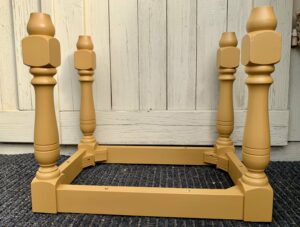
Black wax for impact
To give the piece protection, I started with a coat of clear wax using Annie Sloan’s wax brush. As the bristles are so thick, it feels like excellent quality.
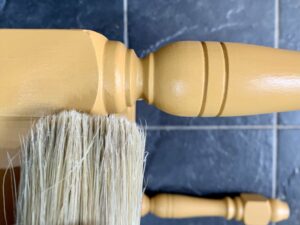
Clear wax as the first layer creates a barrier between the dark wax and the paint so you can always remove the dark wax if you don’t like it.
If you do add too much dark wax, use a cloth with clear wax and buff it off, like your very own eraser tool.
Essentially you’re giving yourself the ability to make mistakes and I’m always a fan of that!
I added black wax with another wax brush and used a microfibre cloth to wipe it back to get the look I wanted.
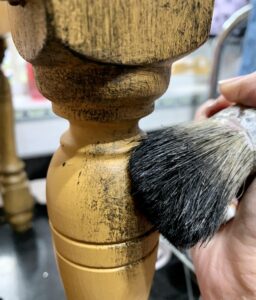
I label my wax brushes as either clear or dark wax so that I don’t get them mixed up and accidentally add dark wax to a piece that I don’t intend to.
Even though I wash them well with warm water and soap, it’s not worth the risk of messing up a nearly finished piece.
Black wax on furniture looks the most impressive when the piece has nice details for the wax to settle into. When I saw the rings around the legs of this footstool, I immediately thought wax would add impact.
Want to know 23 great DIY tools? Get the list!
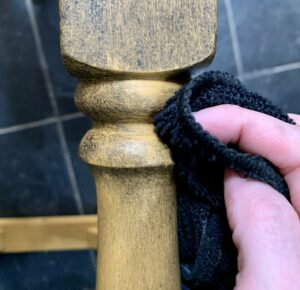
You can add as many layers of wax as you like. It’s better to start subtle and wipe it back quickly and add more later if you want it to be bolder.
For comparison, here are the legs at different states of completion. The top front has no wax. The top back has wax that has been buffed with a cloth. The bottom two legs have wax brushed on but not yet buffed.
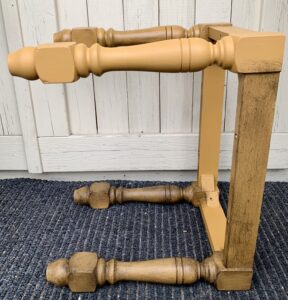
It’s a good way of working out what style you like.
Brown wax would also look great with the mustard colour and would be more subtle.
Wax takes a few weeks to properly cure and harden. Only then will you have a really durable piece of furniture.
Finishing touches
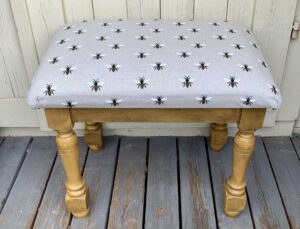
I reattached the newly-upholstered cushion. I really like how the base matches the pops of yellow on the bees.
You may recognise the same bee fabric that I used for this footstool. That’s because it sells like hot cakes for me and I do love a good cake.
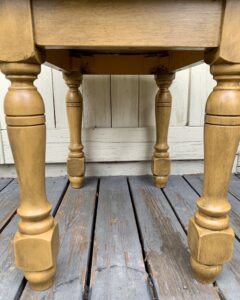
Which do you prefer, the yellow legs or the original black?
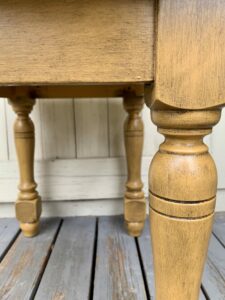
It will be interesting to see if the yellow base helps this sell more or less quickly.
UPDATE: the piece didn’t sell more quickly than the original black. But the customer did say that they bought it because of the yellow legs!
Another piece I added black wax to is this purple console table. It was recently bought by a family restoring a farmhouse. What a great new lease of life for it!
Like more behind the scenes? Follow me on Facebook, Instagram or YouTube!
If you enjoyed this post you might also like my second attempt at a small table…
Pin it for later – black wax on furniture

Hi there! I'm Rachel Bowyer, a passionate DIY enthusiast with a knack for transforming the old into something beautifully new. With a deep love for furniture painting, refinishing, and the art of crafting. I've been documenting my DIY projects and restoration journey since 2018. I specialise in techniques like decoupage, stencilling, and decor transfers. Join me as we explore the world of creativity and home improvement, one project at a time.


Lovely to see the process, thank you for sharing your techniques and tips.
My pleasure, do let me know if there’s anything else you’d be keen to see if the future.
I love this little bee stool. It is just so darling. Anything with bees (like my mudroom), I just love!
Yes I love bees too, such little happy creatures!