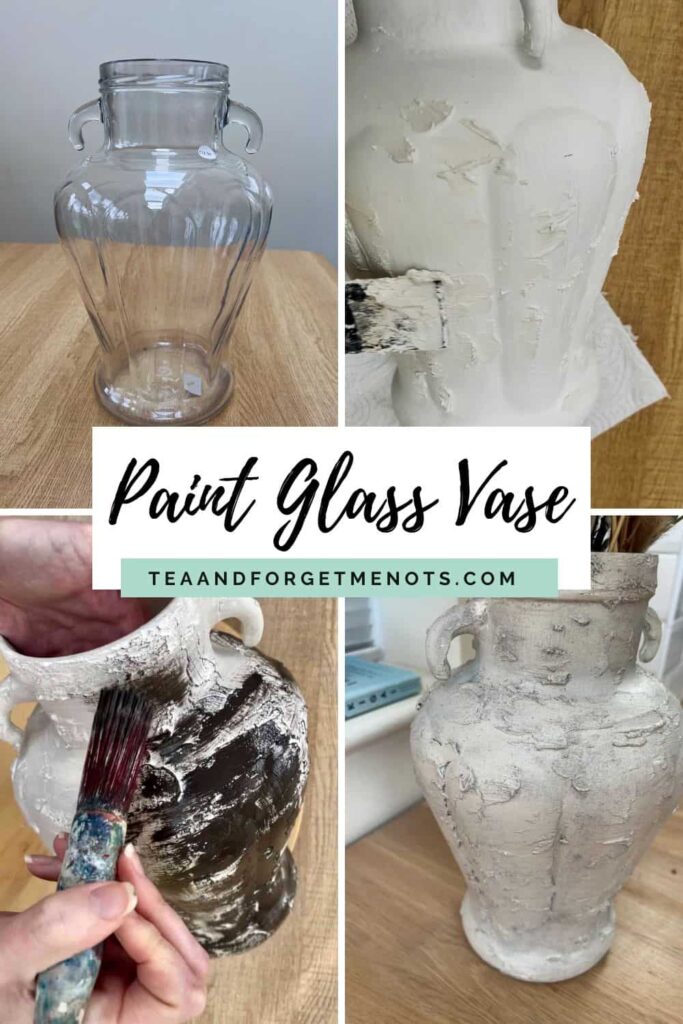
Paint a Glass Vase to Create Easy Textured Look
If you’ve ever picked up a plain glass vase and thought it looked boring, this DIY project is for you! With just a few materials, you can transform an ordinary vase into a textured piece that looks straight out of a designer shop.
When it comes to home decor, glass often blends into the background. But by painting glass vases you can turn them into a statement piece.
That’s why painting glass is a great way to give new life to plain objects. Plus it adds a touch of personality to your home decor.
With a combination of paint, wood filler, and wax, you can create a unique finish that adds character to your home.
See the full step by step video tutorial
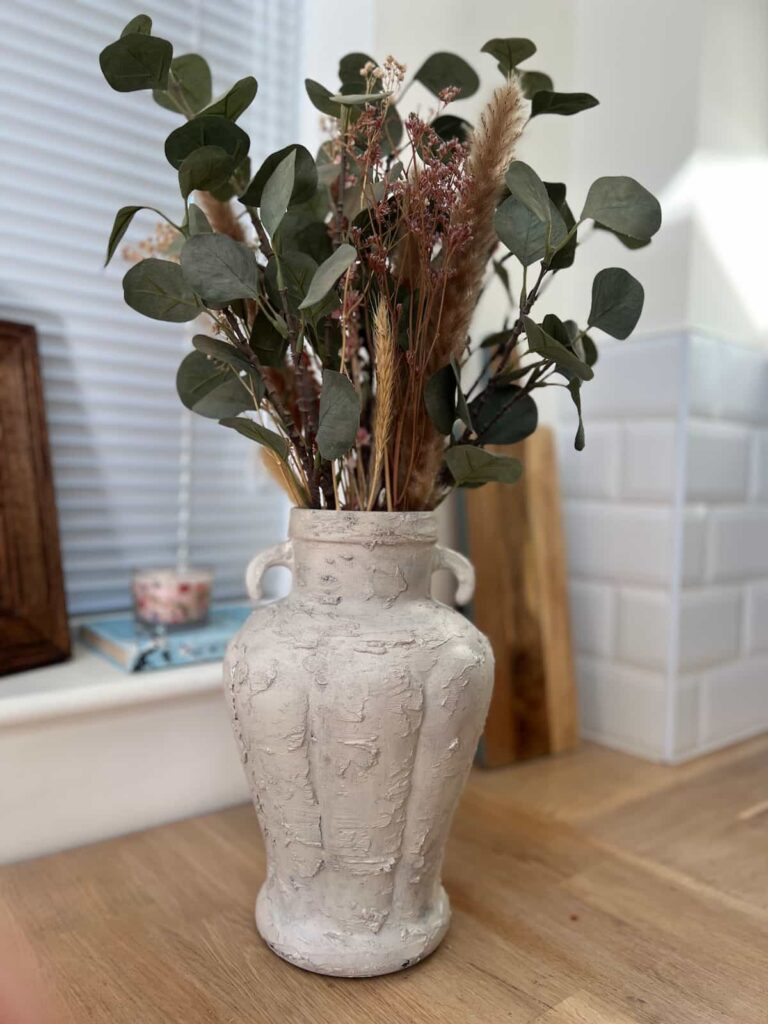
Whether you love the look of ceramic, aged stone, or rustic pottery, this easy tutorial will help you achieve a beautiful, custom look without breaking the bank.
This post includes affiliate links so you can easily find the products I use myself and recommend to friends. If you purchase these products, I may earn a small commission at no extra cost to you.
How to Paint a Glass Vase Step by Step
Materials you’ll need
Step by Step Instructions
Supplies to Paint a Glass Vase
The most important supply you need to paint on glass is an adhesion primer, such as Slick Stick. You use this instead of sanding on surfaces where it wouldn’t work like glass and laminate.
And frankly painting an extra coat or two will always be more fun than using a sander!
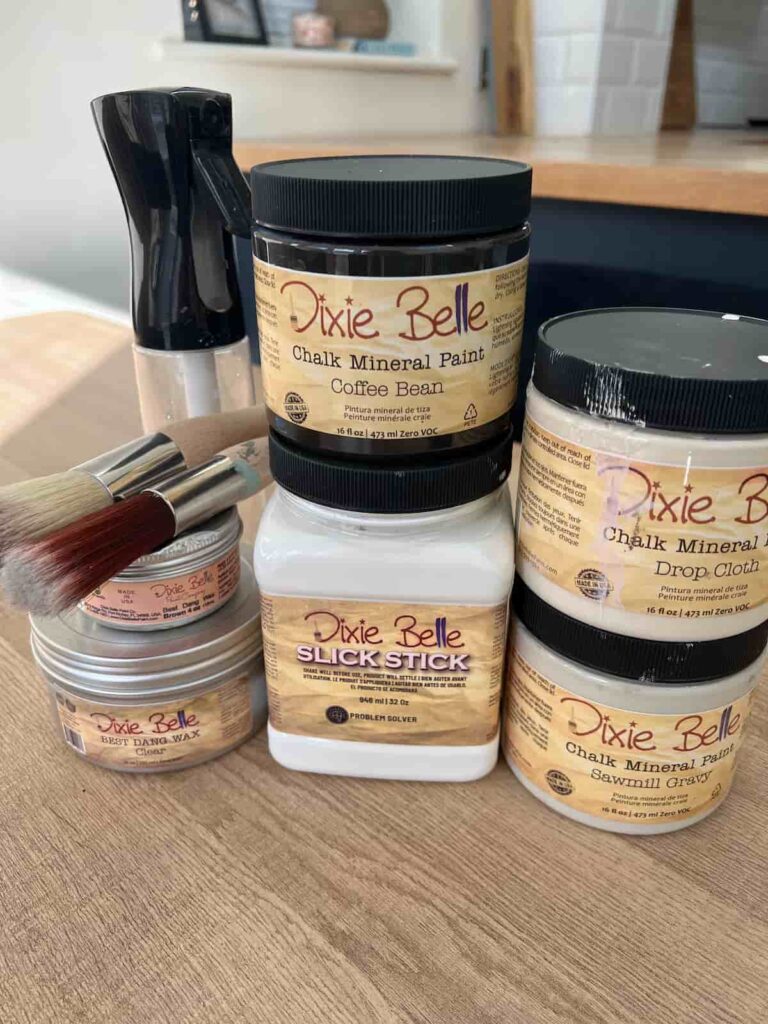
The other products are chalk paint to add layers of colour to the glass vase and wax to seal it.
There are no right or wrong products to use after using a bonding primer. Whether you use chalk paint, acrylic paint or something else, having the right base coat is what will make this project a success.
An alternative product with the same qualities as Slick Stick is INSL-X’s Bonding Primer.
Step 1: Choose a Glass Vase
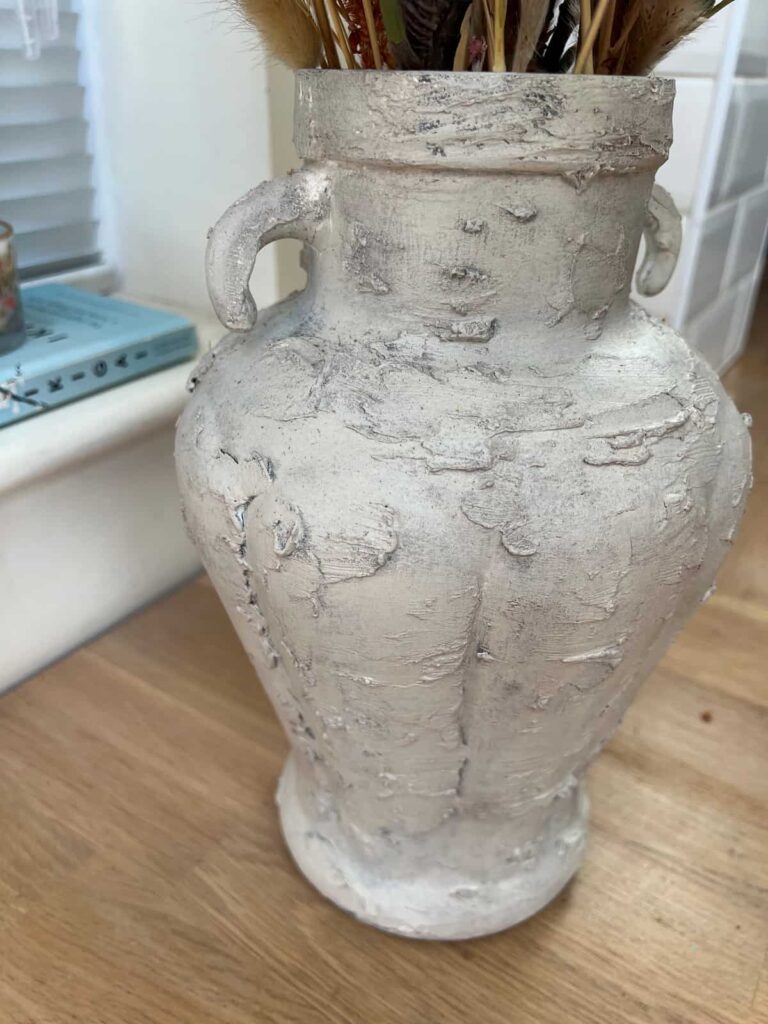
This glass vase cost £12.50 in a charity shop. It’s a great size for a bouquet of flowers. Some vases have narrow necks that don’t hold too many flowers but this one is ideal.
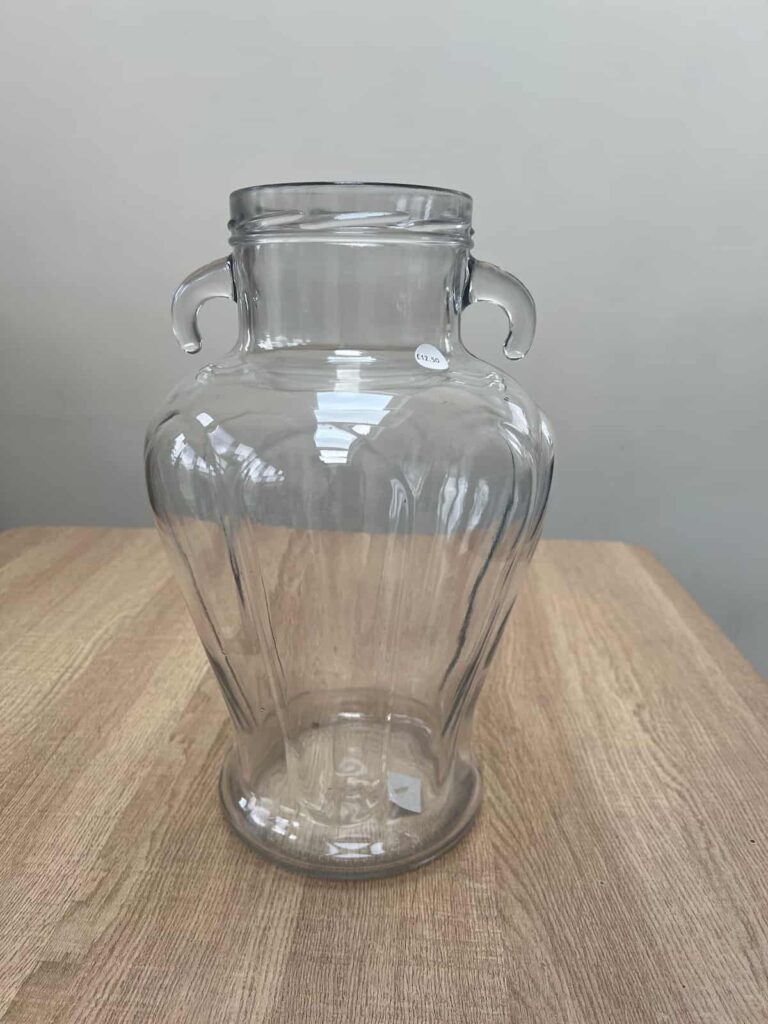
I prefer an opaque vase where you can’t see the stems on the inside of the vase.
Fortunately, painting glass is an easy DIY project. An interesting paint finish can give it a whole new look.
The first step is to clean the glass. Especially when it has been gathering a little bit of dust in a charity shop.
Make sure the glass is completely dry before moving on to the next step so that the primer adheres properly to the surface.
Step 2: Prime the Glass
The most important step in this process is applying the bonding primer or adhesion primer. It has a few names but it’s what will help you paint on top of shiny or slick surfaces.
I’ve painted IKEA laminate dressers, faux leather and an uPVC front door with these primers. It really opens up a whole world of painting when you aren’t restricted by the material.

This bonding primer needs two coats. The second coat can be applied after a couple of hours.
However, you can’t paint on top of Slick Stick for 24 hours. So plan to make sure you have the time to wait. It can be tricky when you just want to get cracking on a project!
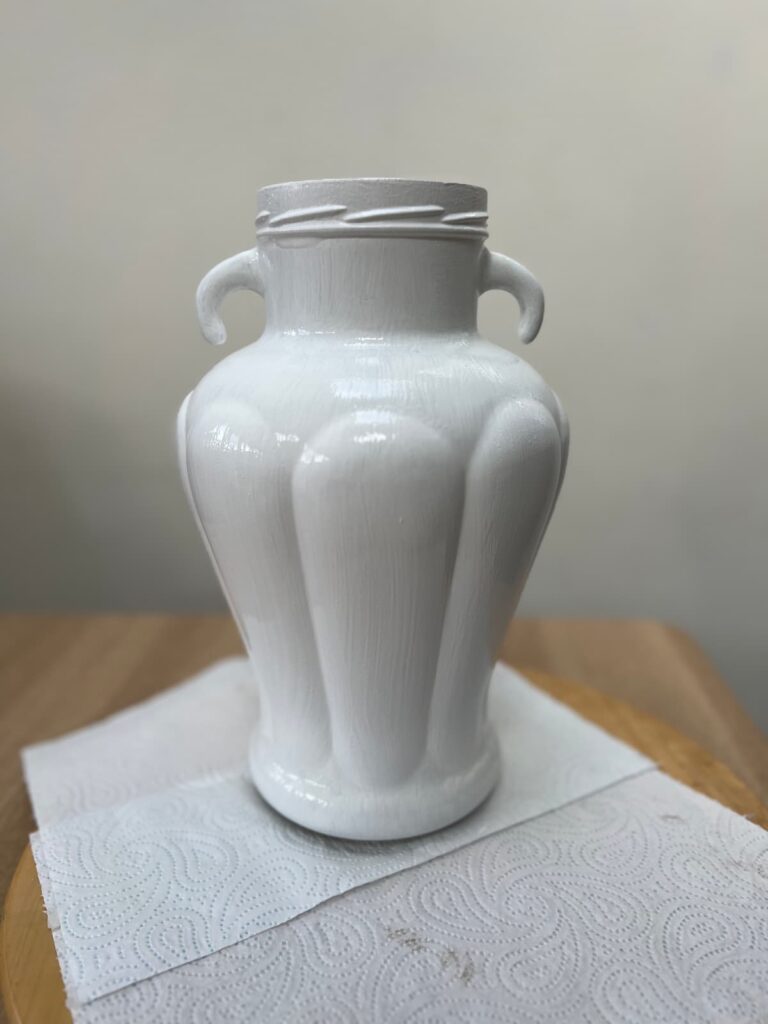
Once it has dried, Slick Stick has a matt finish. You can really see how the paint enhances the curves of the vase which isn’t as obvious when it’s just glass.
Step 3: Hide Glass Features
The main part of the vase that needed concealing were the ridges on the rim. Presumably, this glass vase had had a lid at some point.
As I wanted the painted vase to look more natural and organic, it was important to cover up those ridges.
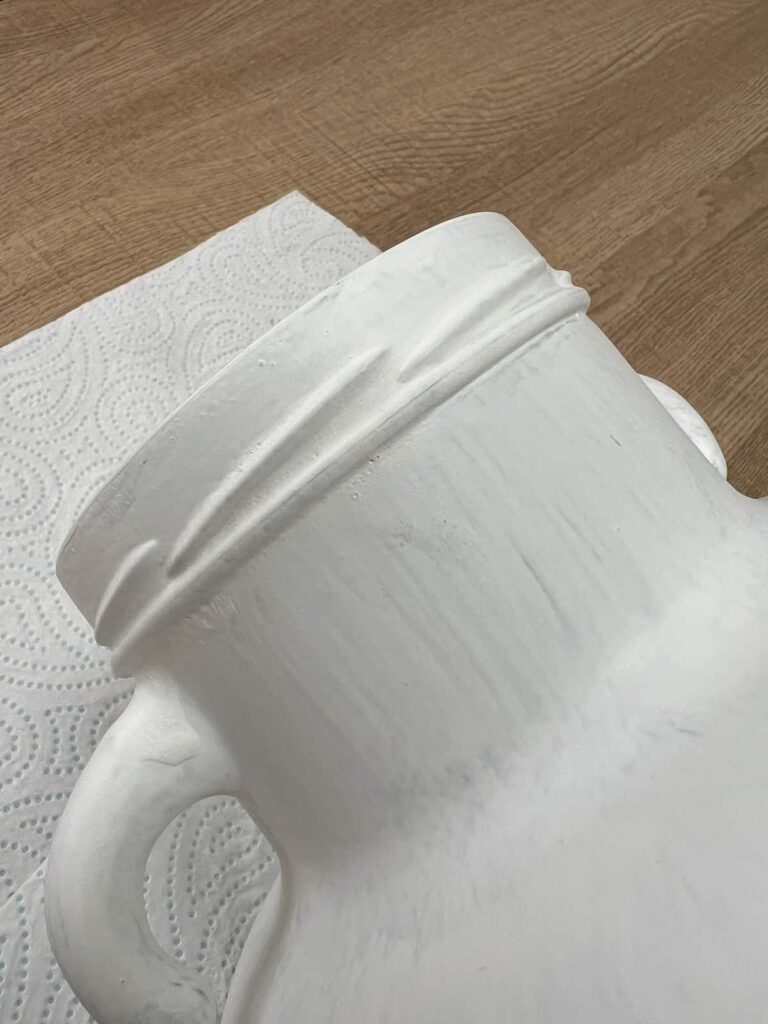
To mask the ridges, you can use a wood filler or putty-like filler to build up around the rim. This hides the factory-made elements of the design and adds texture and interest.
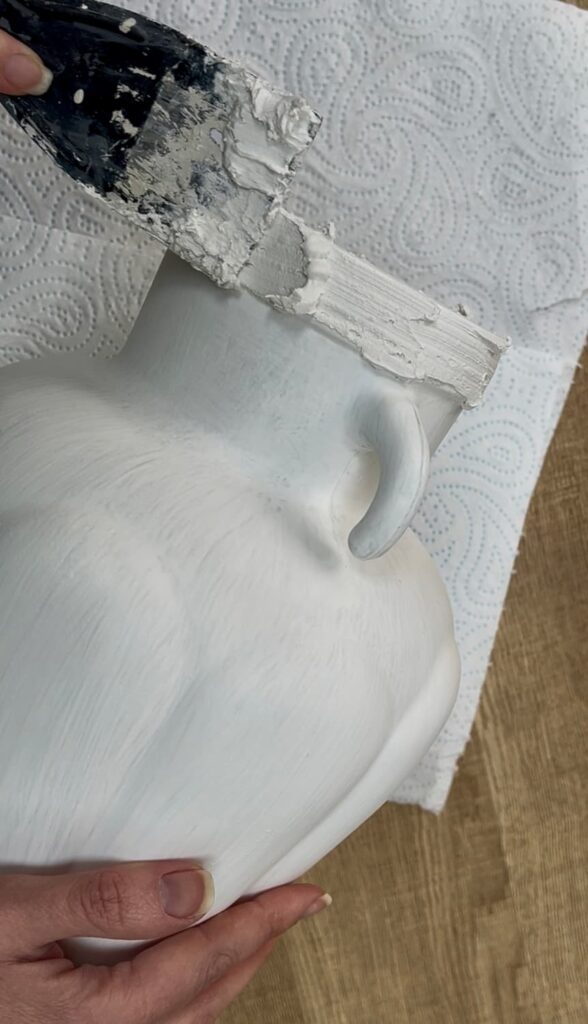
Step 4: Add Texture with Wood Filler
You can add as much or as little wood filler as you like to mask the clean lines. For me, I wanted some texture but not complete coverage.
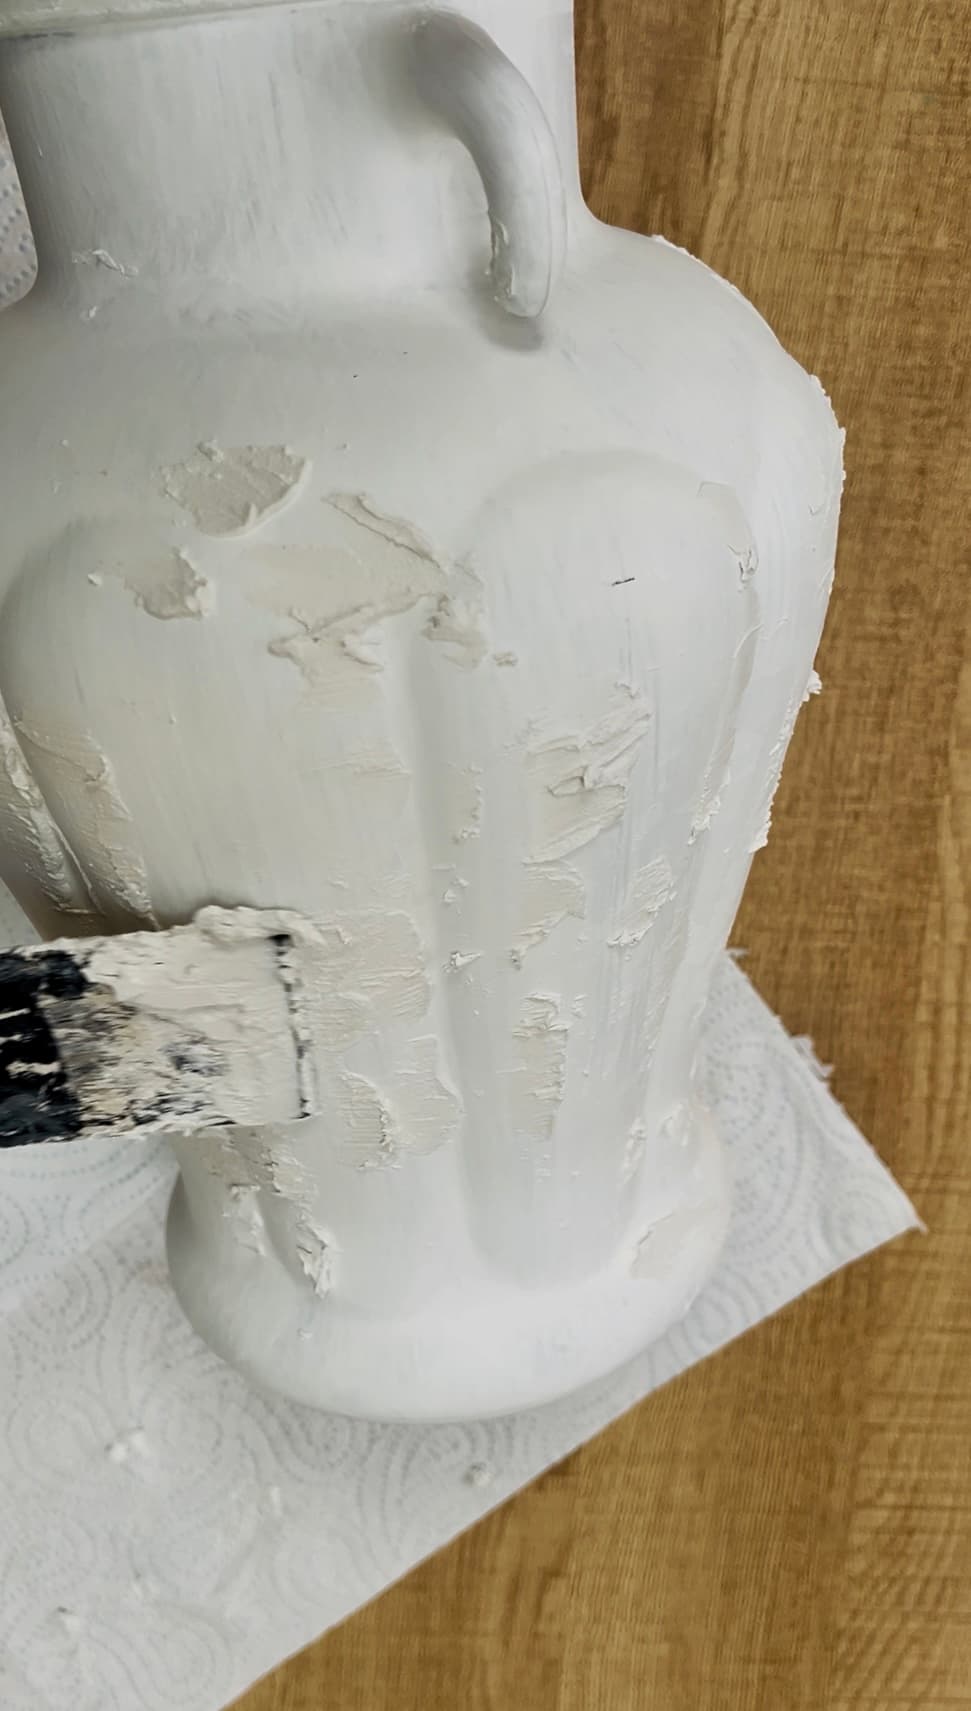
There’s no right or wrong way! It’s better to start with less and add more as you decide how you like the result.
Step 5: Paint Glass for a Natural Look
The fun part about creating this look is the flexibility you have with painting. You can layer different light coats of paint and have a lot of variation in the design.
Many high-end vases have a stoney, natural colour. Layering paint helps to mimic a ceramic or stone-like appearance.

This first coat of paint is a beige called Sawmill Gravy. It’s a natural-looking colour with some warmth. You don’t need perfect coverage. By dabbing the paint into the crevices you build up more variation in the look of the texture.
Step 6: Add More Paint for Dimension
A great way to build dimension within the colours is to use a very different colour, in this case, dark brown. However, it is a paint colour still within the same range of warm tones. So, it looks harmonious.

You can use a rougher paint brush like a chip brush for this style of painting as it doesn’t need a smooth finish.
Step 7: Remove Excess Paint
As chalk paint is a flexible paint to play around with, adding a little water is a fun tool to use with it.
You can spray the paint before it fully dries to make it runny. Then by using a paper towel, you can dab away the excess paint to make it more translucent.
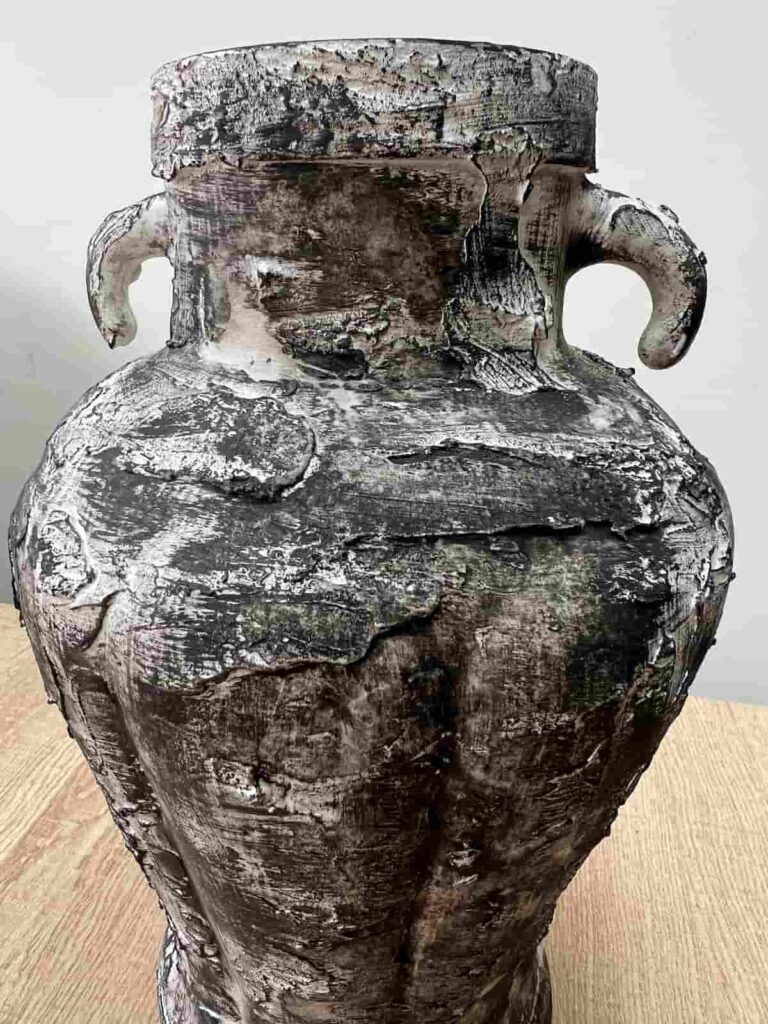
Building the layers, both with the texture and the colours, is fun. It’s a very flexible kind of paint and process, so you can keep changing the look until you’re happy.
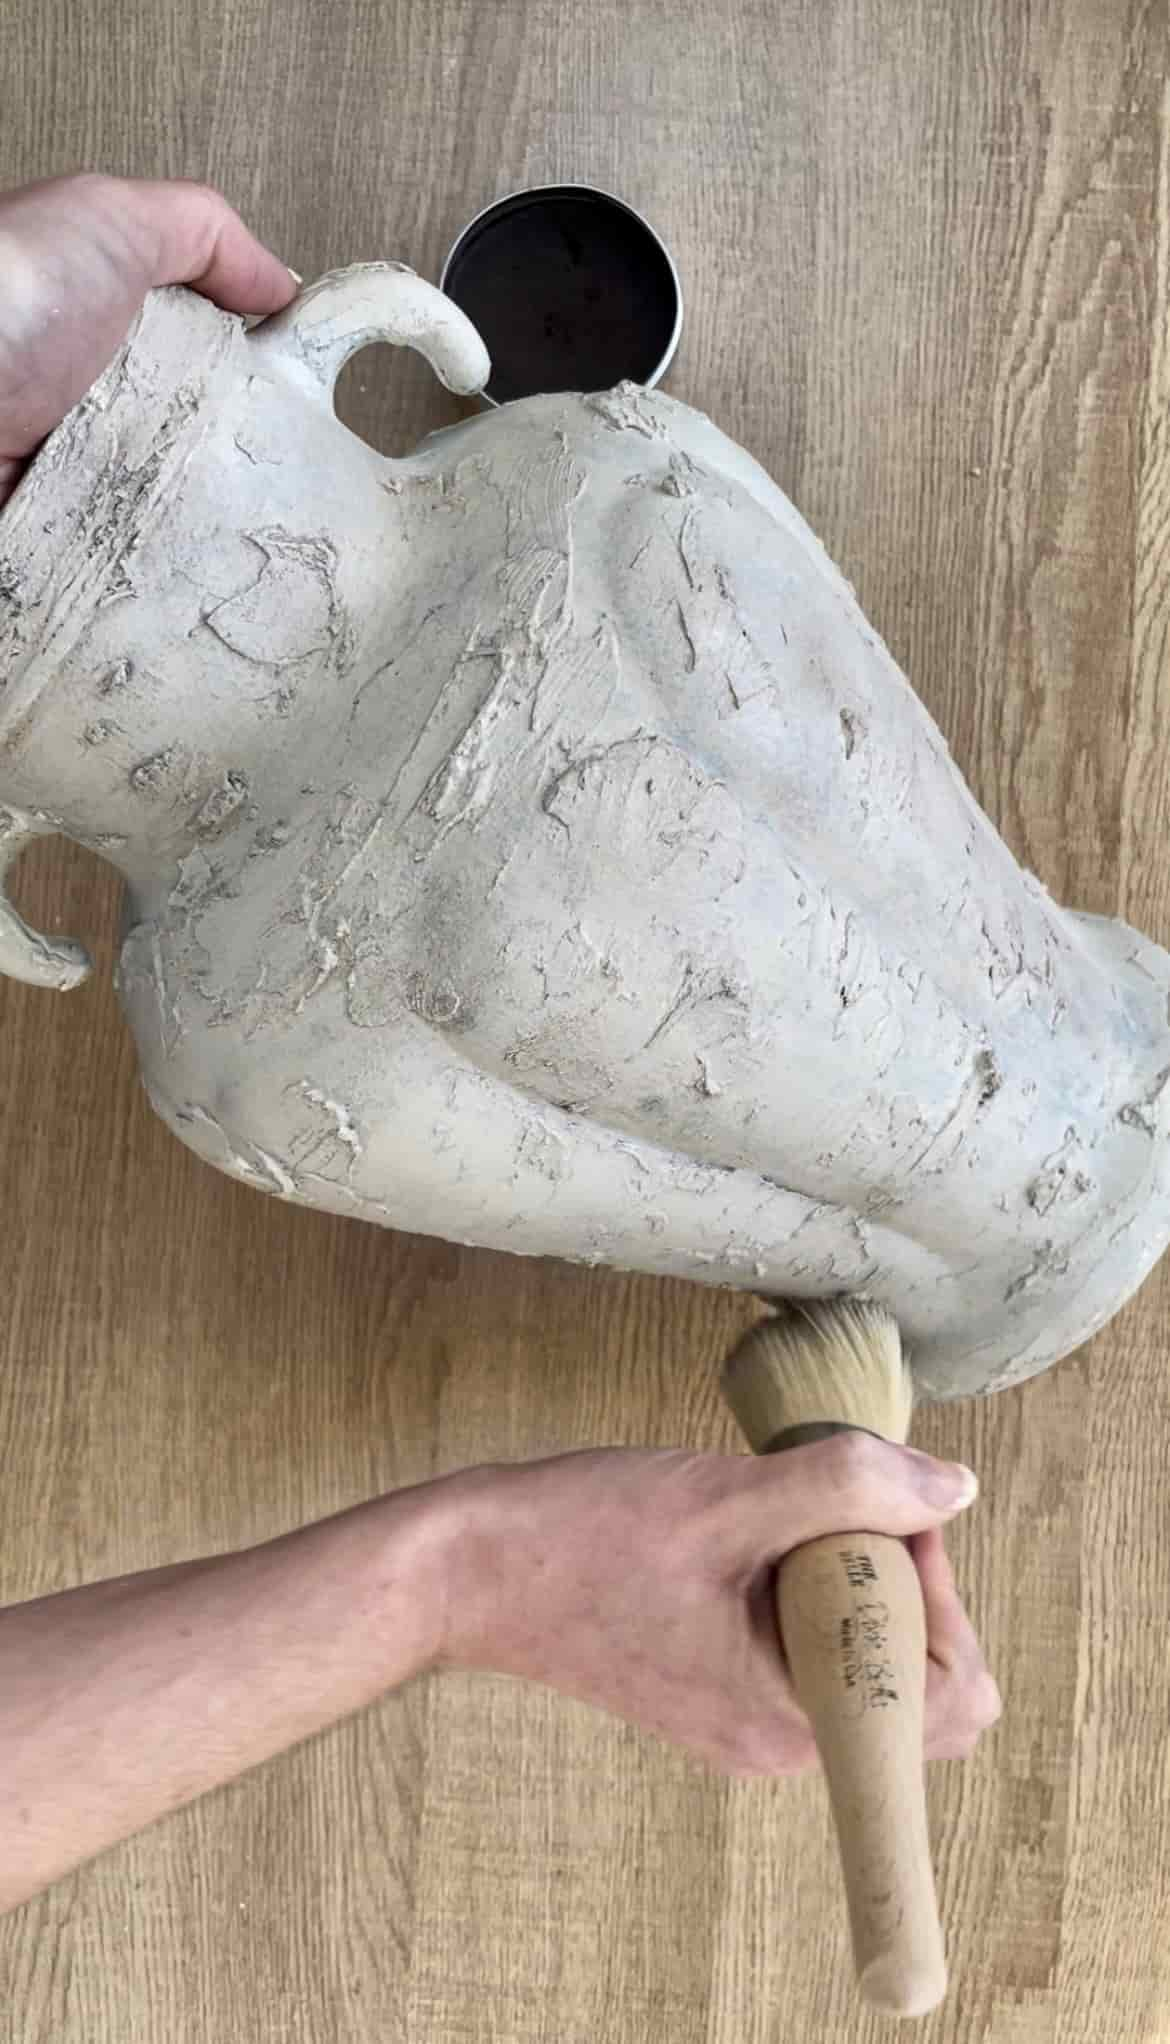
Step 8: Top Coat for Final Vase Colour
The final coat of paint is another layer of cream. This time, a slightly warm white-cream colour called Drop Cloth.
The top coat of paint is what you want the main colour of the glass vase to be. For me, this is a neutral colour that will suit most colour schemes.
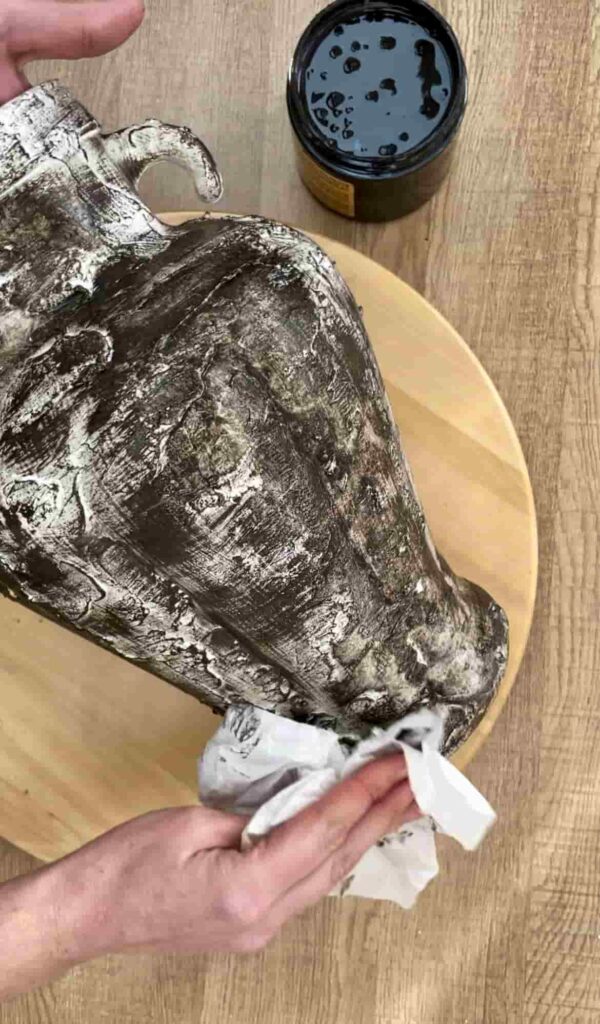
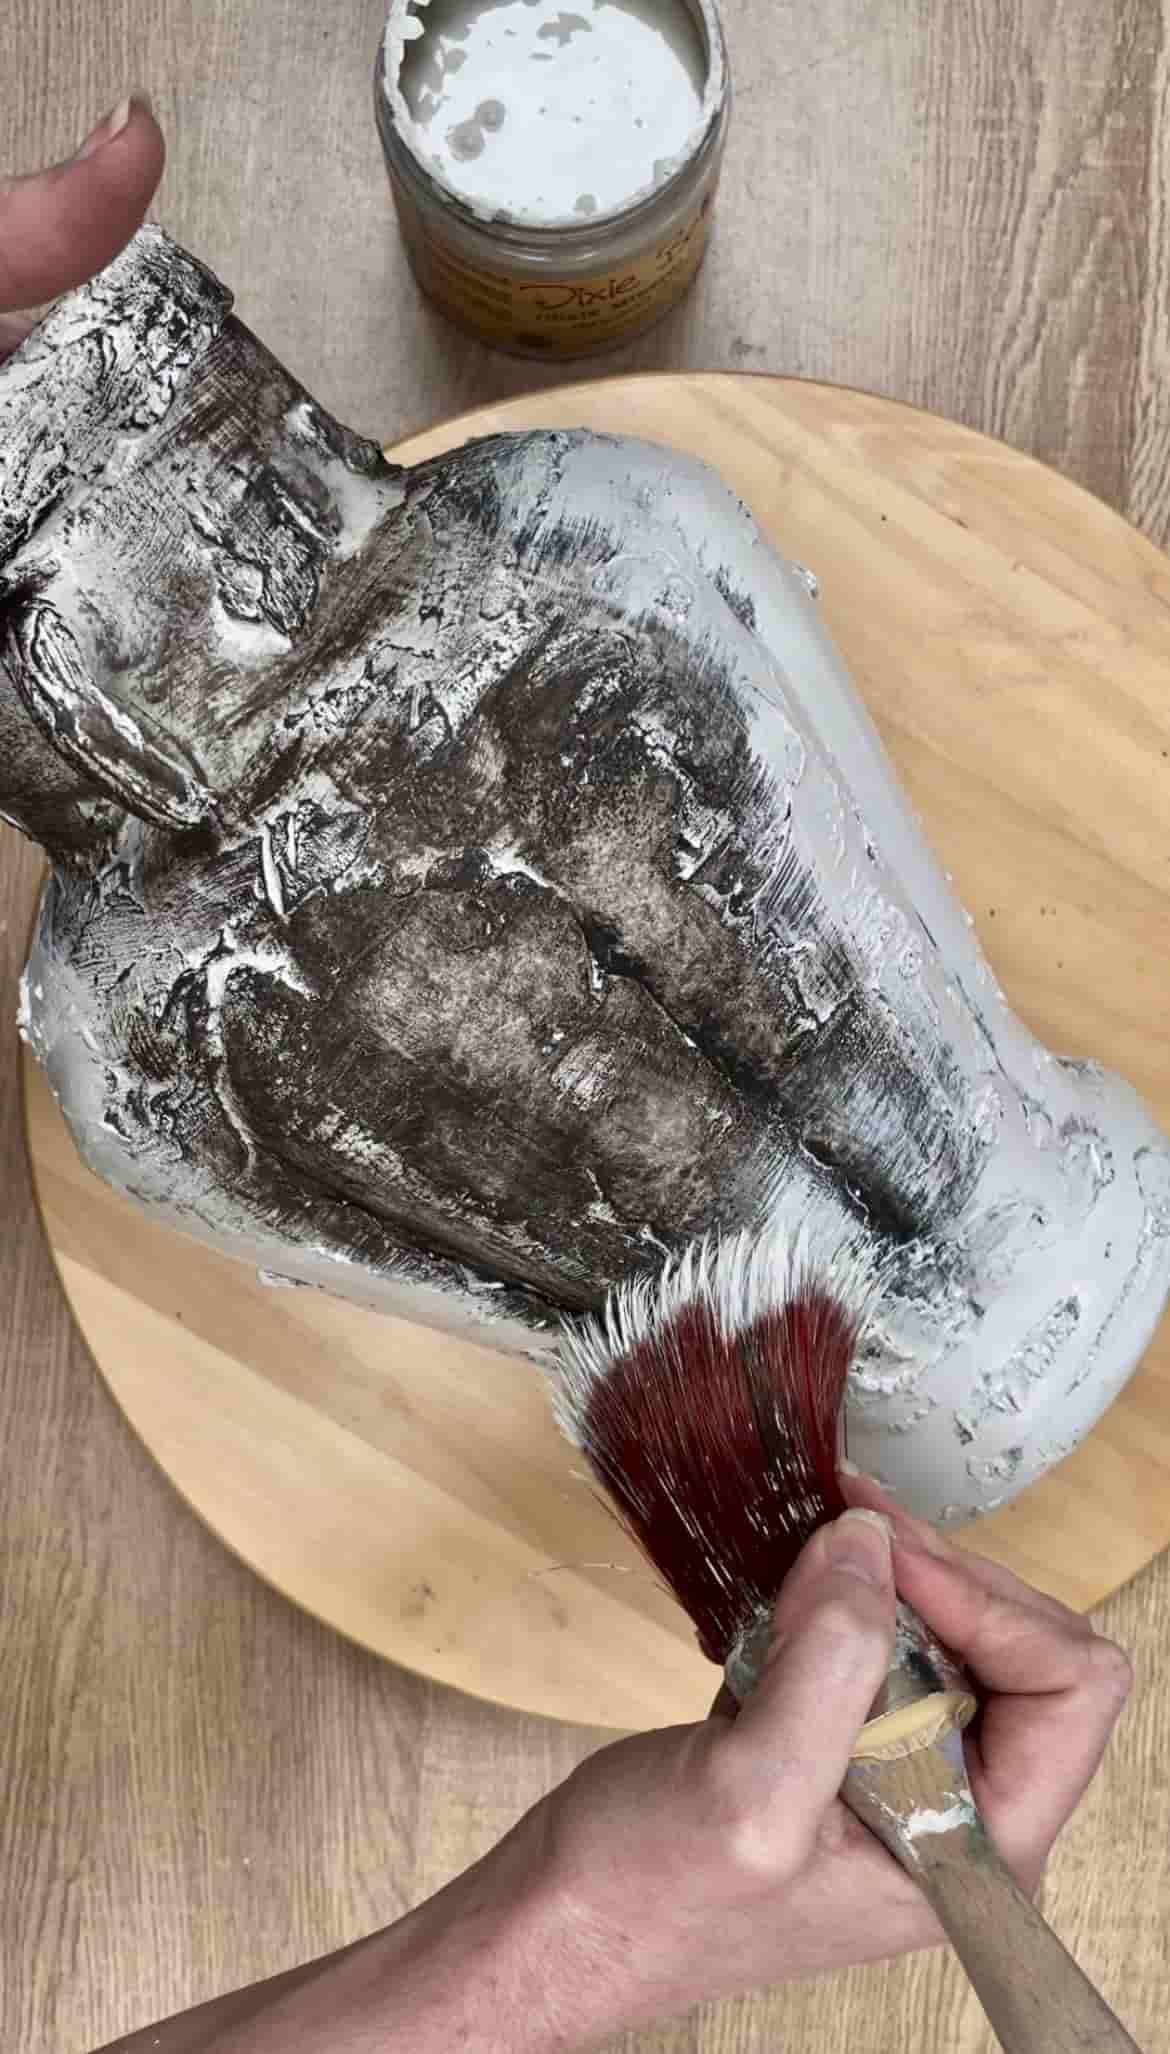
Step 9: Seal the Painted Vase with Wax
It’s not necessary to seal chalk paint. Especially when it’s on home decor that won’t get a lot of use like a vase.
Wax is a great option as it can both seal the paint and enhance the details.
The trick to using a coloured wax is not to use it as the first coat of wax.
The best way is to first do a coat of clear wax. This acts as a barrier between the paint and the coloured wax. Then if you go too heavy with the coloured wax, you can easily remove it again with more clear wax.
This vase was sealed with clear wax and then brown wax. The brown picks up on the texture and settles into the details.
Paint a Glass Vase to Look Textured
This is such a fun project to do. You can see how easily you can take an ordinary glass vase and make it into an interesting decorative piece.
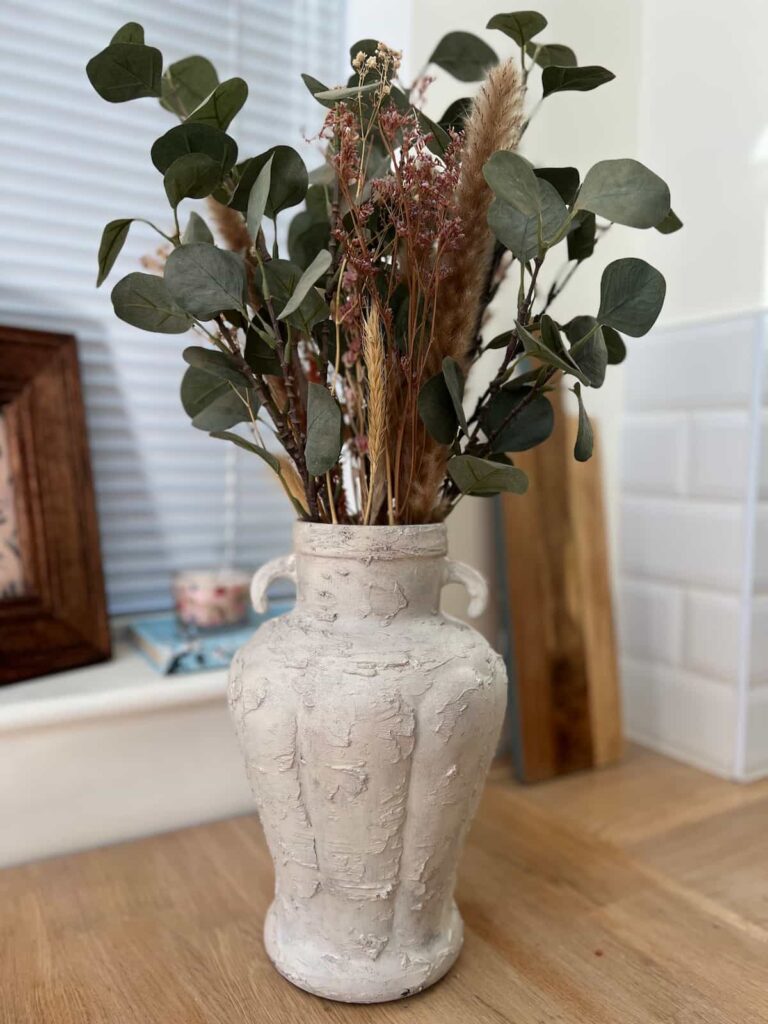
This DIY is a perfect way to give new life to old vases, adding a handmade, designer-quality touch to your home.
The best part? You can customise the texture, colour, and finish to match your style. Whatever your idea of a beautiful vase is, you can create it with this glass painting technique.
And if you want to test out the look on a small project? I’m sure many of us have mason jars at home. A smaller surface is an easy way to dip your toe in and see if you enjoy the process and like the result.
If you loved this project, you’ll love these projects too:
fix scratches on wood
diy mercury glass vase
Painted Faux Leather mirror
Pin it for later – Paint a Glass Vase

Hi there! I'm Rachel Bowyer, a passionate DIY enthusiast with a knack for transforming the old into something beautifully new. With a deep love for furniture painting, refinishing, and the art of crafting. I've been documenting my DIY projects and restoration journey since 2018. I specialise in techniques like decoupage, stencilling, and decor transfers. Join me as we explore the world of creativity and home improvement, one project at a time.