Painted Pinecone Wreath for Simple Autumn Decor
You won’t believe how easy it is to craft this beautiful, painted pinecone wreath this autumn. It’s a budget-friendly, beginner craft that will make your front door look adorable.
This entire wreath is made with foraged pinecones, a reused grapevine wreath, paint and glue. And if you have most of those supplies in your craft stash, it’s almost free to make.

This beautiful wreath has pride of place on my front door to welcome in the autumn season. If you want to make a lovely wreath like this, there are a few easy steps to follow.
Would you rather opt for video tutorials instead of step-by-step instructions? We’ve got you covered with a comprehensive video tutorial that guides you through the process of creating a pinecone wreath.

Check the end of the post for lots more Autumnal and Fall-themed inspiration from my blogging friends.
How to Make a Painted Pinecone Wreath Step by Step
Materials Needed
Step by Step Instructions
Step 1: Supplies to Make a Painted Pinecone Wreath
This wreath is practically free. The grapevine wreath was on sale for £1.50 and I’ve used it multiple times. The cost per use keeps getting lower and lower!
Also, the paint, glue gun and snips were already in my craft stash.

You can use a wire wreath form for pine cone wreaths. By wedging the pinecones between the wires, you can even avoid using glue. But as this grapevine wreath gives the perfect autumnal feel, we can reuse it.
The only thing I needed to get were the actual pinecones. And they were free by going for a quick walk.
So, while I’ve bought these supplies over time, I didn’t have to buy anything new to make this autumn wreath. And if you have a wreath base, you can do it on a very small budget too.
Step 2: Gather Pinecones
The first step in this DIY project is to collect your pinecones. Using items that you find in nature is a great way to save money. And natural decorations give that extra cosy feel.
Gather the pinecones from nearby open spaces. If you don’t have easy access to some, you can buy bags of them online. The advantage is that they should be cleaned and ready to use indoors.
The best pinecones are the fuller, rounder ones. The thin, tight pinecones don’t give that floral shape when trimmed down.
If you collect them on a dry day then the pinecones will be open. On a wet day, they will be closed up and tight and you’ll want to wait for them to dry out before starting.
Aim for a variety of sizes, including some small pine cones to fill in gaps. You’ll mostly want medium pinecones and a few large ones for impact.
Step 3: Prepare the Pinecones
To create those lovely pinecone flowers, use floral snips to cut off about two-thirds of the tips of the pinecones. This will leave you with the bottom part that resembles a flower.
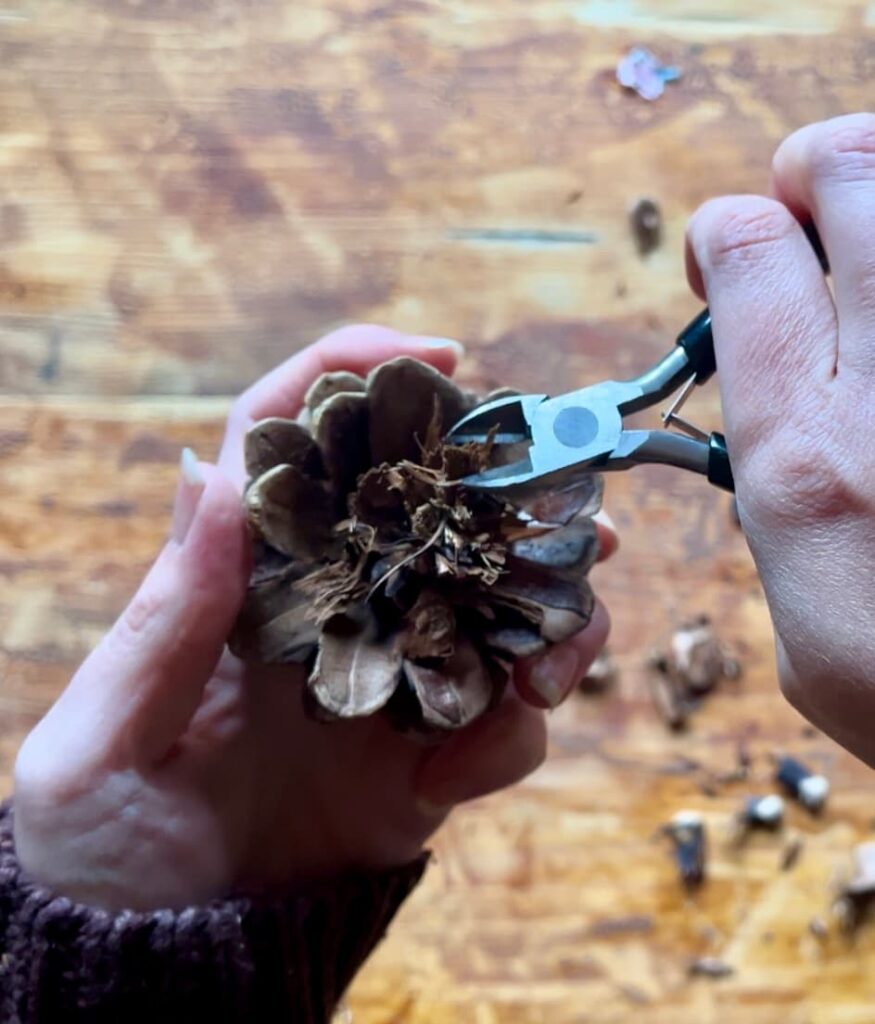
The shape of the pinecone will naturally create layers, giving your wreath a beautiful, dimensional look.
The more pinecone petals you leave in place, the thicker the wreath will be. It will also be heavier and need more hot glue to attach securely.
If you struggle to cut the stem with snips like this, you can get something more heavy-duty like garden shears to cut that off.
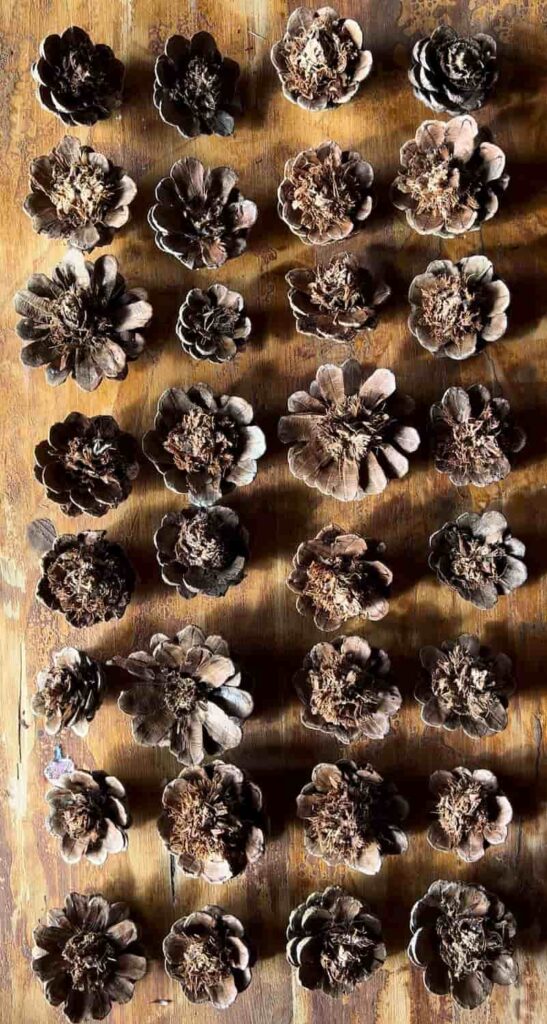
These pinecones are all trimmed down. The variety of pinecones in their shape and size gives it such an interesting look.
Note: if you plan to use your wreath indoors then you should clean the pinecones first. You can do this by warming them in an oven on parchment paper to help remove any unwanted creatures. If this is a wreath for a front door or outside, you don’t have to do this step.
Step 4: Paint Your Pinecones
If you love autumnal colours as much as I do, painting your pinecones is a must. Or at least, painting some of them.
Use a small brush to paint the scales. You can either paint all the visible scales or just the top layer.
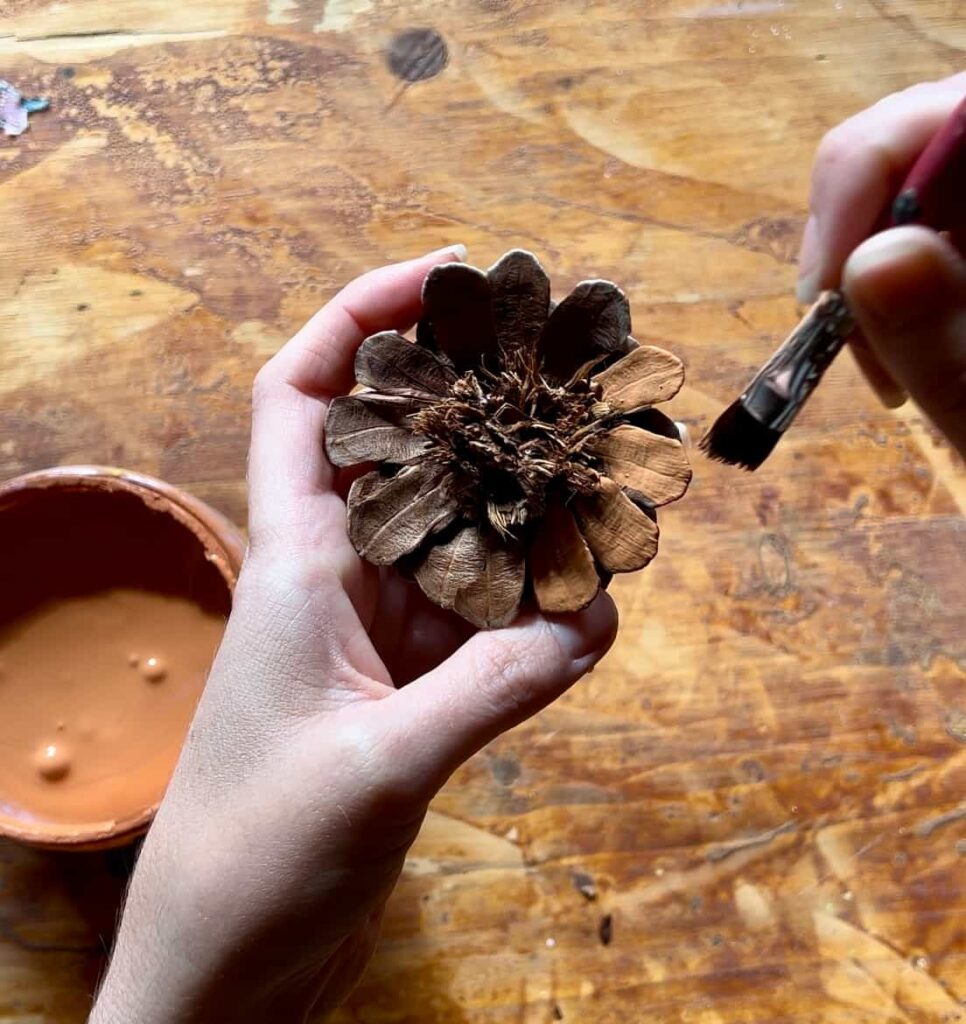
One coat of each colour creates quite a muted, earthy feel.
To build up the layers of interest, you can use different autumnal colours. For this, I used two reds, a dull yellow, and an orange. I also left some unpainted to add the colour of natural pine cones too.

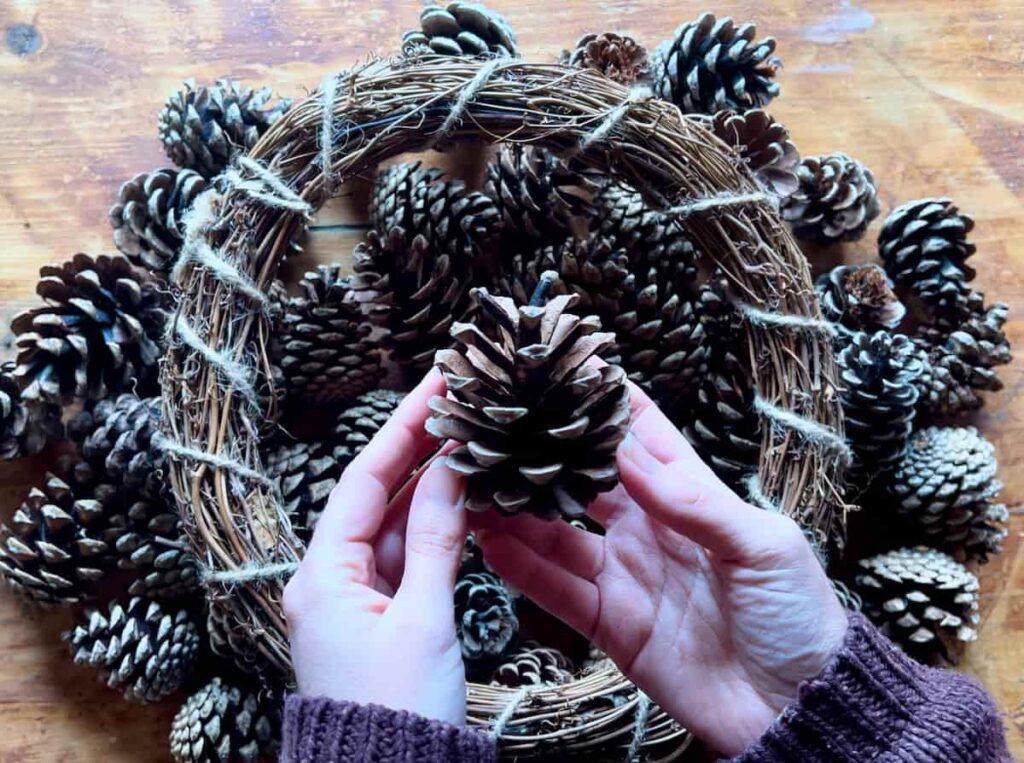
Step 5: Check the Layout and Quantity of Pinecones
Naturally, you want to test the layout of your design before attaching the pinecones. This checks that you have enough pinecones to cover the whole thing, and if you like the layout.
For example, you could spread out the large pinecones to create balance. Or put them all at the bottom and the smaller ones at the top.

So that the pinecones fit well, it’s a good idea to start in one place and go around in a circle. This way you don’t end up with awkward gaps to fill in if you start with the largest pinecones first.
Step 6: Attach Pinecones to the Wreath
After your painted pinecones are dry, the next step is to assemble your wreath. Start by applying a little bit of hot glue to the bottom of each pinecone. If you don’t have a hot glue gun, super glue works too.
Make sure to pay attention to the angle you place the pinecone. You may need to glue the side rather than the bottom.

For a more natural look, space the pinecones apart, and remember to place some smaller cones among the larger ones for variation.
Where there are gaps, you can use parts of pinecones. For example, the leftover tip of a pinecone. Or if your pinecone breaks while trimming it down. These extra pieces make for great fillers around the inner ring.
Maker’s tip: While filling the wreath, it’s helpful to step back and check the balance of it. This can be tricky to see when you are close to the wreath. If you see any gaps, you can fill them in with extra pinecones. I also added more paint where too many natural pinecones were next to each other.
You can also add natural elements like pine needles, greenery or twigs for added texture at no extra cost.
Beautiful Painted Pinecone Wreath for Autumn Decor
The best part about this project is that it’s both cost-effective and very satisfying.
You’ve taken nature and turned it into something that adds warmth and personality to your home.
A DIY pinecone wreath is not only a lovely decoration but also a conversation starter for visitors.

Remember, just as this wreath base has been used before, you can use it again, which makes this an even more budget-friendly craft.
By following this easy tutorial, you’ll have a beautiful pinecone wreath that brings nature right to your front door.
If you like this idea, it would also work great for a winter wreath. Simply use white paint or some glitter to make a new wreath with a festive touch.
How to Make a Painted Pinecone Wreath Instruction Video
You can find more video tutorials on our Youtube Channel
If you loved this project, you’ll love these projects too:

foraged autumn wreath
autumnal decoupage

Candy Cane Wreath
Did you make this beautiful diy pinecone wreath?
I love seeing what you do. Please mention @teaandforgetmenots and share your creations with me!
Pin it for Later – Painted Pinecone Wreath for Autumn Decor

More Autumn Inspiration
And do check out my blogging friends’ creations as part of this autumn blog hop:

Hi there! I'm Rachel Bowyer, a passionate DIY enthusiast with a knack for transforming the old into something beautifully new. With a deep love for furniture painting, refinishing, and the art of crafting. I've been documenting my DIY projects and restoration journey since 2018. I specialise in techniques like decoupage, stencilling, and decor transfers. Join me as we explore the world of creativity and home improvement, one project at a time.
This is lovely, the colors add a pretty pop to a traditional pinecone wreath, like the ones I used to make with my mom when I was little. So many great memories just flooded back into my head. Thanks so much…and now I may need to get outside and start collecting!
Aww love that it’s nostalgic too, that makes it even better. Thanks, Kim.
Such a pretty wreath, Rachel, and I love the colors you chose for the paint.
Thanks so much, Ann.
Hi Rachel! Your pinecone flower wreath is so pretty! The colors you chose are perfect for fall and look lovely with your front door! I’m pinning this now because I have tubs of foraged pinecones in my garage! Thanks for the inspiration!
Thanks, Donna. It’s quite nice getting through the craft stash!
This is stunning Rachel! It’s so beautiful, I would still keep it up through the winter! I wish I could find pinecones like that around here; I’d do this your project in a minute!
Thanks Sara. It’s definitely one to keep for next year.
I love these colors. It turned out to be a beautiful wreath. I have so many pinecones in my year- I need to get busy!
Haha there’s always another cute project on the list, isn’t there?
This is such a cute idea! I have so many pinecones in my yard (I usually make scented pinecone decor with them) that I could use to make one of these wreaths today!! …and lots of Dixie Belle paint I could use! Thanks for the inspiration!!
That would be really fun, such a quick and pretty project.
This is just stunning! I am going to have to be on the lookout for pinecones now! It’s just gorgeous.
Thanks Carol. You’ll have to make a spring one!
Rachel, this project has been on my list for a while. I really love the colors you selected. What a great combination. Pinned!
Thanks so much, Sue. It was on my to-do list for a year at least!
I love your painted pinecone wreath for fall, Rachel! The step-by-step instructions are so helpful, and the autumn colors you chose for the pinecones are just perfect. Such a charming decoration for the season! I may just have to create one of mine own since I have quite the pinecone collection, lol! Thanks for the inspiration!
Thanks Kristy. It seems we all have pinecone stashes in our supplies!
I love this since you don’t have to have perfectly shaped pinecones. And painting can fit into ay decor.
Absolutely, it’s a very flexible idea.
Rachel, great tutorial! And beautiful wreath.
Thank you, Linda.