Pretty Paper Easter Egg Craft with Free Template
Easter is the perfect time to get creative with DIY crafts. This paper Easter egg craft is easy to make and can be reused year after year.
Whether you’re decorating a tree, filling an Easter basket, or looking for a fun activity, this is an easy Easter craft.
You only need paper, glue and scissors (although I’ll also share my time-saving method!).
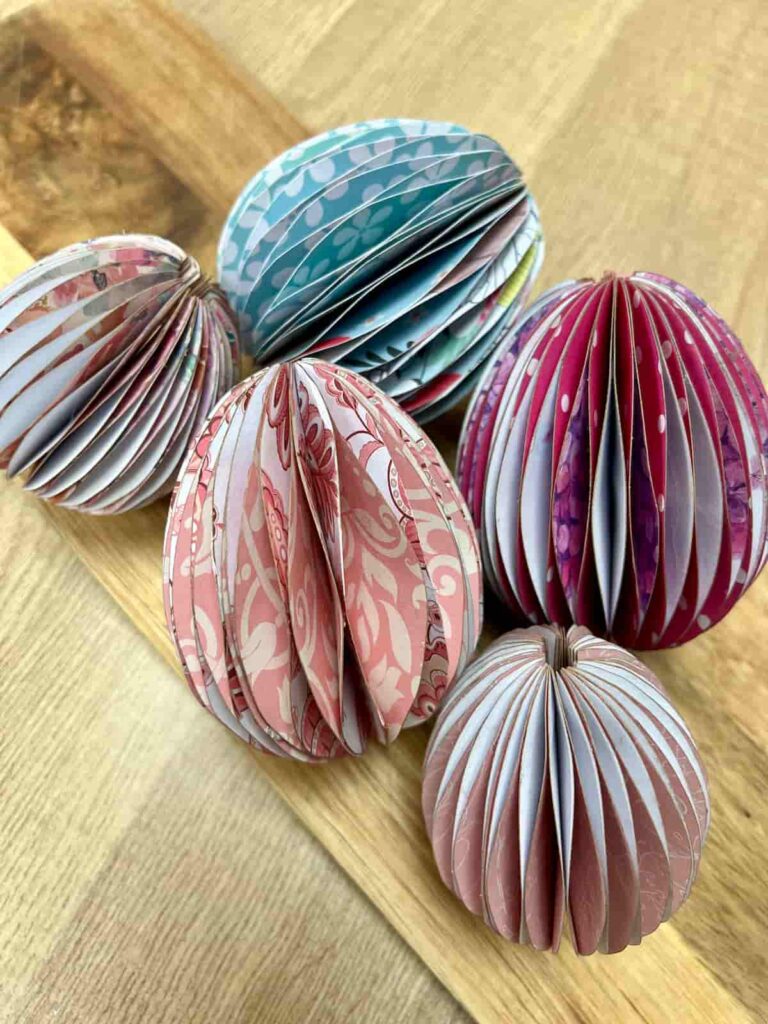
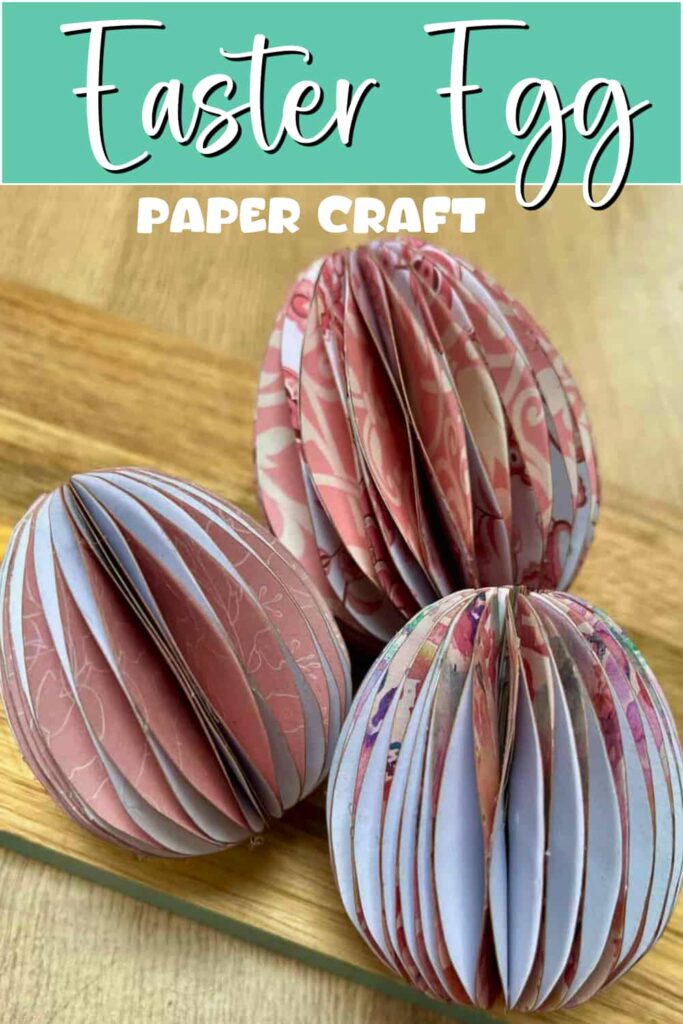
I’ll share how to cut and assemble a 3D paper Easter egg. With Easter-themed cardstock or scrapbook paper, you can create colourful and fun Easter egg decorations.
If you’ve come from Patina and Paint, we’re glad to have you here! Weren’t her flocked bunnies lovely? At the end of this post, we’ll guide you to the next stop on this journey. Make sure to explore all the other stops for a wealth of creative inspiration. Don’t forget to revisit us throughout the week to visit them all!
How to Make Paper Easter Egg Craft Step-by-Step
This post includes affiliate links so you can easily find the products I use myself and recommend to friends. If you purchase these products, I may earn a small commission at no extra cost to you.
Supplies to Make Paper Easter Eggs
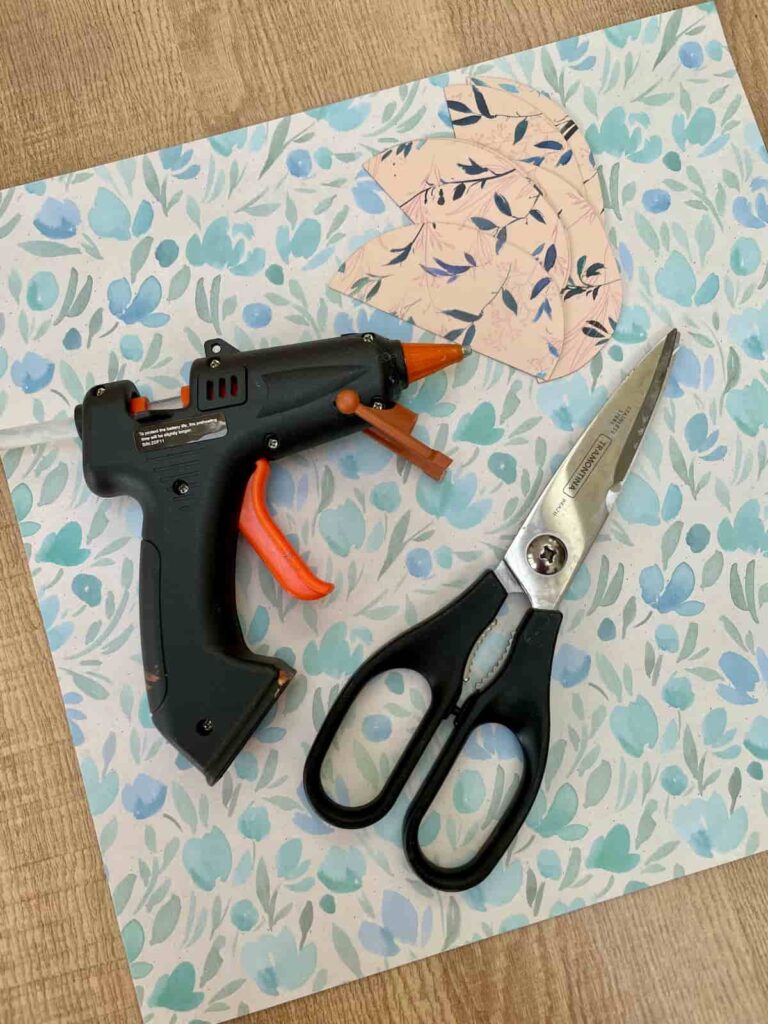
Since this craft involves using a hot glue gun, it may not be suitable for younger children. Also, thin paper like tissue paper may be difficult to use with hot glue, as it can become too hot to handle comfortably.
Step 1: Cut Out Your Paper Egg Shapes
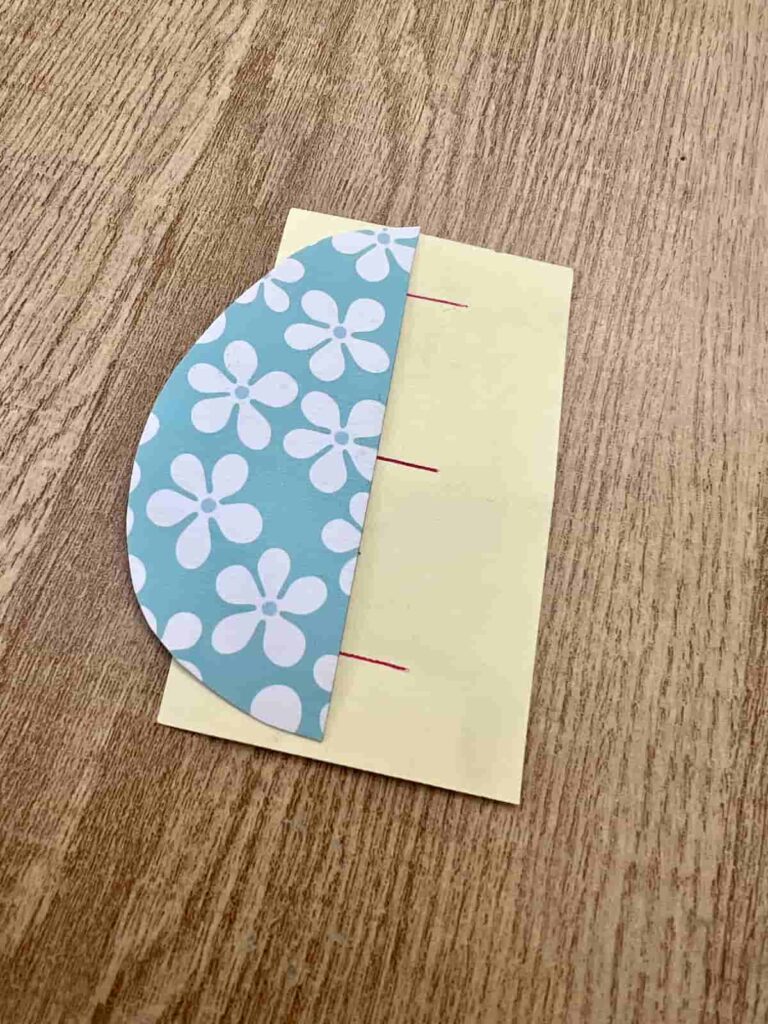
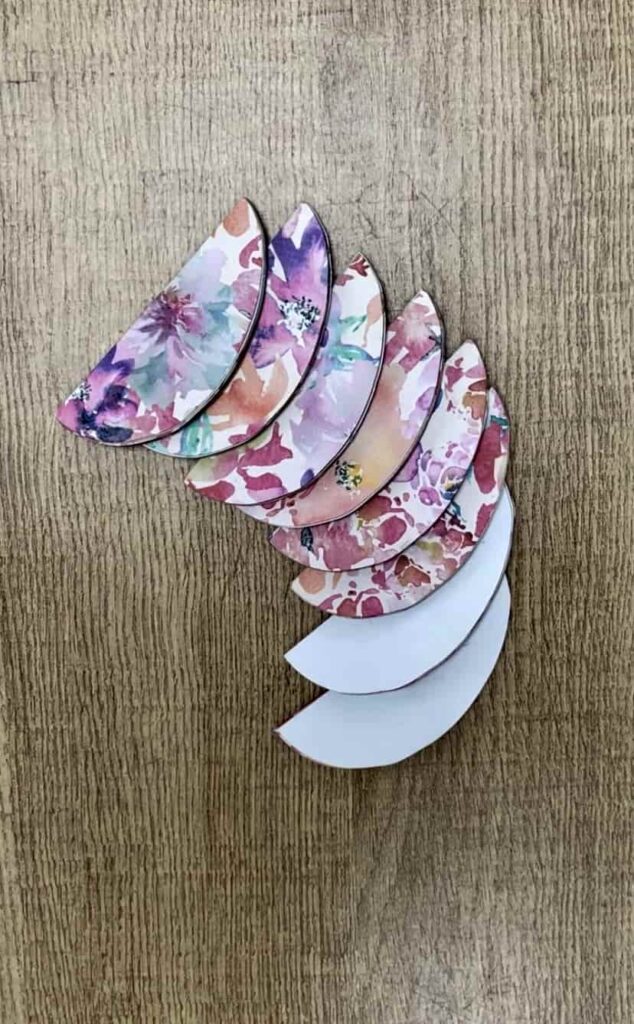
The first step in this Easter egg craft is to cut out many identical shapes. You only need half of the egg shape, not the full shape.
Getting the egg shape just right can be tricky, so I’ve included a free template you can download to make this step easier.
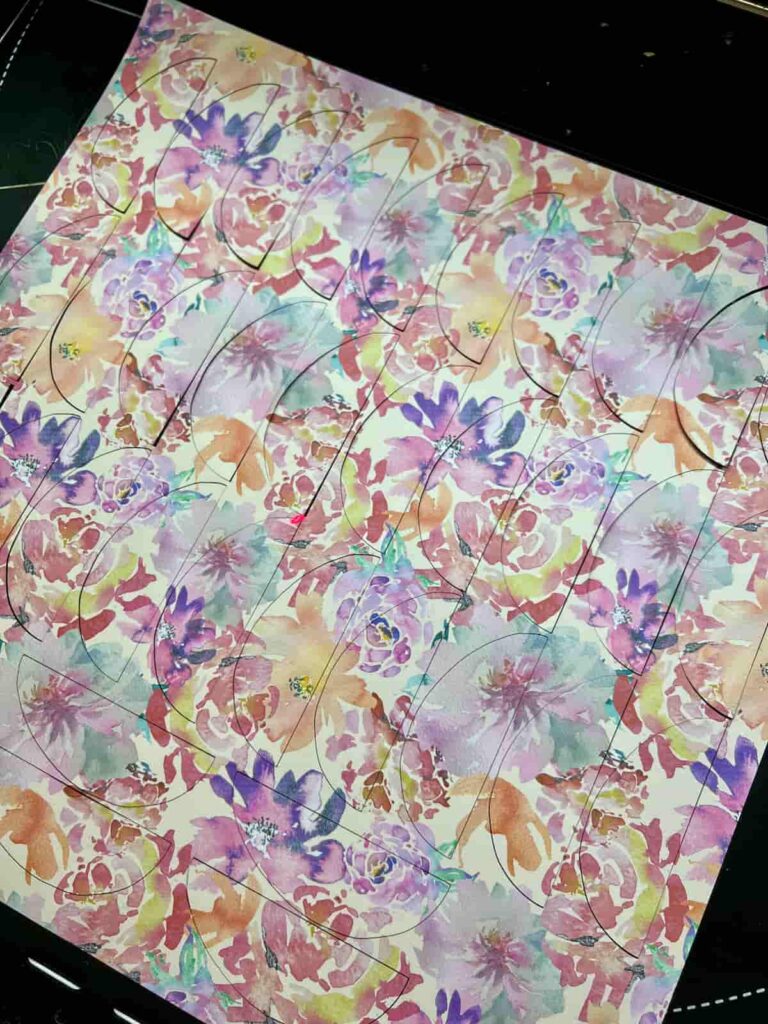
Laser Cutting Method (A Time-Saver)
If you have a laser cutter or Cricut, this is a big time saver for getting the egg shapes cut out. Each complete egg needs around 60 shapes!
Fill up as much of your card as the size of your egg shapes will allow. This might even mean placing some in a different direction.
Of course, not everyone has access to a machine to cut out these shapes. However, if you do have one, the time-saving and getting identical shapes is a big advantage.
Hand-Cutting Method
It will be easiest to print out a free printable template of an egg shape. The size of the egg doesn’t matter, but making a variety of different sizes makes the display more interesting.
Then trace the template onto your chosen paper, such as construction paper or cardstock.
Carefully cut out your egg shapes using scissors. Keep each hand-cut shape as similar as possible for the egg to turn out well.
Step 2: Choose a Paper Egg Design
Whether you have double or single-sided paper will make a difference to the final design.
- Double-sided paper with the same colour on both sides will look the most consistent.
- Double-sided paper with different designs on each side will create a busier look. For this style, it’s important to place the paper in the same place so the design remains cohesive.
- Single-sided paper with a white back can create a pretty contrast by breaking up the pattern. To achieve this effect, alternate between the patterned side and the white side when assembling your egg.
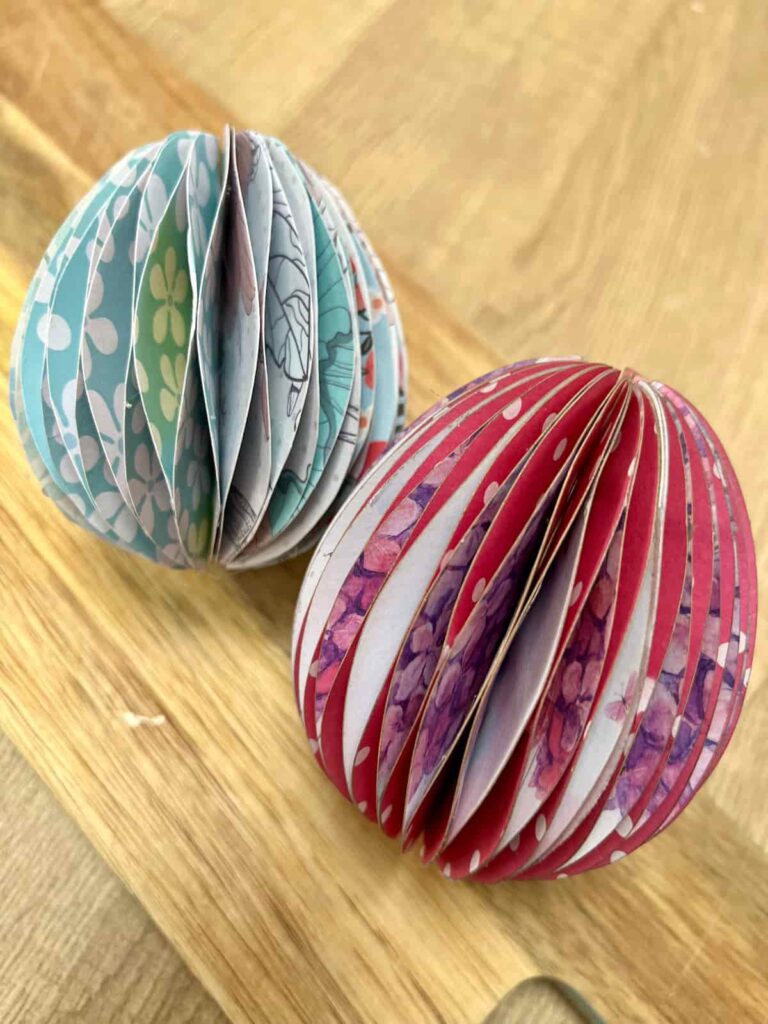
You’ll notice that a pattern runs through the middle of the egg. Decide which paper design you want in this section—this will be the piece where you apply two lines of glue.
In this example, the egg on the left has white in the middle of the design. So, the white card needs two lines of glue at the top and bottom.
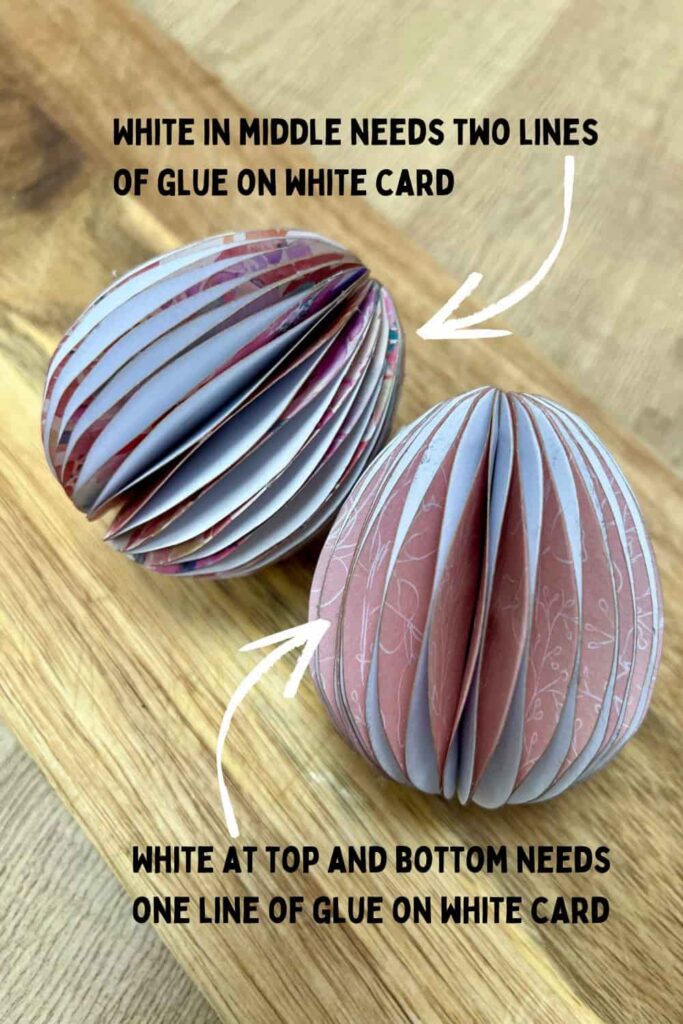
The egg on the right has the white card visible at the top and bottom of the egg. So, those pieces of white card would have one line of glue in the middle of the shape.
You don’t need specific Easter-themed paper to make this craft. I used a mix of pastel-coloured paper and more ornate designs from craft paper in my collection.
If you need to stock up, though, I recommend some pastel, Easter-themed paper. If you prefer a vintage look, these Easter designs would create a really interesting effect.
To create the 3D paper egg, follow these steps:
Step 3: Glue Paper Pieces to Form Egg Shape
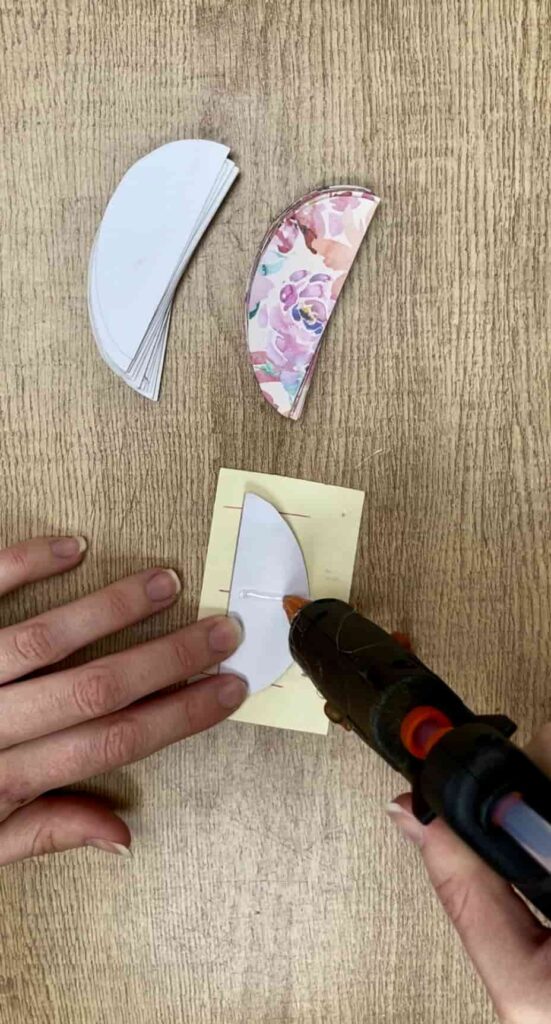
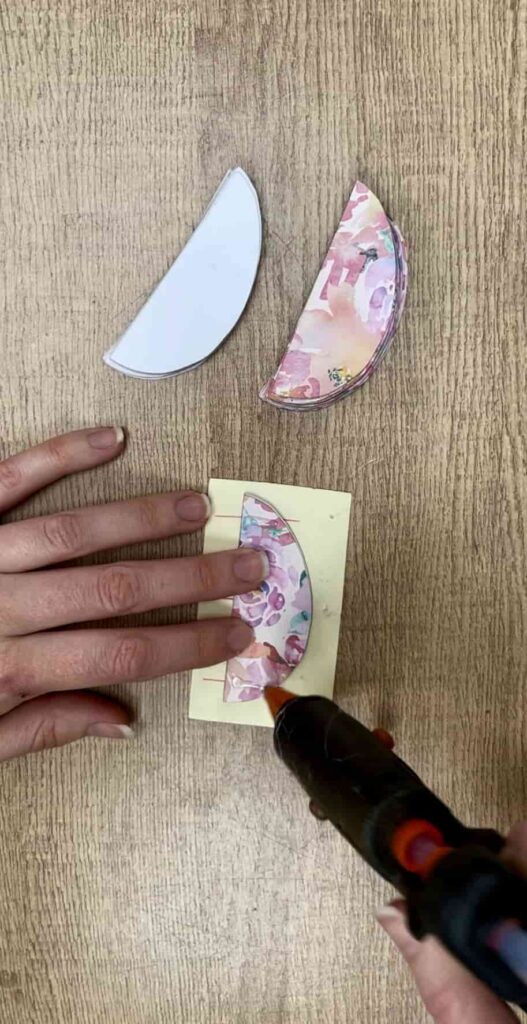
One of the best tips is to create a guide for where to add the lines of glue. By following this paper guide, the glue stays in the same place for each application.
If the glue is not applied consistently, the overall pattern of the egg may look wonky.
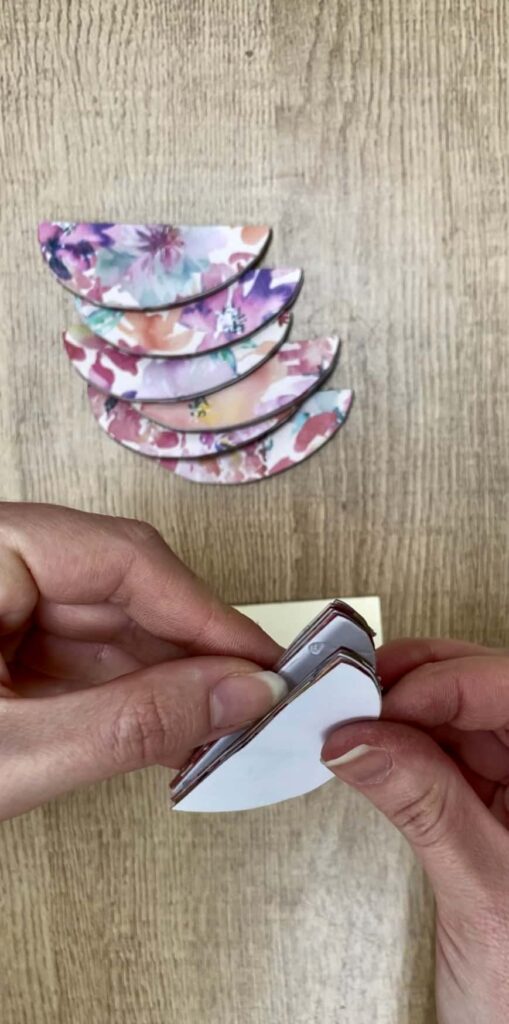
Create two piles of egg shapes. One with the design facing up and one turned upside down so that the white side is visible. You are going to alternate between each pile of paper.
On alternate pieces of the egg, apply a single line of glue in the middle.
With this two-tone design, you can have the white either in the middle or on the top and bottom. If you want the white to be in the middle, the white pieces of paper need two lines of glue on them.
If you want the white to be on the top and bottom, glue the white side with one line of glue in the middle.
On the next egg shape, apply two lines of glue near the top and bottom.
Step 4: Create Stacks of Egg Shapes
Instead of adding each layer one at a time, it’s best to stack about 10 pieces of paper together and then start a new stack. This avoids misalignment, as stacking too many layers at once can cause the egg shape to shift slightly.
By creating a few stacks first and then glueing those stacks together, you maintain a more consistent overall shape and avoid the pieces wandering off too far in any direction.
Continue glueing the pieces together in this alternating pattern until you’ve assembled all the pieces, leaving one last edge open for the final step.
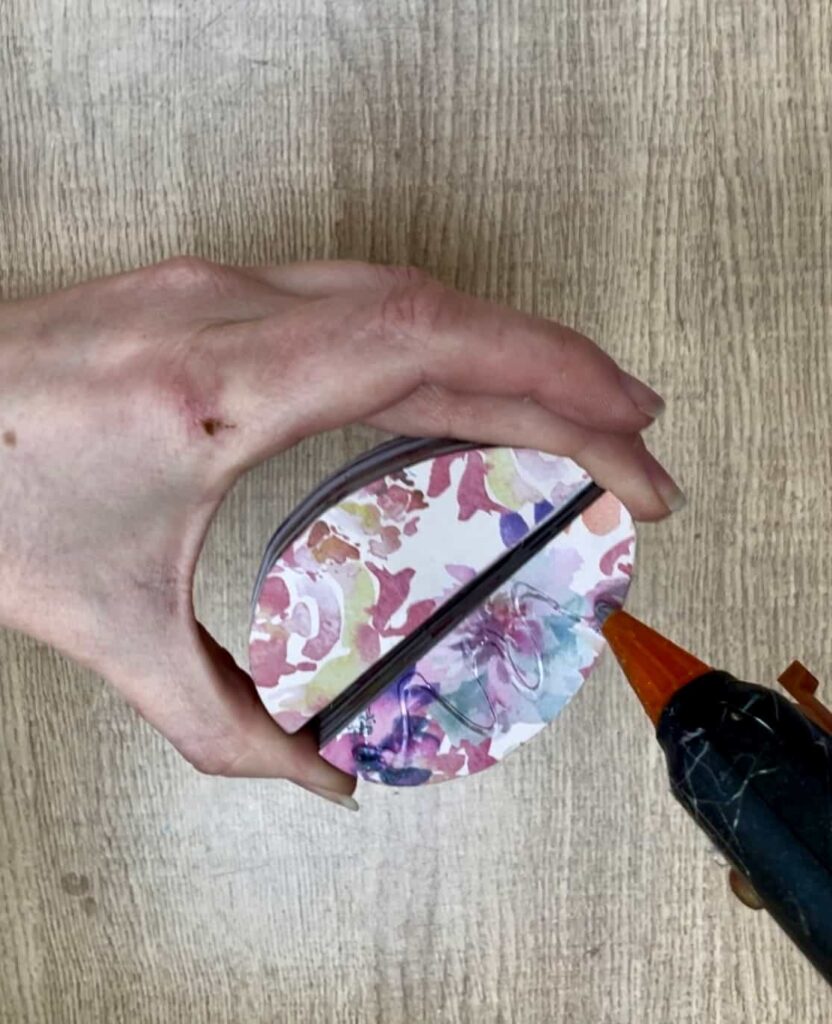
Step 5: Closing the Easter Egg Shape
Once all the pieces are attached, apply glue to the remaining open edge. Carefully press the two ends together to complete the 3D egg shape. It’s important to line this up well otherwise the egg may look wonky.
If you want to hang your paper eggs on an Easter egg tree, attach a piece of string to the top of the egg. Something simple like twine wouldn’t detract from the colours of the eggs. Or a ribbon would add to the pretty look.
Why This is a Great Easter Craft
Aren’t these paper easter eggs such a fun way to celebrate the Easter season with a creative DIY project.
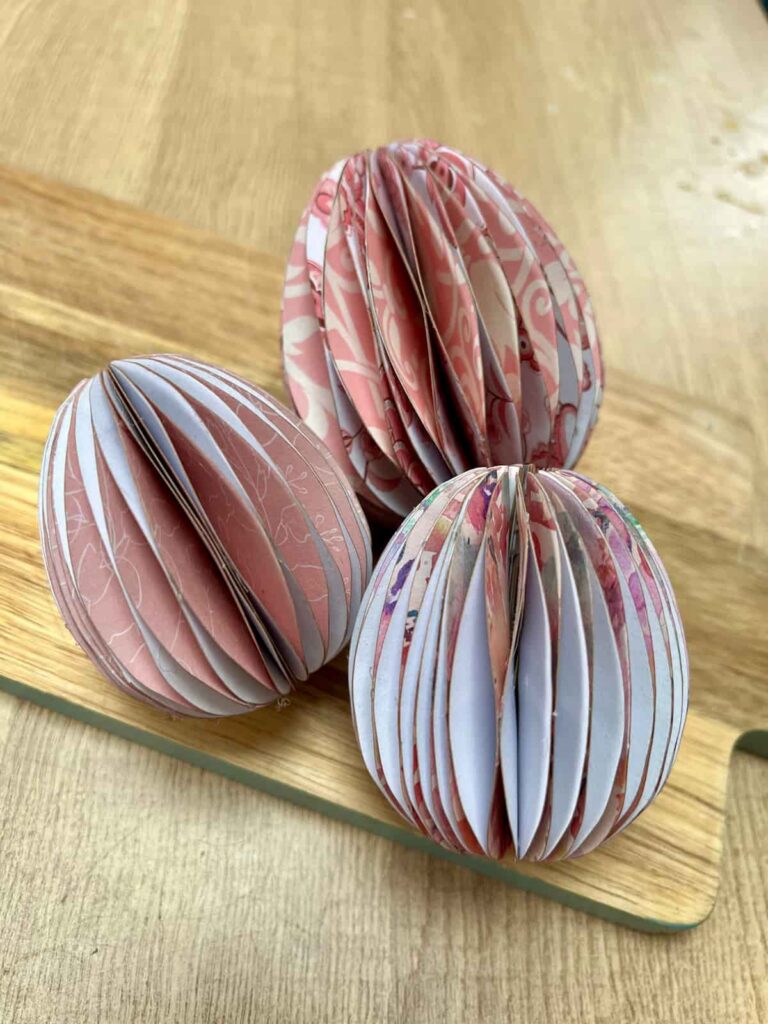
They’re perfect for using scrap paper and making something pretty and reusable each year.
Happy crafting for Easter with these adorable paper eggs!
If you loved this project, you’ll love these projects too:
wreath made with real eggs
19 Easter wreaths
Refinished outdoor furniture
Pin it for later – Paper Easter Egg Craft
Creative Craft Hop
Now it’s time to check out these great Decorative Vase from Purple Hues and Me. When you’re done, please remember to visit these other amazing talents below:
Egg-cellent Rustic Easter Garland Wreath
Pretty Paper Easter Egg Craft with Free Template – that’s me!
Decorative Foam Noodle Crystal Vase
DIY Bunny Crafts With Dollar Tree Mini Foam Bunnies
How To Make An Easy Spring Throw
How to Make the Prettiest DIY Air-Dry Clay Easter Eggs

Hi there! I'm Rachel Bowyer, a passionate DIY enthusiast with a knack for transforming the old into something beautifully new. With a deep love for furniture painting, refinishing, and the art of crafting. I've been documenting my DIY projects and restoration journey since 2018. I specialise in techniques like decoupage, stencilling, and decor transfers. Join me as we explore the world of creativity and home improvement, one project at a time.
What a fun project, Rachel! Besides using printed paper, I imagine making some in solid colors, too! What a cool way to enhance Easter decor! Thanks for sharing!
What a fun project, Rachel! Besides using printed paper, I imagine making lots in colorful plain paper, too! It’s also a cool way to match Easter decor! Thanks for sharing!
Yes, plain paper would create a pretty look too. I seem to only have fun designs! It’s good to try out both.
Your attention to detail on these paper Easter eggs is incredible Rachel! You’ve turned this stunning craft into a foolproof project!
Aww, thank you so much, Sara, that’s a lovely thing to say.
These are adorable Rachel. I love the idea of customizing them to the color you want and size. Thanks for sharing the step by step with us. Super cute.
Thanks, Terrie. Hopefully it will be easy to recreate these from the explanation.
I Love These! I will definitely be giving these a try.
Thanks, Tammy
These are so pretty Rachel. And your tutorial is excellent as well. I pinned this post.
I appreciate that, Donna.
Rachel, these are so creative and whimsical! Thanks for sharing the tutorial–pinned! Blessings, Cecilia @ My Thrift Store Addiction
Whimsical is such a great word, thanks Cecilia.