Simple Rag Garland DIY Tutorial with Scrap Fabric
Rag garlands are a fantastic way to add something extra to your decor. They’re budget-friendly, easy to make, and a relaxing project.
Plus, they’re a great way to repurpose scrap fabric.
In this tutorial, I’ll show you how to make a cosy autumn-inspired rag garland, perfect for adding background interest to your seasonal décor.
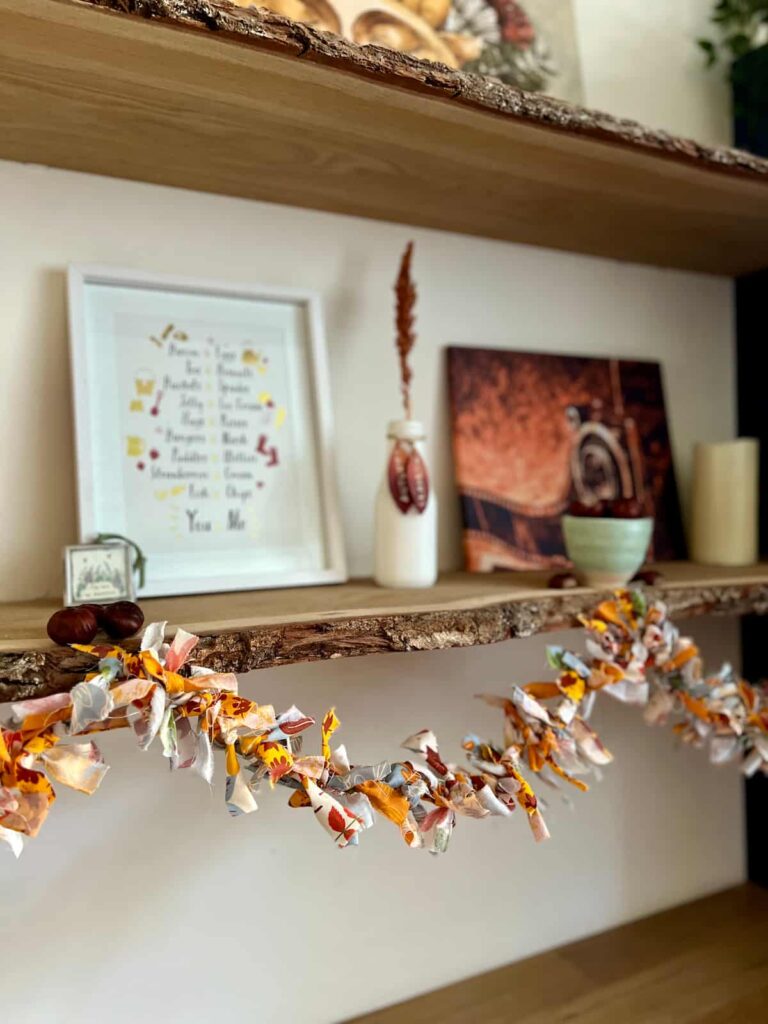
A fabric garland isn’t a show-stopper, centrepiece-type DIY project. It adds visual interest and texture to a space and is perfect in its simplicity.
This post includes gifted products and affiliate links so you can easily find the products I use myself and recommend to friends. If you purchase these products, I may earn a small commission at no extra cost to you.
If like me, you already have scrap fabric and string, this project is also free. What better way to start off than by making something pretty out of unused materials in your craft stash?
So, please check out this quick tutorial. It’s the perfect addition to seasonal decorating.

Welcome to our Creative Craft Hop hosted by Sara from Birdz of a Feather and Donna from Modern on Monticello. I’m are so glad you’re here!
If you’re coming over from Decorate with Tip and More, welcome! Wasn’t their Christmas Deer Revamp lovely?
Check out more ideas from my blogging friends at the end.
How to Make a Rag Garland Step-by-Step
Materials Needed
Step by Step Instructions
Step 1: DIY Rag Garland Supplies
To get started, gather these simple supplies:
- Scrap fabric in your desired colours (for autumn, think warm tones like orange, brown, and deep greens)
- Scissors (or rip the fabric by hand)
- String or twine (however long you want your garland to be)
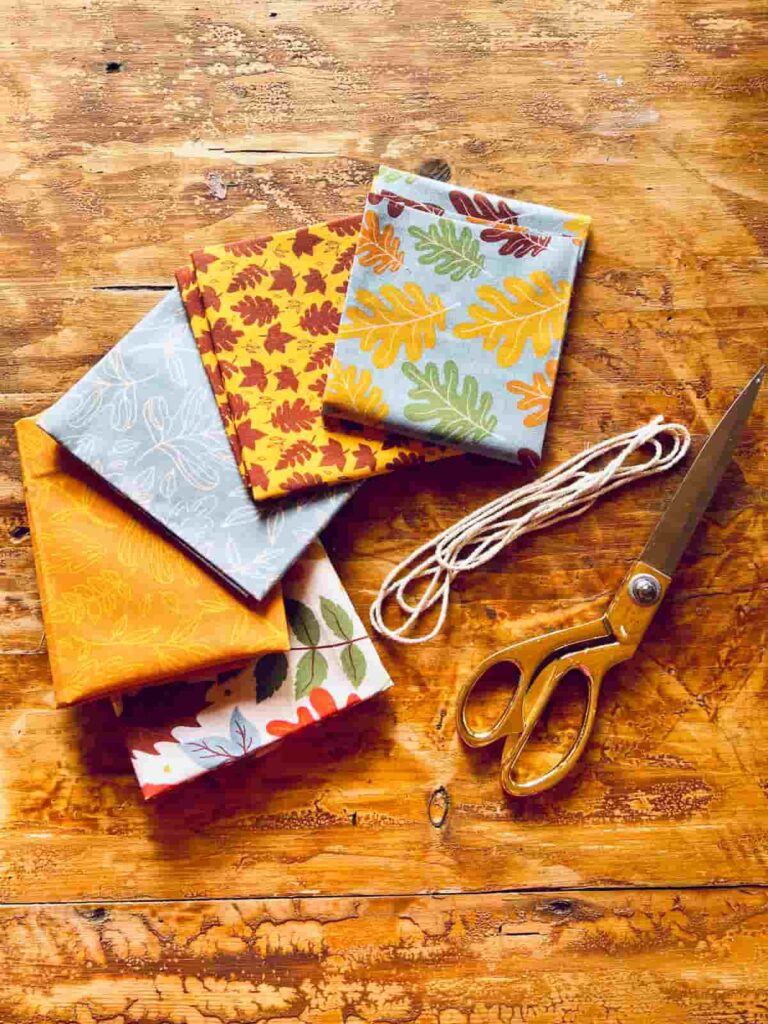
This scrap fabric was autumn-coloured fat quarters that I had never found a use for. Additionally, the string was repurposed from another project. The perfect union of random things in my craft stash.
Alternatively, you could use twine for a more rustic look. But as the twine will be covered, it doesn’t really matter what you use.
Step 2: Preparing the Fabric
First, prepare your fabric strips.
Depending on the scrap fabric you use, you might need scissors or a rotary cutter to cut the strips.
I started by simply ripping the strips of fabric by hand. But I soon realised that it made the widths of the strips quite varied. As a rag tie garland is naturally a rustic, messy look, this might be fine.
But I wanted it to be a bit more uniform. So I used my favourite fabric scissors to make a cut at the start of each strip to space them more evenly.
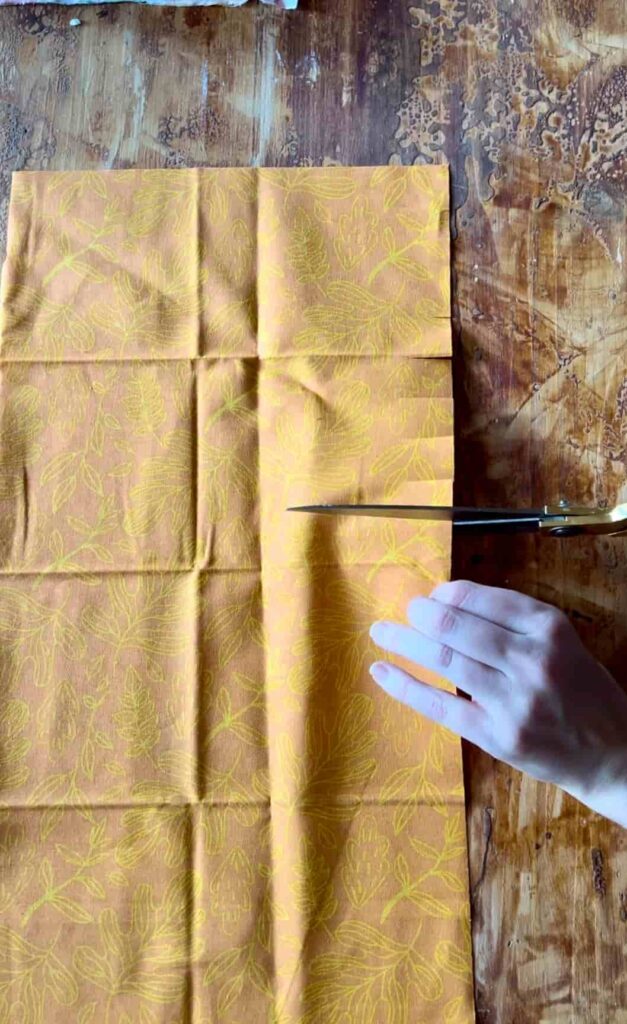
If you have a lot of space to fill, wider strips will fill in the garland more quickly.
With this process, there are lots of frayed edges. You can trim these off or leave them for a more rustic look. I went for the middle ground and trimmed a lot of them without aiming for perfection.
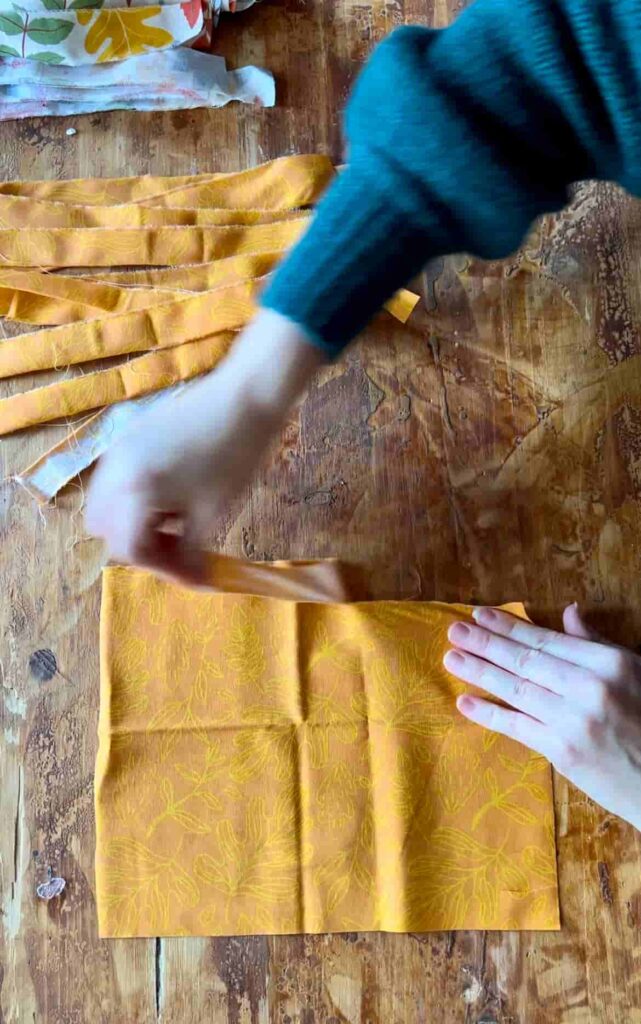
Depending on how bushy you want your garland to look, is how long to cut the strips to length.
It was a guess of how much fabric I needed for the length of the garland I was making. Somehow it worked out exactly perfectly for the length of scrap string I used.
Each half of a fat quarter made about 20 lengths of fabric. As there were 5 autumn-coloured fabrics in this set, I started with 100 strips of fabric.
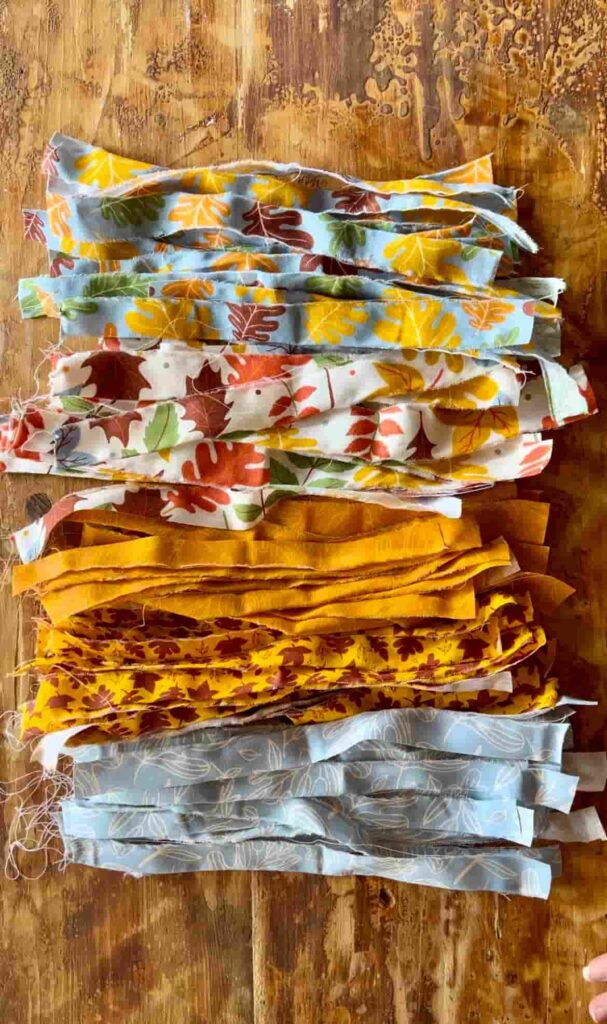
I cut these lengths in half again. So each strip was around 15 cm / 6 inches.
Which resulted in 200 15cm lengths of fabric in total. With a string about 2 metres long. By chance, this resulted in the perfect string-to-fabric ratio.
Step 3: Attaching the Fabric Strips to the String
Now that the fabric strips are ready, it’s time to create the garland.
Take one strip of fabric, fold it around the string, and tie a simple overhand knot. This knot will hold the strip in place without needing glue or additional fasteners.
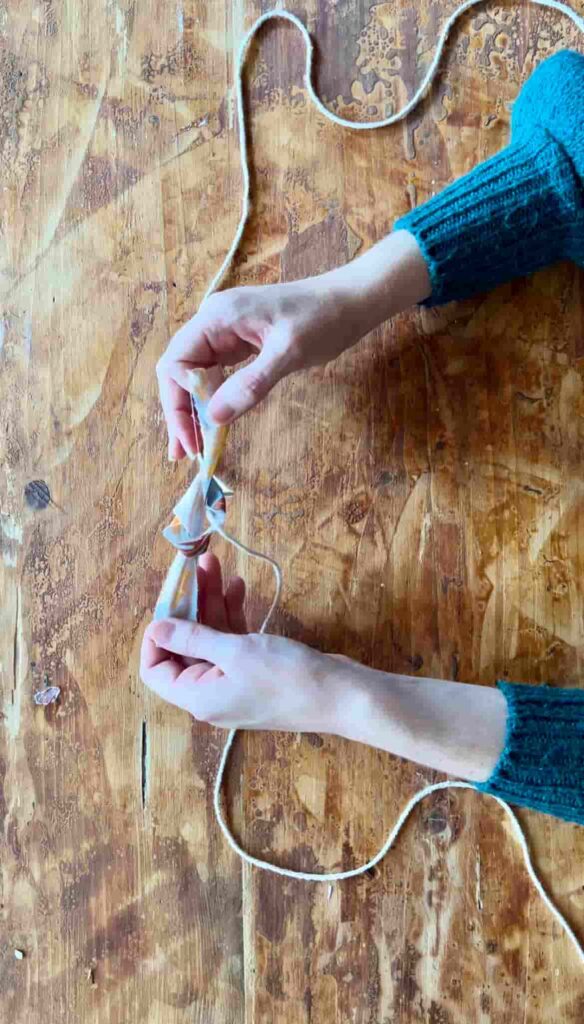
After you tie a piece, slide it along the string to close the gaps. Repeat until the entire string is filled, or until you reach the desired fullness.
As we tend to work more quickly when repeating the same process, it’s faster to tie a few knots and then push them along the string to close the gaps. Rather than tie a knot, close the gap and repeat.
If like me, you have different fabric patterns, you can alternate between each design for a consistent look.
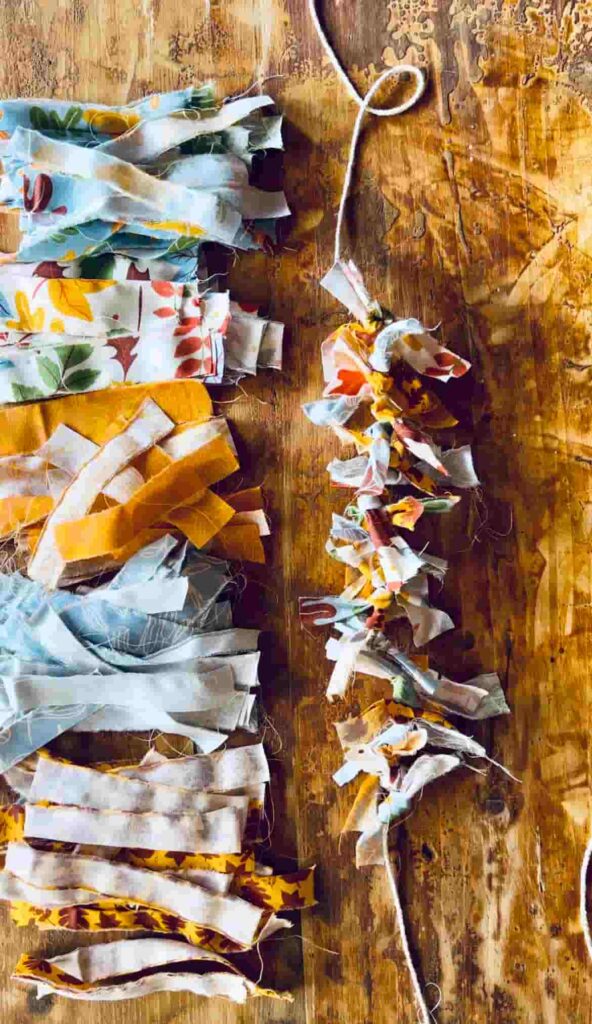
The amount of time it will take to make depends on the desired length and fullness of the garland.
This garland took about an hour to make, including ripping the fabric. Not bad considering you could do it sitting on your sofa with the TV on if you wanted to!
Styling a Rag Garland
So how can you style a rag garland after you have made it? As it’s not typically the focal point of home decor.
One way to add interest to a space is to add layers and additional texture. That’s exactly what a rag garland achieves.
Firstly, you can attach the rag garland at intervals to a shelf. This gives it a festive, cheerful feel.

Secondly, you can make it even more of a background function. By looping in and out of other decor pieces. This gives a display a more grounded, fuller look.
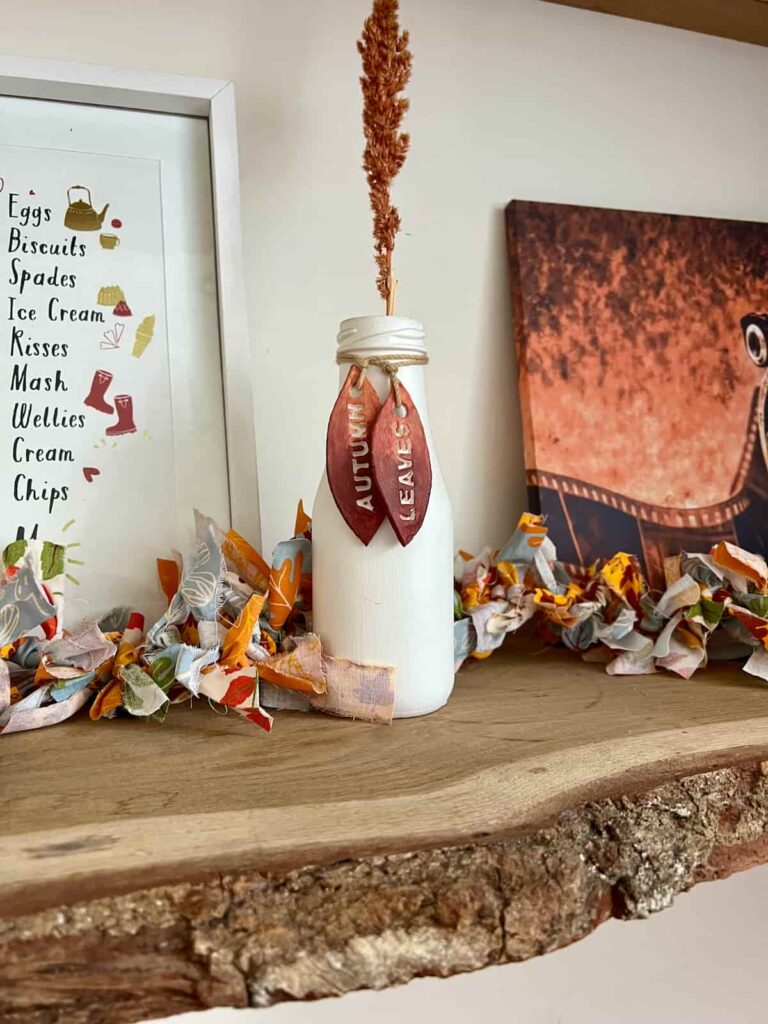
Lastly, you can drape it over and around your shelves and highlight it more as a border.
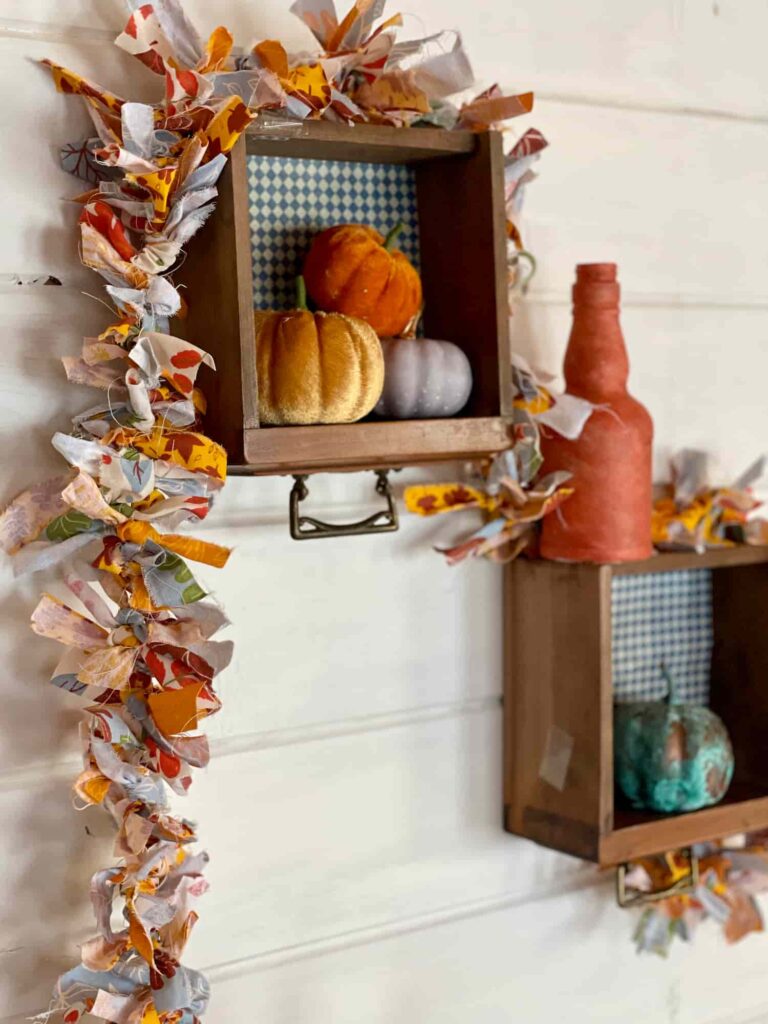
There are so many ways to style a simple rag garland. Each gives a different feel. You might want to play around with the displays to see which works best in each situation.
Tips for Creating the Perfect Fabric Rag Garland
Have different fabric choices. Don’t worry about uniformity. Mixing fabrics with different patterns and shades adds visual interest.
Complementary colours make a more calming and cohesive look. While contrasting colours create a more dramatic feel.
Or if you use a silky or velvety type of fabric, you get a more luxurious look.
Customise the colours to fit different seasons or celebrations. For autumn, rich, warm colours create a cosy backdrop; for winter, try whites, greys, and icy blues.
Another option is to use pastel colours for baby showers or silky whites for bridal showers.
It’s so much fun coming up with ideas.
Creating a beautiful garland garland is not just a budget-friendly and easy project—it’s also a mindful, satisfying way to use up scrap fabric for home decor.
This project is meant to be fun and relaxing. There’s no wrong way to do it (unless the fabric falls off!), so enjoy this simple and easy craft.
Did you make this craft?
I love seeing what you do. Please mention @teaandforgetmenots and share your creations with me!
Pin it for Later – Rag Garland Tutorial
Creative Craft Hop
Now it’s time to check out this amazing Gingerbread House from My Thrift Store Addiction. When you’re done, please remember to visit these other amazing talents below:
Easy DIY Pine Cone Christmas Trees and Topiaries
Darling Gingerbread House Crafted with Dollar Store Decor
Christmas Glitter Foam Flower Decor
Christmas Clay Pot Craft Ideas for Santa and Elf
Three Easy Christmas Tree Ribbon DIY Projects
Hi there! I'm Rachel Bowyer, a passionate DIY enthusiast with a knack for transforming the old into something beautifully new. With a deep love for furniture painting, refinishing, and the art of crafting. I've been documenting my DIY projects and restoration journey since 2018. I specialise in techniques like decoupage, stencilling, and decor transfers. Join me as we explore the world of creativity and home improvement, one project at a time.



Rachel your rag garland is perfect for Fall. You chose the perfect fabrics – I love their colors – the fabrics are perfect together. Love everything about this.
Thanks so much, Tammy.
This is so charming and I think you’re on to something with your Christmas decor Rachel. It might not be the show stopper, but you definitely need this type of craft to make it cohesive. It’s like floral displays – you need a thriller, filler and and spiller to bring it all together :). This gives me warm and cozy feels; perfect for the holidays!
Wow, I’ve not heard of those terms, what a great concept. Thanks, Sara.
Rachel, your rag garland turned out so pretty and I love the fabrics you selected–pinned! Blessings, Cecilia @ My Thrift Store Addiction
Thank you, Cecilia.
What a super cute way to decorate for the season, Rachel! So simple and yet very rewarding to make! I love all the different ways you used the rag garland in your home! The areas look so festive and inviting!
Thanks so much, Gail. Yes it is so easy!
Very pretty! I love all the ways you’ve styled it!
Thanks Jenna, yes it adds a bit of flexibility.
So pretty and your choice of fabrics work so well together. This is something you can look forward to styling in different ways each year. Your post has also reminded me that I have some Fall fabric scraps that I need to find a purpose for. Thanks for the inspiration.
Ah perfect. It would also be great as a little wreath.
I like the versatile ways you gave for using your pretty garland! It’s an excellent idea for using up fabric scraps for sewers and crafters. I have a jam packed laundry basket full from years of sewing.
I bet! And it’s so satisfying to use scraps.
Rachel your garland turned out so cute. This would be awesome for all seasons and holidays with the right material. Thanks for sharing this! Pinning to make me one for Christmas!
Thanks Terrie, yes it’s a great way to use scrap fabric for any season. I’ll have to dig through my stash for more!