Upcycle an Old CD Tower into 3 Pretty Storage Ideas
Old CD towers are everywhere in charity shops, often going for free or very cheap. Instead of letting them gather dust, why not upcycle them into beautiful storage boxes?
With a little cutting, staining, and adding a few simple details, you can upcycle a CD tower into stylish storage for your home.
This easy DIY gives new life to something old—perfect for craft supplies, bathroom storage, or even a unique floral display!
See the full step by step video tutorial
How to Upcycle a CD tower Step by Step
If you’re looking for supplies, I’ve included affiliate links to the right tools, from Amazon. If you make a purchase, I may earn a small commission at no extra cost to you.
Materials you’ll need
Step by Step Instructions
Step 1: Find a CD Tower
Start by checking charity shops, and the free section of Facebook Marketplace, or ask friends if they have an unused CD tower. You can often find these or a DVD rack for free as most people no longer use them.
Look for one with a sturdy frame, as that makes DIY projects easier.
This CD tower was both free and from a charity shop. One of my local charity shops has a free section at the front of the shop.
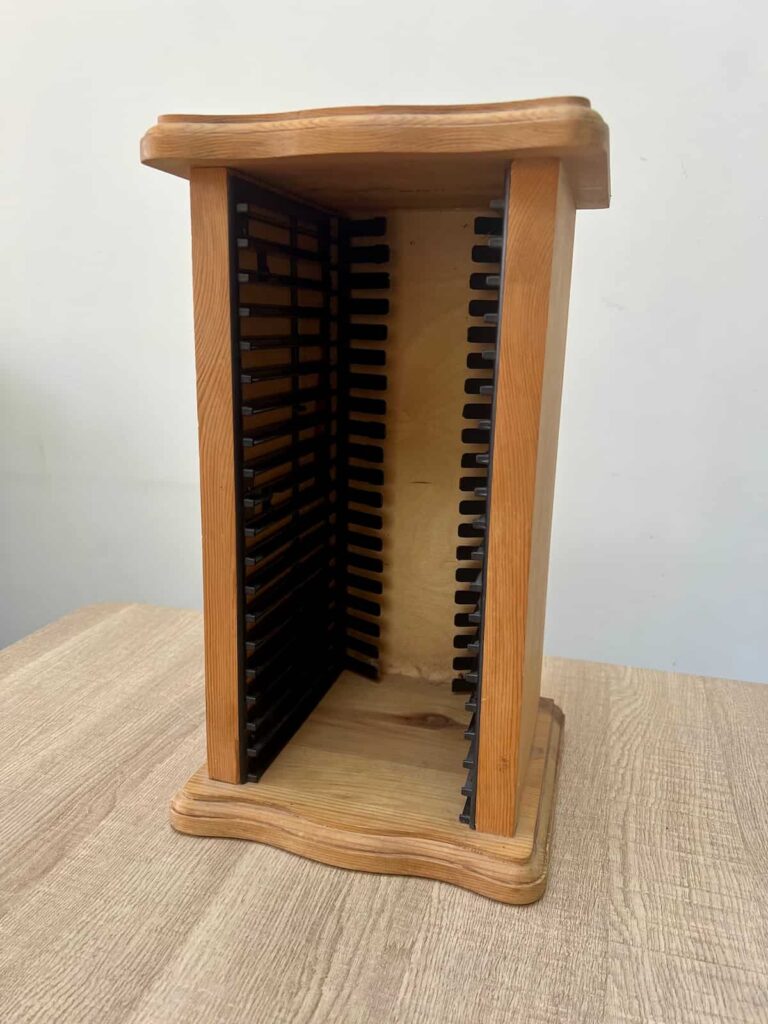
As soon as I saw the wooden CD tower, I knew it had potential. That’s one of the key things to think about when hunting in charity shops. You should look beyond what the current purpose is and think about what you could turn it into.
This is also the perfect size to display on a table. Longer CD towers are better for permanent storage rather than something you can carry around such as craft supplies.
Step 2: Clean and Prepare the Tower
Before you begin, give the CD tower a good clean. Remove any dust, grime, or stickers but avoid getting the wood too wet.
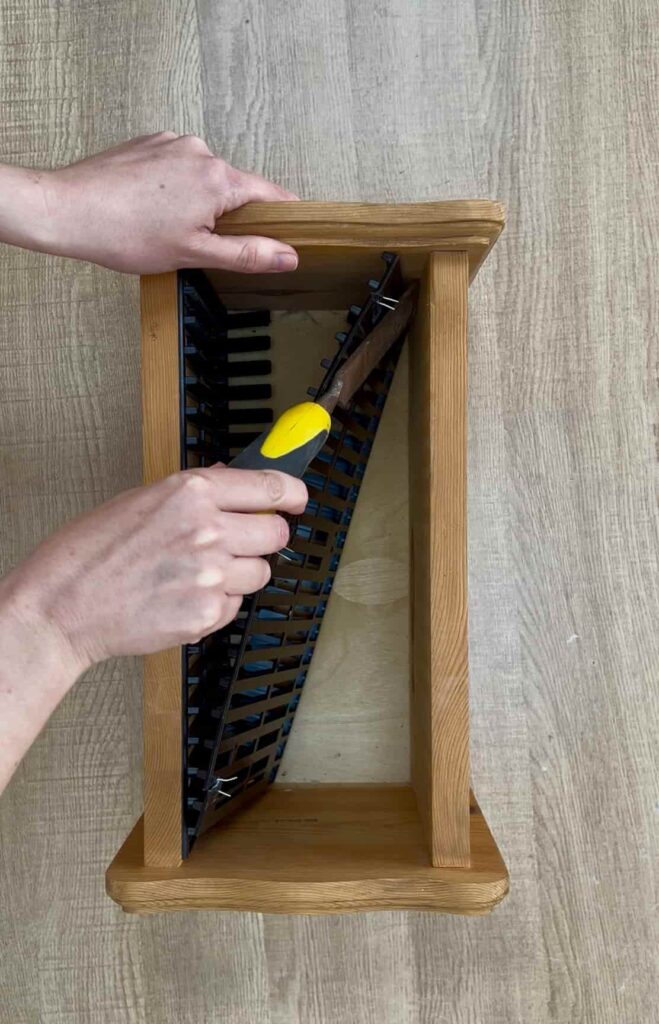
Then, take out the internal CD dividers, these are usually screwed or stapled in place. These plastic dividers were stapled in, so easily popped out with some force.
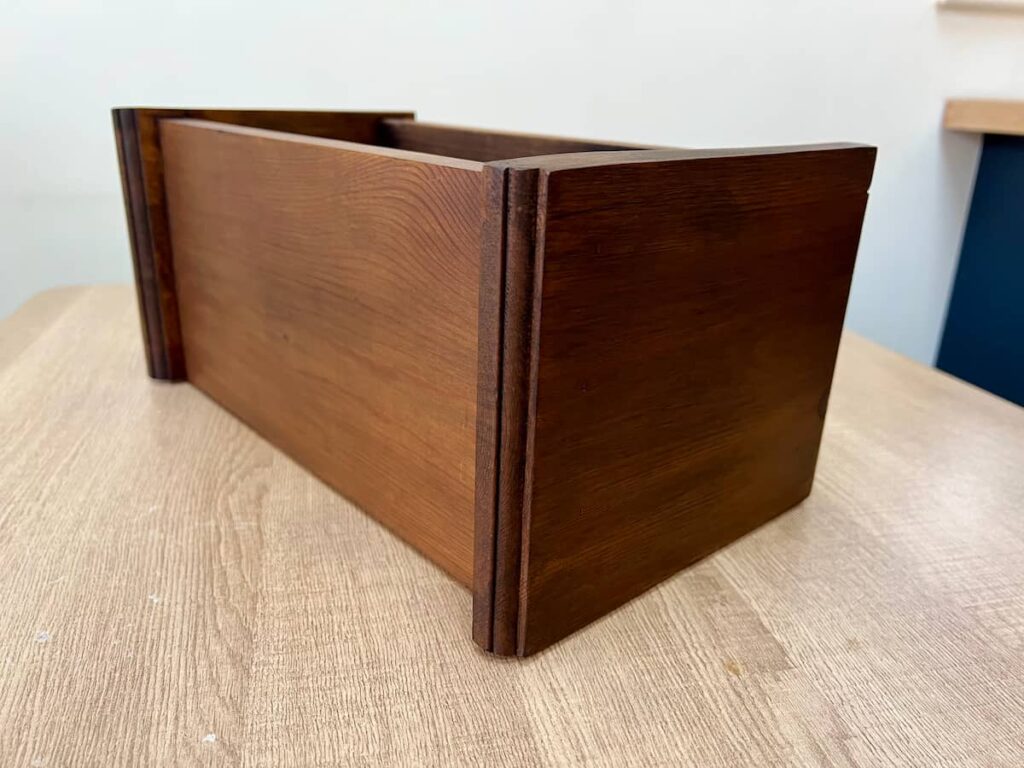
Now, you have a plain wooden frame ready to transform!
The date May 1998 was printed on the inside of the CD tower. Hard to believe that 1998 makes this vintage but as always, time flies. I left the date visible so that anyone who sees this in the future can know the age of the piece too.
Step 3: Trim the Edges
Many CD towers have decorative or ornate edges that may not suit a modern storage box.
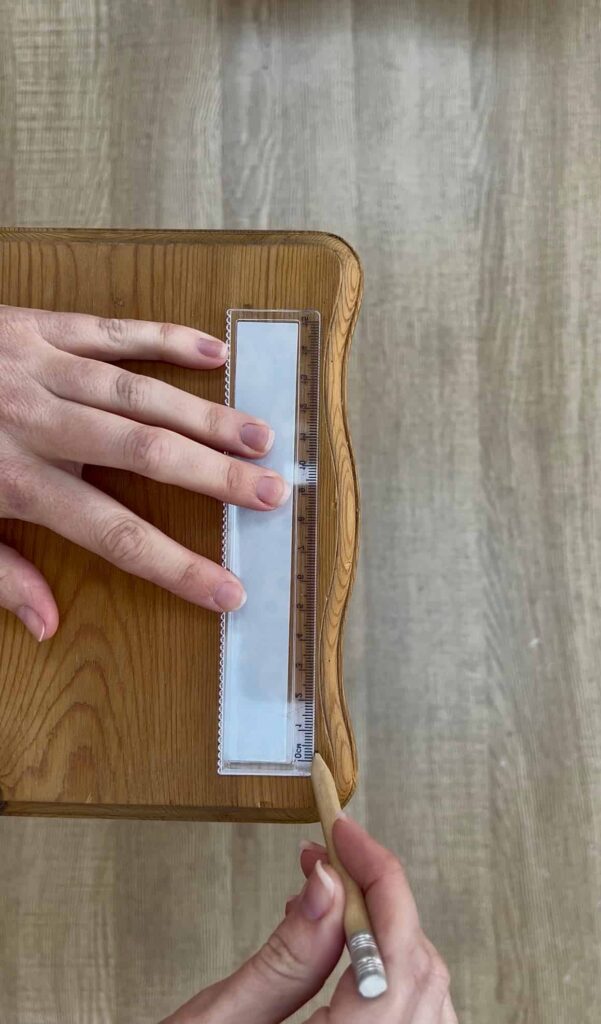
You can use a jigsaw to trim down unwanted details, giving your boxes a cleaner, more streamlined shape. This step helps create a more polished, high-end look.
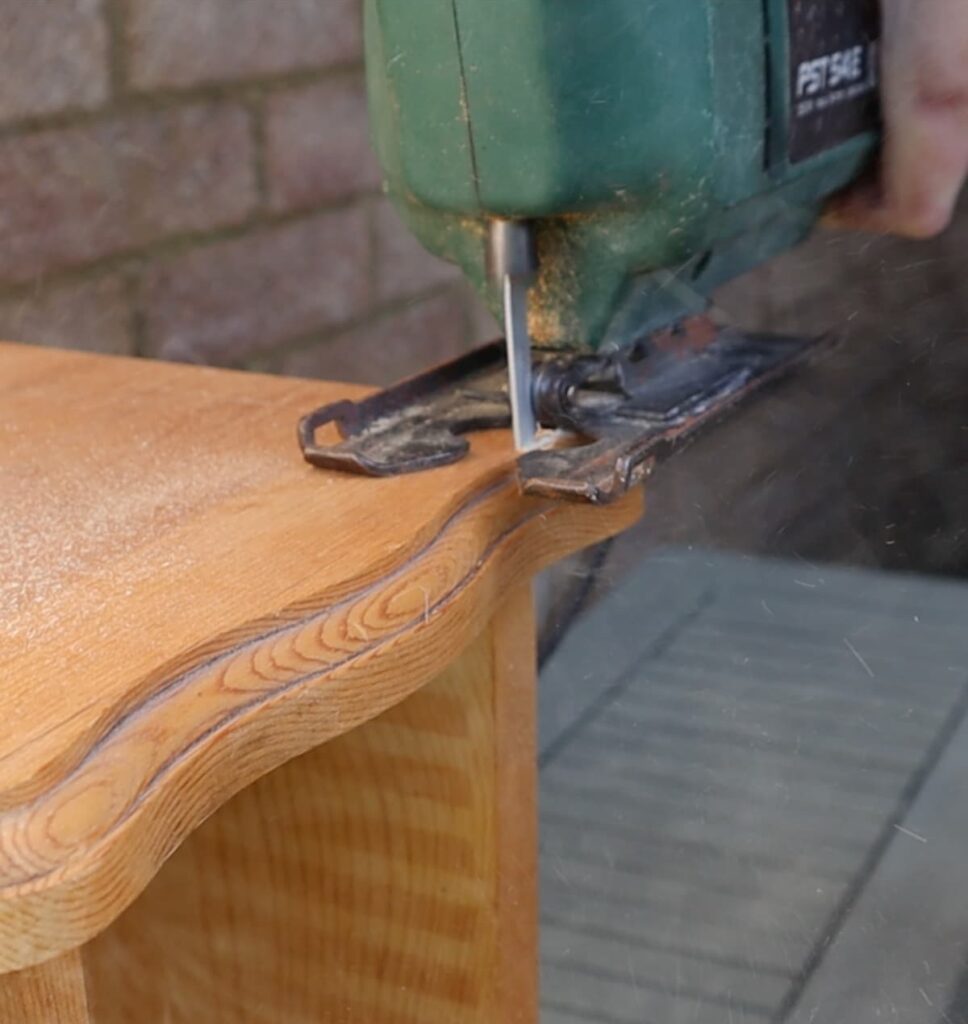
Once you’ve cut down the edges, use 180-220 grit sandpaper to smooth the surface. This step is important for a more consistent finish when applying the stain.
Step 4: Add Wood Filler to Hide Screws
The final thing to prepare the CD tower before staining is to hide the screw holes. This isn’t essential but helps to create a prettier, smooth finish.
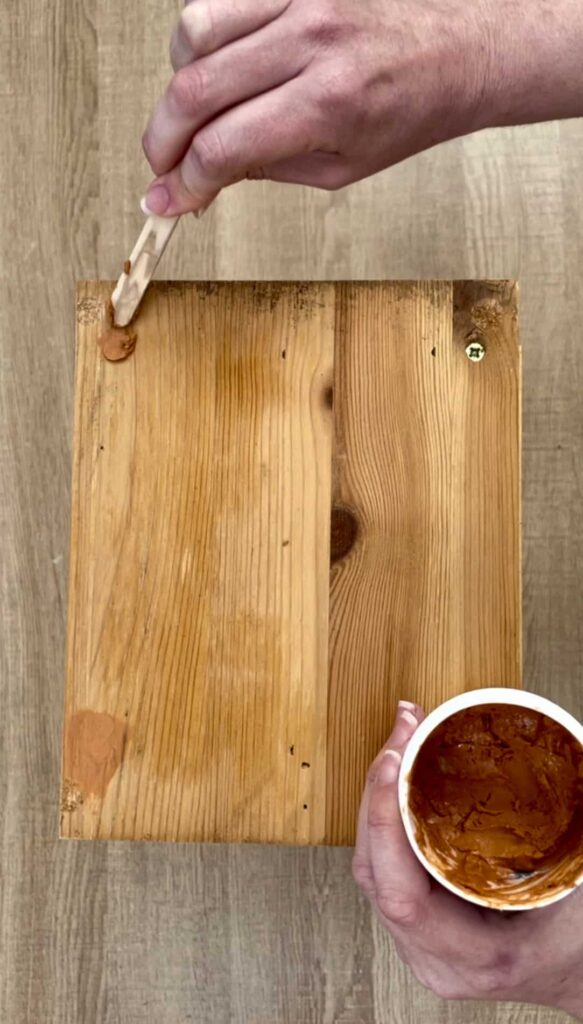
Add wood filler above the surface of the hole as it may shrink back slightly as it dries. Then sand it flat with sandpaper so it is ready for staining.
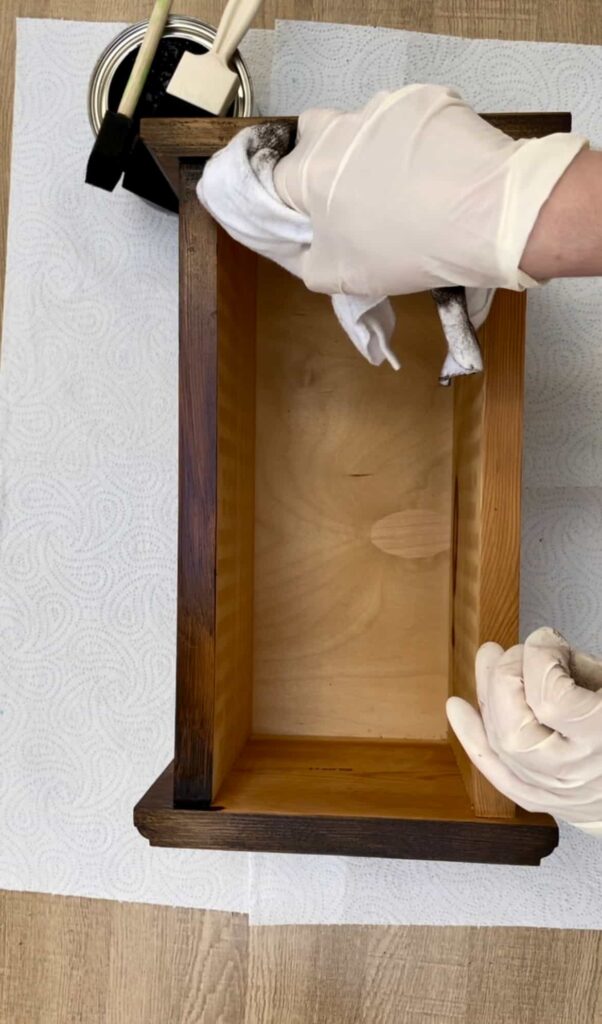
Step 5: Apply Wood Stain
Choose a wood stain that suits your home décor. I used a warm brown called Walnut for a rich colour.
Using a foam brush, apply the stain evenly across the surface.
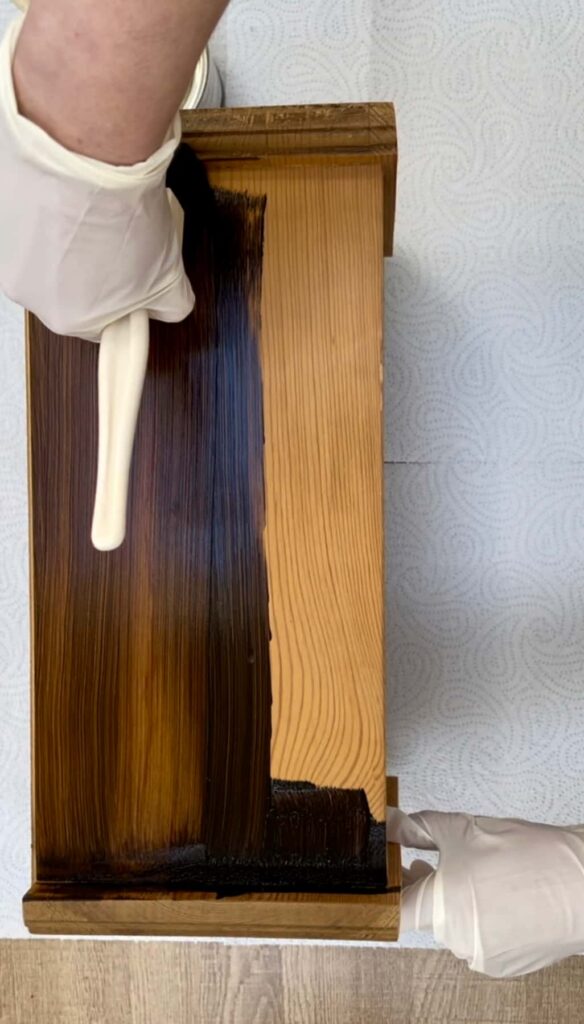
With this type of stain, leave it for 2-3 minutes then wipe off any excess stain with an old t-shirt.
Let the first coat dry completely before adding any further coats.
As the ends of the CD tower stained darker than the sides of the box, I added a second coat of stain only to the sides.
Step 6: Add Handles and a Card Holder
To make the box more useful and stylish, I added handles and a cardholder.
One way to attach handles so they aren’t wonky is to mark the holes on the handle with painter’s tape first. Then put the painter’s tape in position on the box and make sure it is level with a spirit level.
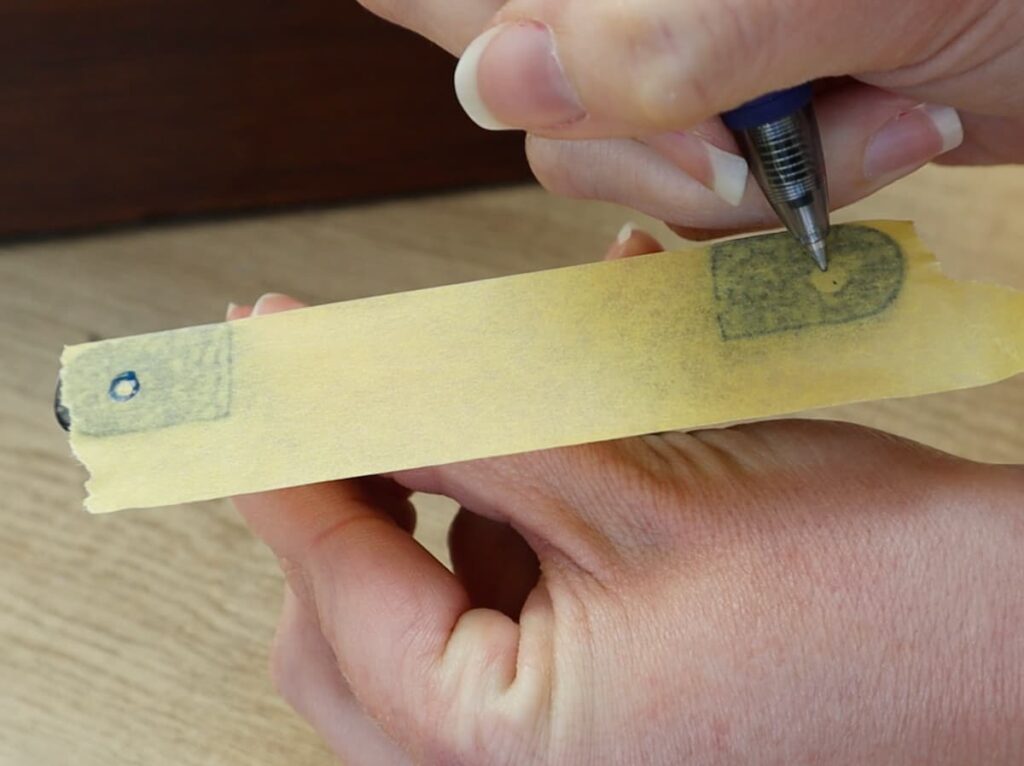
You can use metal handles for a vintage feel or leather straps for a softer touch. Cast iron is a good choice for an older, rustic look.
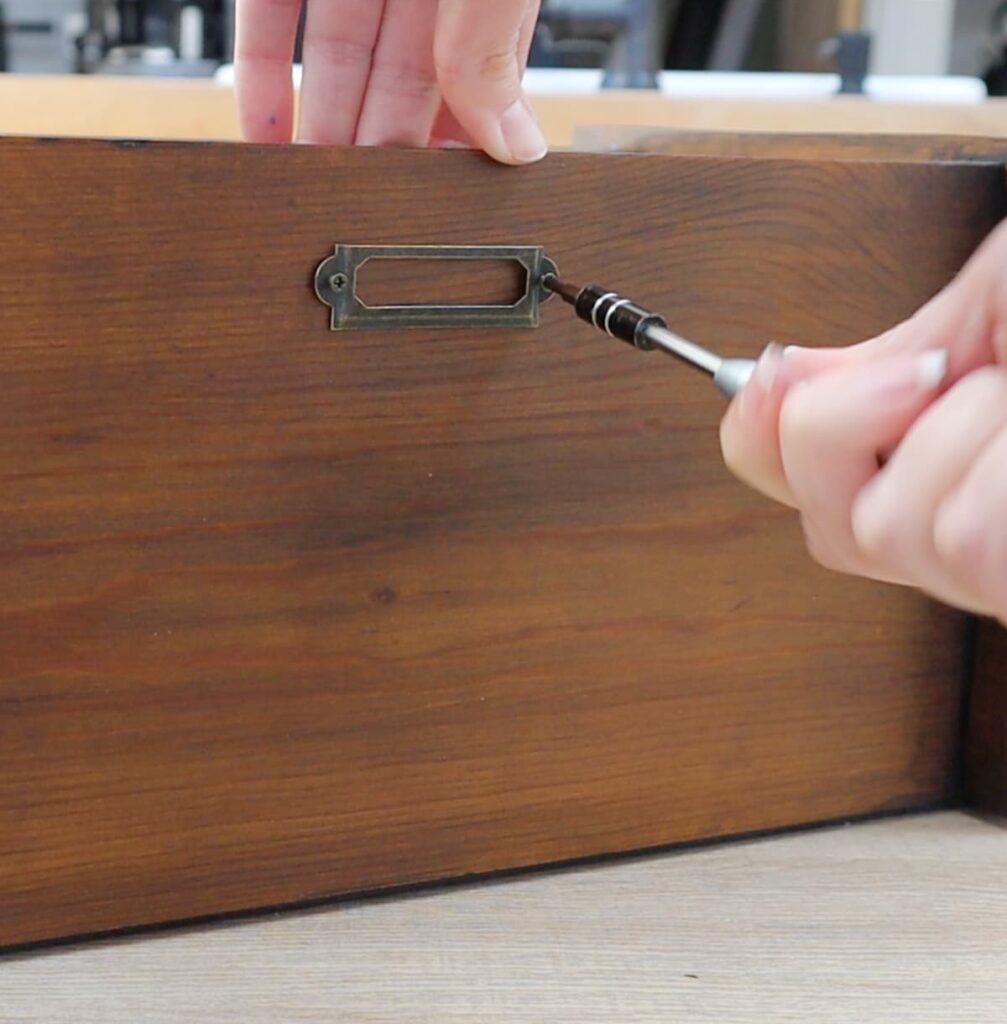
Adding a small card holder to the front is perfect for labelling the contents but mostly just to add some character.
Ways to Use Your Upcycled Storage Box
Now that the CD tower has been transformed, here are three creative ways to use it:
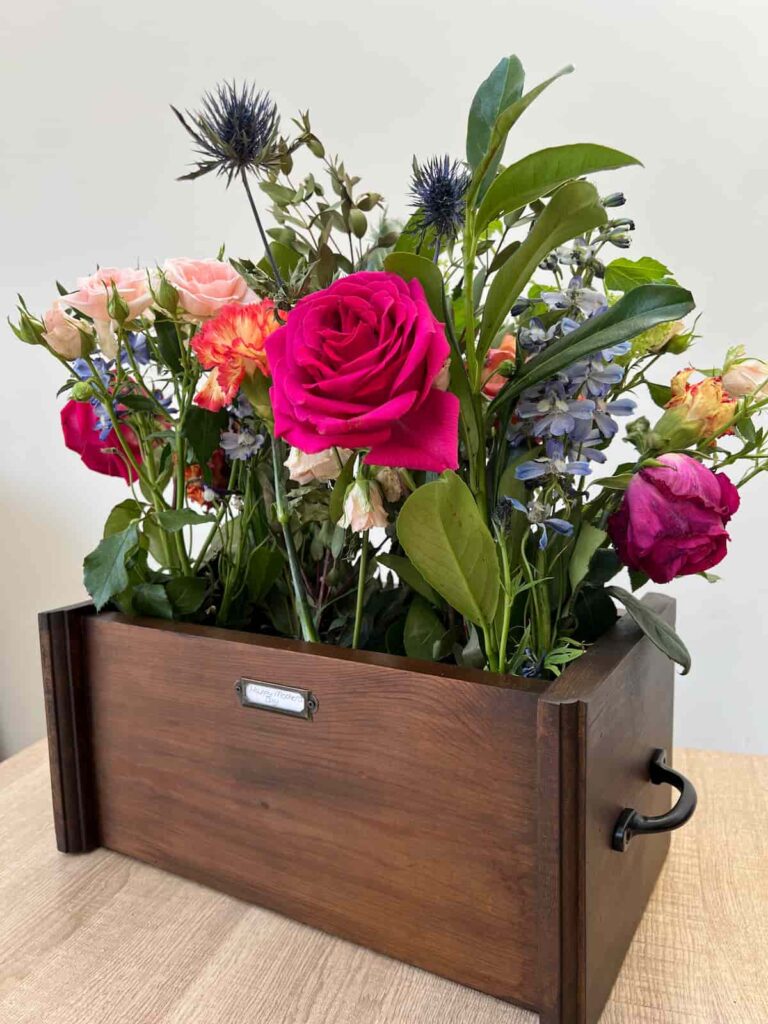
Floral Display
I filled the box with various jars with water and placed a bouquet of flowers inside.
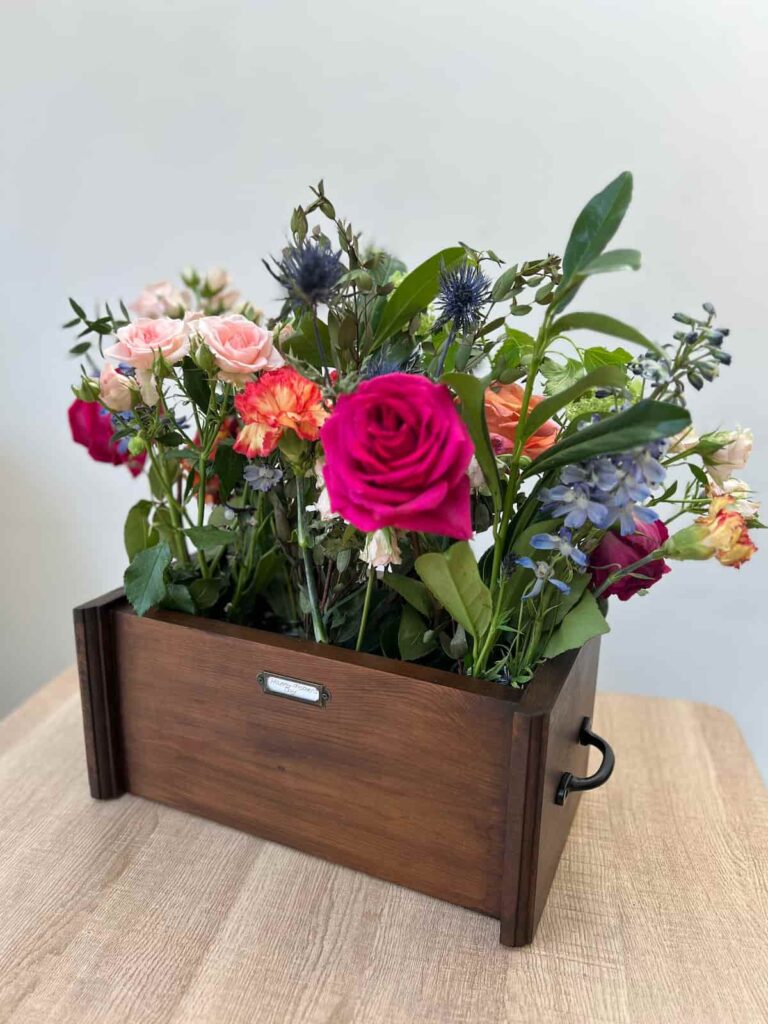
This makes a beautiful floral display but the water makes the storage box heavy.
Alternatively, you can use dried flowers for a rustic centrepiece.
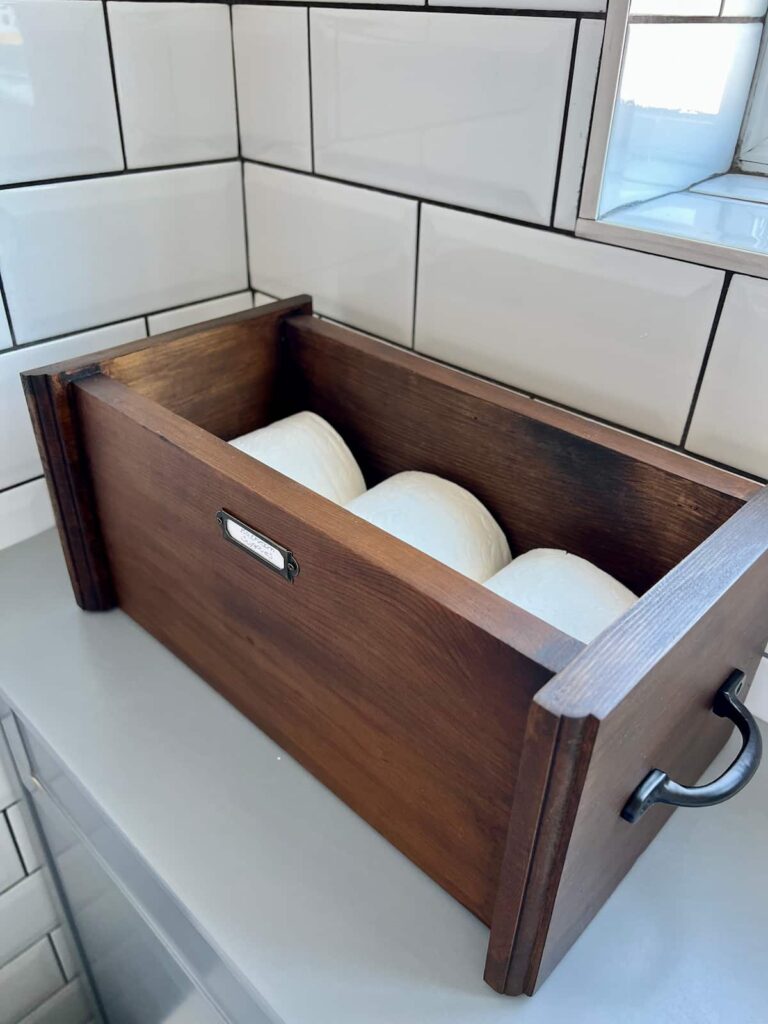
Bathroom Storage
A stylish way to store extra toilet rolls, keeping them handy but without being stacked up in plain sight.
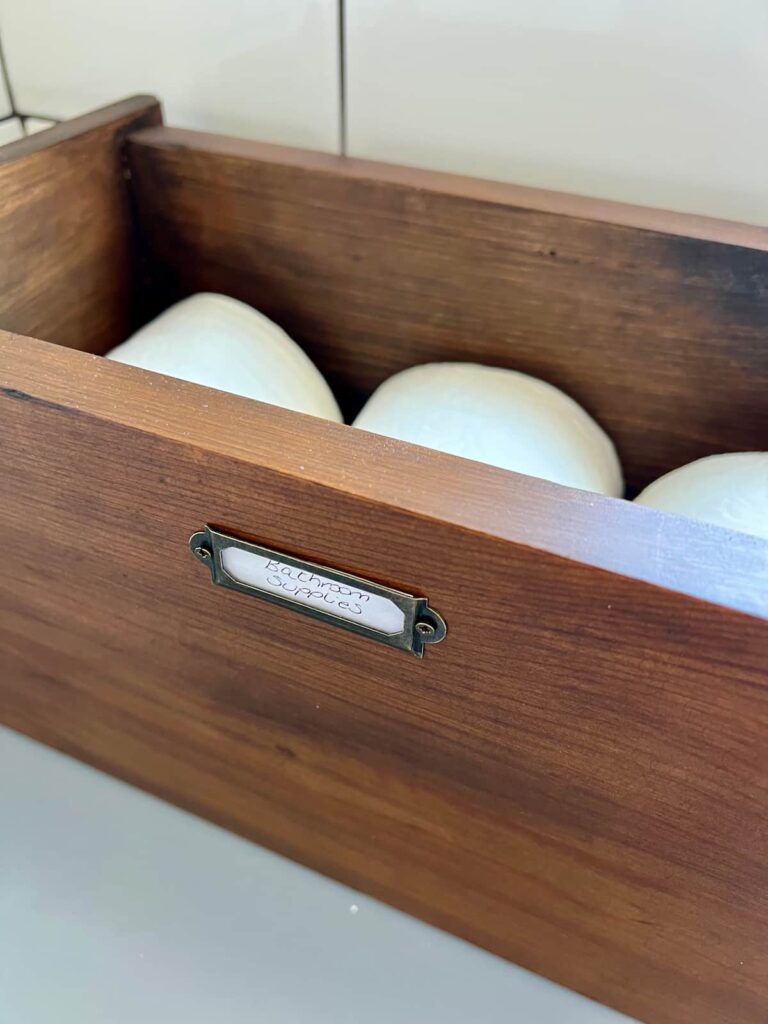
This bathroom storage also works well for extra hand towels.
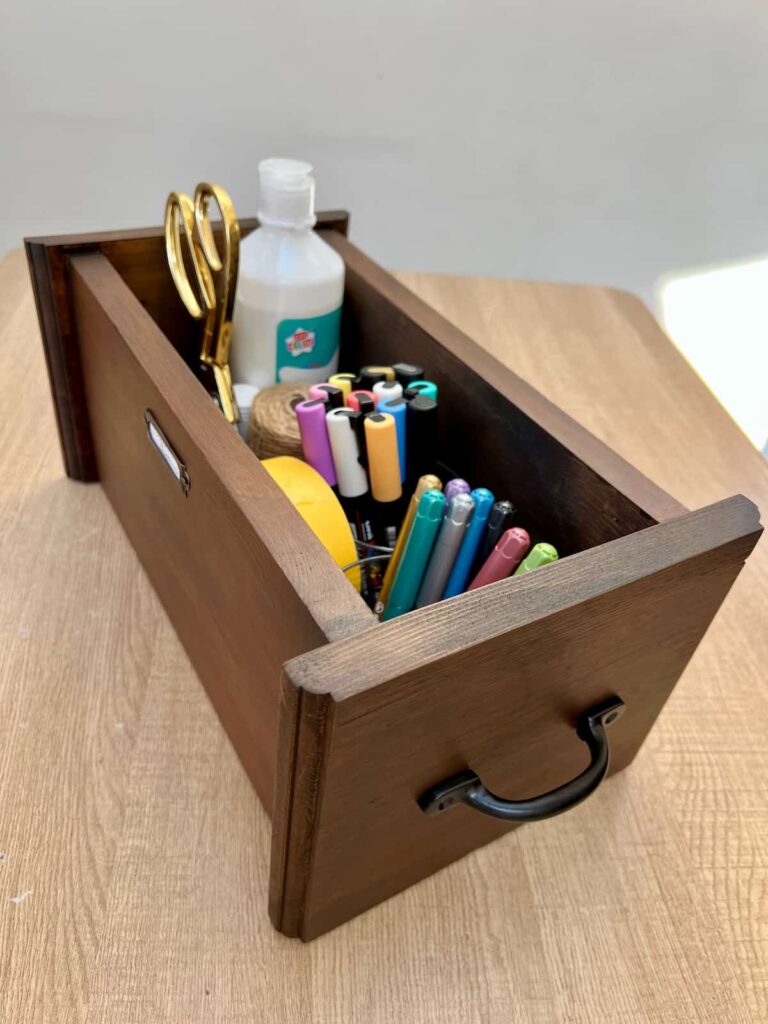
Craft Supply Organiser
Keep your paints, brushes, and fabric neatly stored in one place. This CD tower is just the right size to have craft supplies that you can bring out to your table while you’re working on it and put away at the end of the day.
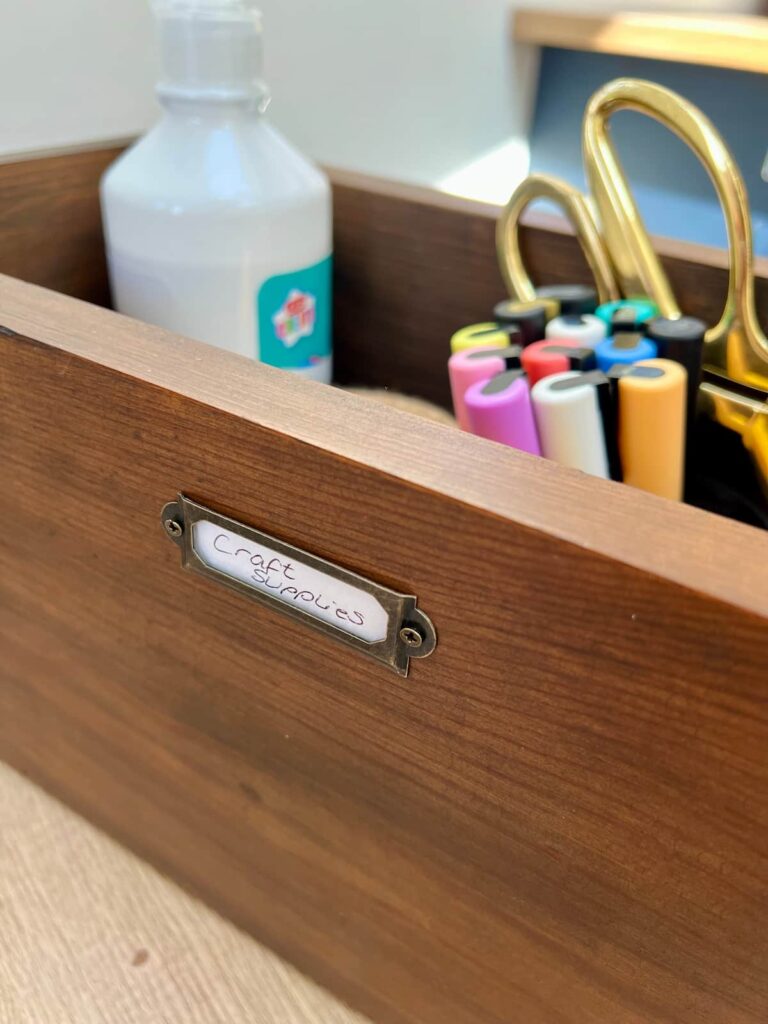
It’s perfect for small spaces when you don’t have easy access to everything at the same time.
With just a little effort, an upcycled CD tower can become a beautiful and functional storage solution for your home.
This upcycle project is simple, budget-friendly, and a great way to give new life to something outdated.
Next time you see one at a charity shop, grab it – you’ll be amazed at how easy it is to turn it into something beautiful!
If you loved this project, you’ll love these projects too:
REPURPOSED CD RACK
CHARITY SHOP LAMP MAKEOVER
UPCYCLED PLANT POT
Pin it for later – Upcycled CD Tower


Hi there! I'm Rachel Bowyer, a passionate DIY enthusiast with a knack for transforming the old into something beautifully new. With a deep love for furniture painting, refinishing, and the art of crafting. I've been documenting my DIY projects and restoration journey since 2018. I specialise in techniques like decoupage, stencilling, and decor transfers. Join me as we explore the world of creativity and home improvement, one project at a time.