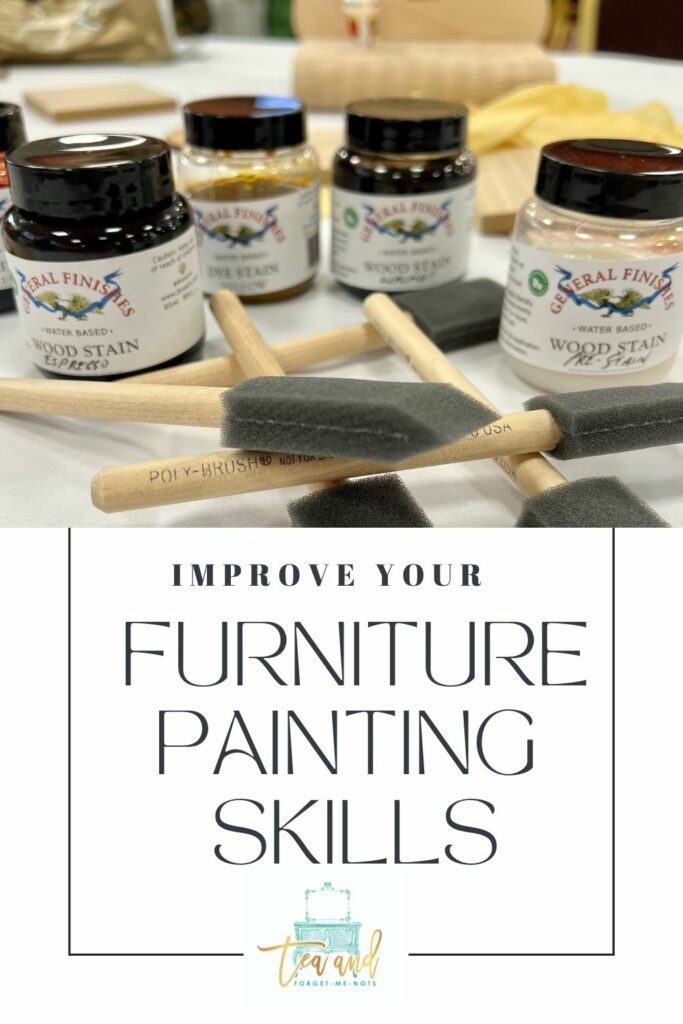
How to improve your furniture painting skills (lessons learned from a painting conference)
How to improve your furniture painting skills. With new painting products and techniques learned at the Painters Business Academy.
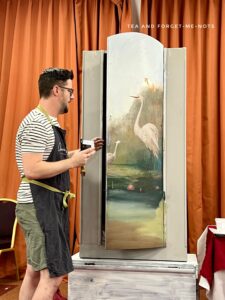
Recently, I went to the second Painters Business Academy Conference in the UK.
Some of the greats in the industry were there… Annie Sloan, Brushed by Brandy, Bella Renovare by Crys’Dawna, Jonathon Marc Mendes Painted Love, The Turquoise Iris (Dionne Woods).

Artists who I have watched, learned and recommended over several years. Those people with supreme furniture painting skills.
There were also some of the biggest brands there too. Fleur Paint, WoodUbend, Fusion Mineral Paint, Daydream Apothecary, PolyOnlay, Posh Chalk, Iron Orchid Designs and Mint by Michelle.
Artists came to share their techniques and brands gave tutorials on their products.
From blending, decoupage, stencilling, concrete paint and paint inlays, there was a lot to absorb.
Painting can be a solitary art so it was lovely to meet other painters in similar shoes. In all kinds of stages of their careers.
The speakers are of course, extraordinarily talented. Some people had been painting furniture for 20+ years. And someone had not painted a single piece of furniture… yet.
What a courageous person. To have never painted furniture and yet attended a conference for furniture painters. I don’t doubt that they’ll pick up a paintbrush soon.
Words I try to live by is to not compare your chapter 1 to someone else’s chapter 20.
I do my best to share what I learn on this blog. Hopefully, then you don’t make the same mistakes as me. Or just realise that we all make them.
So, what did the greats of the furniture painting industry have to share? Here are some of my favourite things…
Are paint inlays the new transfer?
Iron Orchid Designs shared a product called a paint inlay which blew my mind.
Can it be true? My beloved furniture transfers might be surpassed.
Just see how many creations I’ve made with them!
A paint inlay is like a furniture transfer. It’s a picture that you attach to wet paint.
However, that picture is not a decal or a sticker. It’s paint.
This product has been around for a year. But Iron Orchid Designs themselves say that it has been somewhat under the radar.
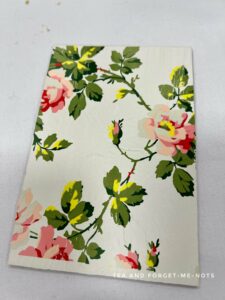
A paint inlay is an image made of paint, on carrier paper.
You firstly paint a surface. While it is wet, you apply the image on top. Similar to applying a decoupage paper.
You leave it to dry. Then you spritz the surface with water and pull off the carrier paper.
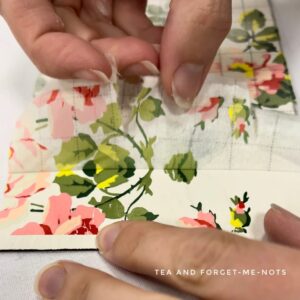
That leaves the paint embedded in the surface.
You need to seal it to protect it. But otherwise, it’s as permanent as the paint beneath it. An image on a surface but not stuck on, fused into the paint.
Beautiful.
And another thing. (Can you tell that I’m a fan?)
It’s reusable!
Each application doesn’t use all of the paint from the image. Some remains on the carrier paper for more uses.
Iron Orchid Designs say that each paint inlay can be used 2 or 3 times. But unofficially you’re likely to get 4-5 uses from each one. It gets lighter and more distressed each time as more paint is transferred from it.
There are even more things I want to tell you about it.
Fortunately, I got a paint inlay in my conference goodie bag. And I chose an additional one of beautiful birds (naturally!).
Here’s how I used it on a chest of drawers and noticeboard.
Have you heard of or used a paint inlay? Does it appeal to you?
I can’t wait to try it.
How to get a durable finish with the sheen you want
Now, this technique was news to me and a great discovery. I’m sure some people know about it already.
I love a flat, matte finish on my pieces. I often use satin because it gives a higher level of durability.
Gloss was the right call for these tables though. They needed serious protection!
Gloss gives the highest protection. It’s the most stain and water-resistant. Very useful but what if you don’t like the look?
What if you could have the durability of gloss with the appearance of matte?
Well, now I know, you can.
The look of a piece is only dependent on the final layer of the top coat.
So you can apply one or two coats of gloss to a piece. Then apply a coat of matte. The result will be a matte finish.
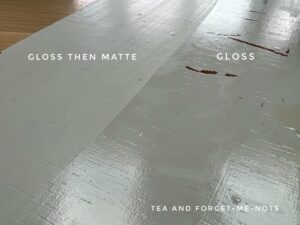
Durable underneath with the sheen that appeals to you most.
I will be using this tip on future pieces. If you didn’t know it, I hope it’s helpful to you too!
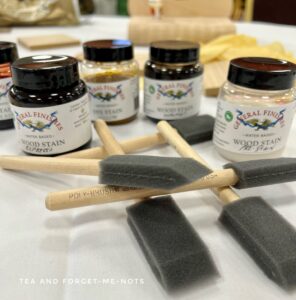
Do you need a wood conditioner when staining wood?
This one isn’t a specific product, more of a general product type.
This demo was from Brauch, the UK distributor for General Finishes.
I stain furniture occasionally. It can look really warm and add a lovely contrast to the paint.
But I use paint more. Simply because it’s more colourful.
So a product I haven’t used before is pre-stain or wood conditioner.
When I see discussions about wood stain, it’s about 50-50 whether people recommend using pre-stain or not. Not necessarily the opinion of experts, but people like me.
And as someone who doesn’t buy products if I don’t need to, I’ve never used pre-stain.
However, this demo changed my mind.
A pre-stain or wood conditioner is the first coat before the stain. It adds a layer to even out the appearance of the stain.
This is so you don’t get a blotchy or patchy look.
And is particularly important on surfaces such as bannisters or handrails. Where you have grain from both the top and side of the wood. These areas naturally absorb the stain differently.
Gel stain is a great option for stain as it doesn’t sink in. Just look at this beautiful makeover!
A pre-stain neutralises the difference between these areas.
And while I knew this, I hadn’t tested it myself. Until I got the chance to do a side-by-side demo.
This hedgehog has a layer of pre-stain on the right-hand side.

With red and yellow wood dye and brown wood stain over the top.
Just look at how even the yellow and red, especially, look.
I’m not sure what this hedgehog was made of, not solid wood. But it was helpful to show individual lines of the dye.
Much more consistent and even.
While I still don’t own any pre-stain or wood conditioner. I might just invest in it for my next stained project.
Did you learn any new furniture painting skills? I always have pages full of notes and it’s great to find out new things.
I have lots more lessons to share with you, so I’ll post a part 2.
Want more tips now? How about these great ones?
Pin it for later – improve your furniture painting skills

Hi there! I'm Rachel Bowyer, a passionate DIY enthusiast with a knack for transforming the old into something beautifully new. With a deep love for furniture painting, refinishing, and the art of crafting. I've been documenting my DIY projects and restoration journey since 2018. I specialise in techniques like decoupage, stencilling, and decor transfers. Join me as we explore the world of creativity and home improvement, one project at a time.
What a great experience Rachel! I agree with your thought of not comparing yourself with anyone. Today I’m about to stain a piece of furniture so I was glad to see you do not use pre-stain. Now I don’t have to go out and buy another product.:) -Maria
Yes it’s all about getting the best result with the fewest products. Please share when it’s done!
I love Annie Sloan! It looks as of you learned a ton of new tips, and skills and I am looking forward to seeing how you use them on your future projects.
I did, I’ll share some more soon and then onwards into using them in real life.
How exciting that you got to meet Annie Sloan! I love her paint! Thanks for sharing your knowledge with
us!
Hi Rachel.
This is a great post. I have wanted to try Iron Orchid but haven’t. Great that yu met Annie in person. Must have been an awesome experience!
Pinned