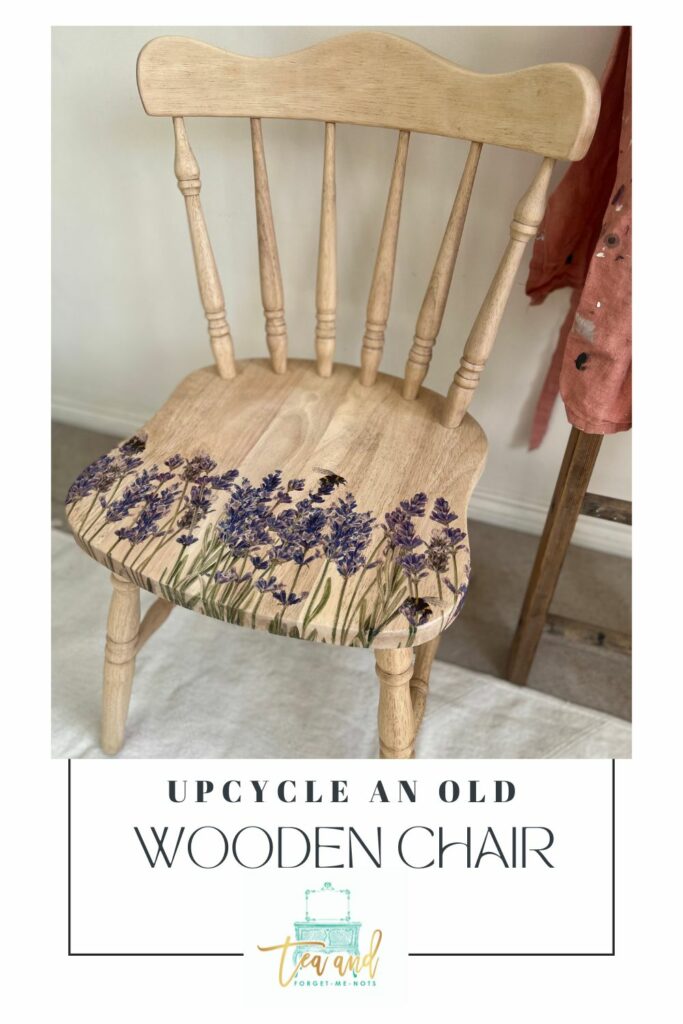
How to upcycle an old wooden chair with a furniture transfer in 4 steps
Looking for a makeover to upcycle an old wooden chair? Here’s how you can give it a new lease of life in 4 steps with a furniture transfer.
I got two old wooden chairs from a free garage sale in my neighbourhood. I got these alongside this wooden folding chair and table set, what a great find! Garage sales can uncover all kinds of treasure.
A thrift store or charity shop are often great places for random chairs too. And a low-risk way to use your creative ideas to give furniture new repurposed life.
I planned to use chalk paint to refinish the wooden chair. I pictured a fresh coat of paint and a grain sack type of stripe. Something cute to give it a new life.
The chairs had seen better days. The varnish was chipped, especially on the back of the chair.

So I thought about what DIY project I could do with an upcycled chair. It would be fun to make a statement dining room chair. Something with a wow.
This post includes gifted products and affiliate links so you can easily find the products I use myself and recommend to friends. If you purchase these products, I may earn a small commission at no extra cost to you.
How to upcycle an old wooden chair with a furniture transfer in 4 steps
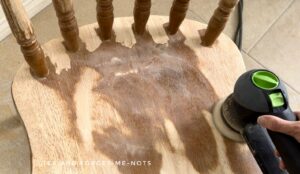
Step 1 – sanding
The first thing I did was to sand down the entire chair. I intended to scuff sand and rough up the surface before applying paint.
But as I started sanding back, I could see the lovely natural wood underneath. Despite my better judgement, I kept on sanding.
The good news is that the easy way to repurpose old chairs is just to paint them. But I thought a great idea would be to give this old furniture a real refinishing treatment. Starting from the inside.
If I had known how long it would take to sand the rough edges back to natural wood, I may have stuck with the painting plan.
At first glance, the 100 grit sandpaper was cutting through the finish quickly.
However, it was all the little bits and nooks and crannies which were my undoing. Hours and hours of sanding.
I used many different things. I started with my electric sander. Used a thin belt sander between the spindles. Then wrapped sandpaper around rubber pads. I used sandpaper folded in half to get into the details.
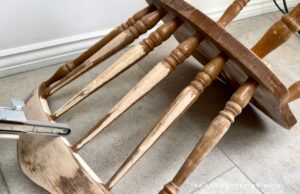
It took around 15 hours to sand this kitchen chair. Shocking.
But throughout the process, I knew it would look great. Sanding it back to natural wood was a great way to revamp this old wooden dining chair.
Step 2 – cleaning an old wooden chair
Secondly, I cleaned the chair.
I spritzed it all over with a tsp cleaner and wiped it back. Then I rinsed off the cleaner with plain water.
However, this raised the grain. Raising the grain is where the wood fibres swell and roughen the surface. Like the surface of the chair had never been sanded smooth.
So while I thought my sanding was over, I did another quick sand with 180 grit sandpaper to smooth out the surface again.
And as you’ll see, there was even more sanding to come…
So, while the wood was looking beautiful. Light, clean and refreshed. It wasn’t yet a statement chair.
Already it had a new lease of life. But it was just nice.
Step 3 – sealing the natural wood
My next step was to seal the natural wood. You can’t leave raw wood as is because it will absorb any dirt and oils that it comes into contact with. It needs a protective barrier.
But I loved the wood and didn’t want it to change too much. A lot of sealers change the colour slightly.
So I used Clear Coat in Flat. A matte finish makes it basically invisible. Perfect to keep my finish intact.
One of the best things I did was put the chair legs on moving wheels.
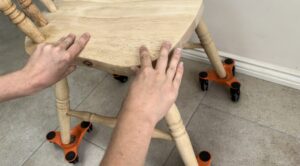
However, they (and I) were the culprit of this disaster!
The difficulty of painting spindles is that you need to constantly rotate the chair. You need access to all sides before each side dries. With the wheels, I could easily rotate the chair to seal the whole spindle quickly.
This also helps you see paint buildup. If you end up with blobs of paint or sealer after it has dried, the only option is to sand it off.
Step 4 – adding a furniture transfer
So, for that wow factor. It might be no surprise to you that I broke out my furniture transfers.
And even for me, who has used many furniture transfers, there’s always a lesson to learn. And mine was a simple one.
Read the instructions.
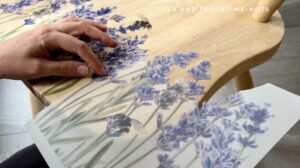
I chose the Lavender & Bees furniture tattoo from It’s So Chic. Firstly, the transfer is beautiful. Flowers and bees are right up my street.
And wouldn’t that make a brilliant upcycling project for a random chair? And add a pop of color to that natural wood.
Another nice thing about this design is that it’s a repeating pattern. So if you have multiple of them, you can continue the same design on a longer piece.
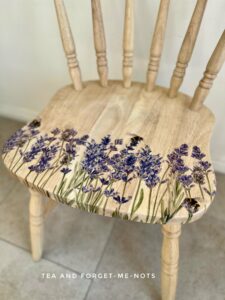
I planned to use the transfer across the seat and over the edges. This way it would look more built into the seat rather than just stuck on top. Fortunately, the transfer was an inch or two bigger than I needed to cover the seat.
Depending on the brand of transfer, sometimes you seal the piece before or after applying it. With It’s So Chic transfers, you seal before.
It felt strange to be sealing a piece after hardly having done anything to it yet. Many hours of sanding aside. It was otherwise the same.
And clearly, I’m no stranger to transfers!
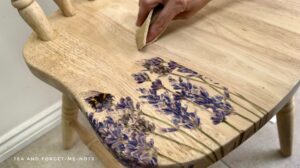
The design was printed across three sheets. I started on the left-hand side to make sure that I would be able to cover the edges fully. If you have a symmetrical design, it’s a good idea to measure where the middle is and start from there.
I applied the transfer by removing it from the backing sheet and smoothing it down on the seat surface. I used a felt squeegee tool which works for applying both transfers and decoupage paper.
Where the transfer went over the edge of the seat, I made cuts into it so that it didn’t overlap too much. Typically you have a halo or border around the image. These usually disappear after applying a sealer.
So, onto the part where I should have read the instructions…
For the first time, I noticed that the backing halo of this piece was the entire rectangle that the image was printed on. Not an outline of the image itself.
After applying a top coat, I realised that the halo wasn’t disappearing… how strange. So, naturally, I then read the instructions. And saw that It’s So Chic recommends cutting around the design first to avoid the halo.
Oops. I didn’t do that.
So I had two choices. Remove the first transfer and try again or sand the edge and see how well it disappeared. It was back to the sandpaper I went!
Fortunately, the edge of the transfer blended back in nicely. And for the two next pieces of transfer, I cut them out individually around the top edge of the design.
Top tip, read the instructions! Who’d have thought?
I sealed the transfer again with a second coat of Clear Coat in Flat. Matte finishes give lower levels of protection but this is enough for a more decorative chair.
Here’s how to get the protection of gloss with the sheen of matte!
Upcycle an old wooden chair – the result
And there it is.
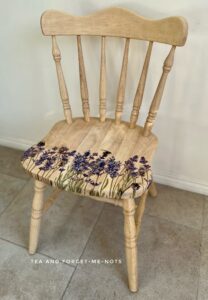
Isn’t it a beauty? I love how this chair turned out. A lot of effort but well worth it. I might not sand another chair back to natural wood any time soon. But it’s an easy DIY idea to reinvigorate old dining chairs.
A low effort way to get this new chairs look would be to paint it white first. A perfect example of how to get the style on a wooden spindle chair without the level of work.

Want to see the process unfold? Watch the YouTube video.
I hope you enjoyed reading about how to upcycle an old wooden chair. If you did, you might also like other great things thrifty in this post.
Pin it for later – upcycle an old wooden chair

Hi there! I'm Rachel Bowyer, a passionate DIY enthusiast with a knack for transforming the old into something beautifully new. With a deep love for furniture painting, refinishing, and the art of crafting. I've been documenting my DIY projects and restoration journey since 2018. I specialise in techniques like decoupage, stencilling, and decor transfers. Join me as we explore the world of creativity and home improvement, one project at a time.
How pretty. It’s wonderful when the project doesn’t turn out how you expected, but better.
Thank you, Rosemary, it absolutely did!
I am loving the lighter furniture trend! Rich and I recently stripped a mirror that I’ll be posting soon! It was a lot harder (and took way longer) than I thought it would be to remove the old stain. It was worth it though! Your chair looks amazing and the transfer adds the perfect touch! Happy day!
Thanks for your kind words, Donna. Looking forward to seeing the mirror!
I’m amazed by what you did to this chair Rachael. It’s so lovely, and special now.
Thanks very much, Maria.
Rachel!!! This is beautiful!!!! I love it so much!!!
Thanks Aliya, that’s very kind.
Very cool! I just happen to have 2 leftover chairs much like this from selling my dropleaf table. They are just sitting patiently in our basement. I have arthritis in my hands pretty badly, so would probably have to forgo all the sanding. Just paint it and do something pretty. Would that work, you think? Thank you for sharing! 💜😊🌻🕊️✌️🌈
Absolutely. In fact, I’d do the same a second time. A lovely pale colour would have a similar feel I think.