The best tool to fit hardware straight
Ever struggled to fit hardware straight? Or want to fit cabinet handles straight but not sure how? Here’s a great tool that makes it easy.
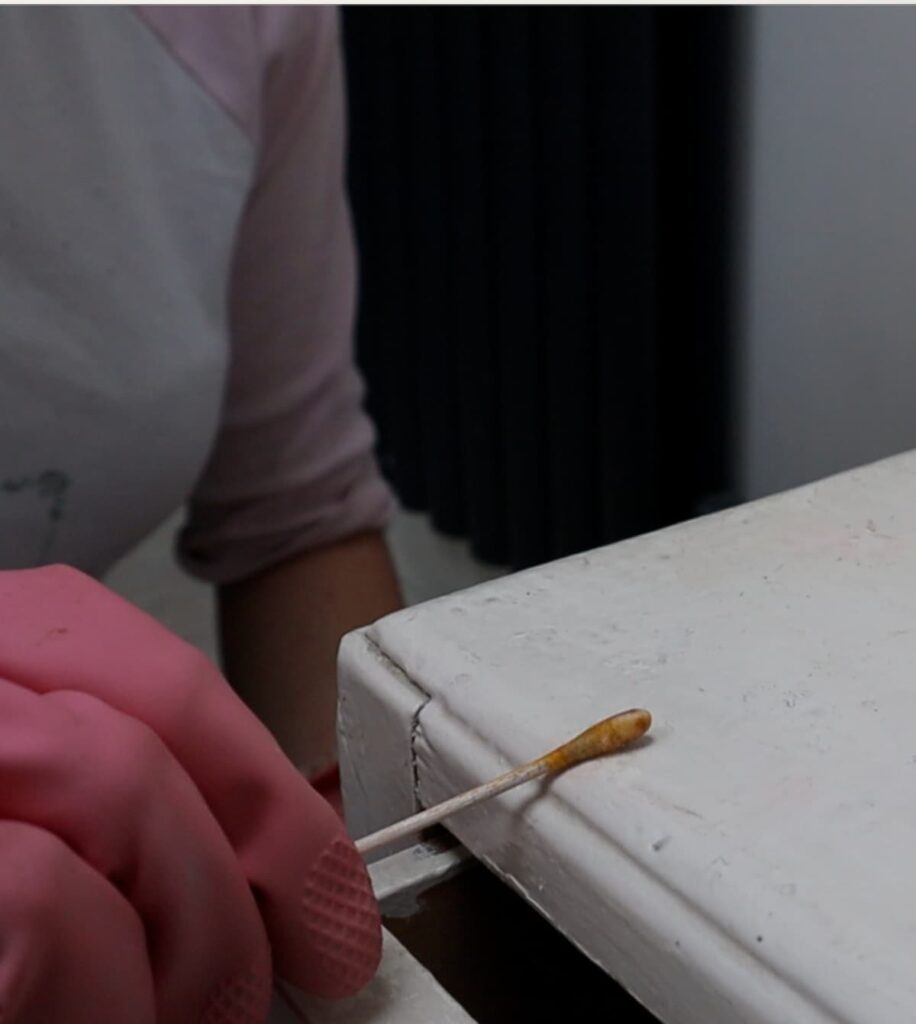
Found yourself sitting back, squinting at your finished piece and thinking, hmm, is that handle wonky? It has definitely happened to me before.
Until recently, I added hardware to a piece at the very end. But I realised, why wait until you’ve finished and then risk getting the hole in the wrong place?
If you make a mistake with placing your handle then you can fill the hole and carry on painting and no harm done. But if you need to move a hole after you’ve painted, that’s a bigger issue.
So, drilling for your hardware at the start is a good strategy if you aren’t confident in your handle hole placing ability.
But what this post is about is a great tool that will give you the confidence to do it at the end.
This post includes an affiliate link so you can easily find the tool. If you purchase this, I may earn a small commission at no extra cost to you.
The best tool to fit hardware straight
I’ve used this tool several times after it was recommended by another DIYer. I’ve shown it briefly in several YouTube video makeovers. Recently, I’ve been asked by a few people to show the full process.
So now the tool has its own 3-minute how-to video.
How to Fit Hardware Straight Video
This blog post and video are not sponsored by this brand or product. It’s a tool I use, like and it might be useful to others.
Personally, I learn best by watching others, which is why I made the video. But if you learn from reading instructions, then this is for you.
How do you go from 1 hole to 2 hole cabinet pulls?
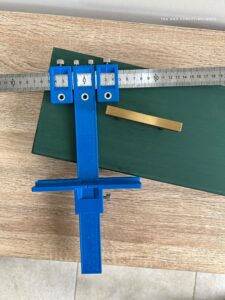
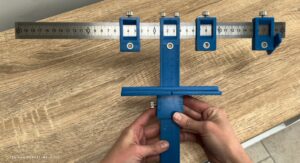
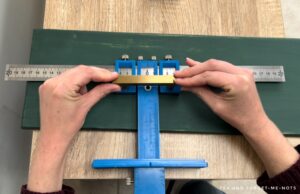
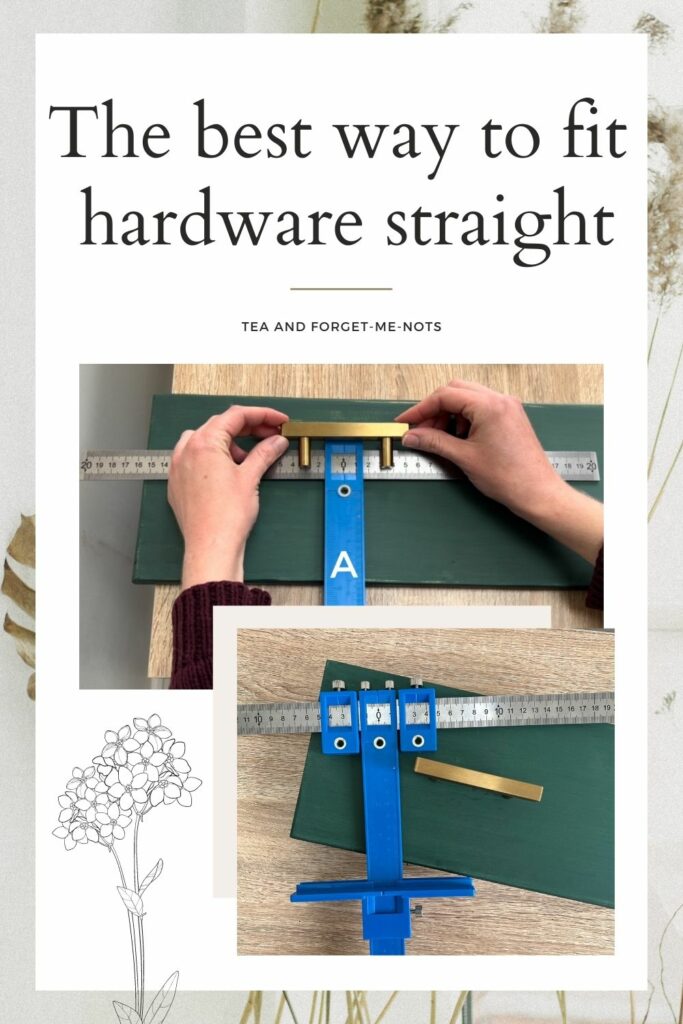
The tool is very basic. The best things usually are. It is made up of a ruler and four sliders which you position to where you need to drill the holes.
This will give you the placement of where to put holes for both a single or double hole cabinet hardware. You might not even need this tool for the single hole hardware. If you can find the centre point of the drawer with a ruler, then job done.
But where this tool shines is with two hole hardware. So, let me explain how it works.
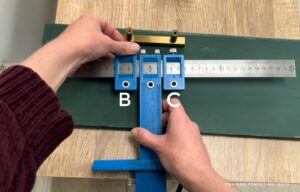
Place the central slider (A) to position 0 on the ruler. If you were to drill a single hole it would be using this slider.
Then take the hardware and use the ruler to measure the distance between the holes. In this case, it is 65mm.
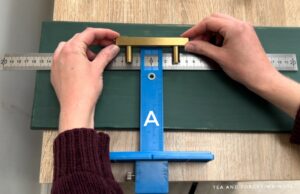
Next, you need to adjust sliders B and C so that the distance between them is 65mm. So, you secure each slider to the right and left of slider A, at half that distance. So slider B goes to -32.5mm and slider C is placed at 32.5mm.
Those sliders are now 65mm apart from each other. And the right distance to make the handle holes.
This is where you want to check your measurements against the hardware. Line the handle against the holes of sliders B and C. If they’re aligned, then it’s ready.
How do you install straight drawer handles?
So you have the drill holes but they won’t be straight just yet. There are two more sliders to move to ensure that you get straight drawer handles.
Slider D makes sure that the holes are in the right position vertically on the drawer. Slider D is attached to the central column of slider A.

This assumes that you want handles centred in the middle of the drawers vertically.
This isn’t always the case. On this recent makeover, the handle holes were off centre, so I needed to make adjustments to allow for that.
But assuming they are centred halfway up the drawer. Use the ruler to work out the halfway point vertically on the drawer front.
Then put a small mark through the hole in slider A. This tells you that the height of the holes is correct as long as you can see the mark through the hole of slider A.
Then use slider D and position it tight against the bottom of the drawer. Make sure that you can still see the mark through the hole of slider A.
Once slider D is secured, the vertical placement of the holes is ready.
Then the final step before drilling. Measure how far in you want the handles placed from the side. Place the tool there and make another mark through slider A.
With the mark at slider A visible, secure slider E tight against the side of the drawer.

Now with sliders D and E secure on the bottom and side, the tool is in the right place. And the holes of sliders B and C are where you will drill your holes.
Note: Slider E is optional. That’s the one that secures the tool to the side. On this pink chest of drawers, I didn’t need slider E because the drawer was too wide to use it on.
Want to know 23 great DIY tools? Get the list!
Drill holes for straight cabinet hardware
If your drill bit is small enough, you can drill straight through the tool without removing it from the drawer.
Personally, my drill bit isn’t small enough to do this. So I make marks through sliders B and C to identify where to drill.
Then simply remove the tool and drill straight down through the marked holes.
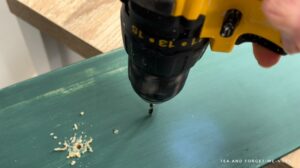
You should have perfectly placed holes.
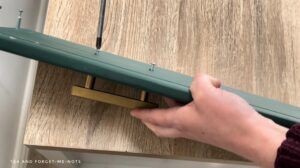
And for the handle on the other side, all you need to do is flip the tool over. Secure slider E to the other side of the drawer and the holes are ready for marking and drilling.
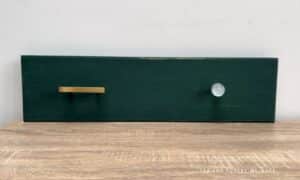
It really is a great tool if you’ve ever struggled to get handles straight.
Sometimes handles can look offset just because you’re looking at them from an angle. But if you don’t feel confident, then sometimes tools like this can give that extra reassurance.
Want more help? I also recommend the FrogTape tip that I shared in my nautical chest makeover.
If you have any tips on how to place handles and fit hardware straight, please share them in the comments.
If you loved this guide, you’ll love these posts too:

Do you have this tool?
I love seeing what you do. Please mention @teaandforgetmenots and share your creations with me!
Pin it for later – best way to fit hardware straight

Hi there! I'm Rachel Bowyer, a passionate DIY enthusiast with a knack for transforming the old into something beautifully new. With a deep love for furniture painting, refinishing, and the art of crafting. I've been documenting my DIY projects and restoration journey since 2018. I specialise in techniques like decoupage, stencilling, and decor transfers. Join me as we explore the world of creativity and home improvement, one project at a time.
I didn’t know about this tool. Thanks for sharing great information too! It’s on the list to find.
Brilliant, I hope it helps.
Wow! This tool makes the job of adding hardware so simple! Great tutorial! Thanks for the tips! Donna
Thanks Donna, it really is great!