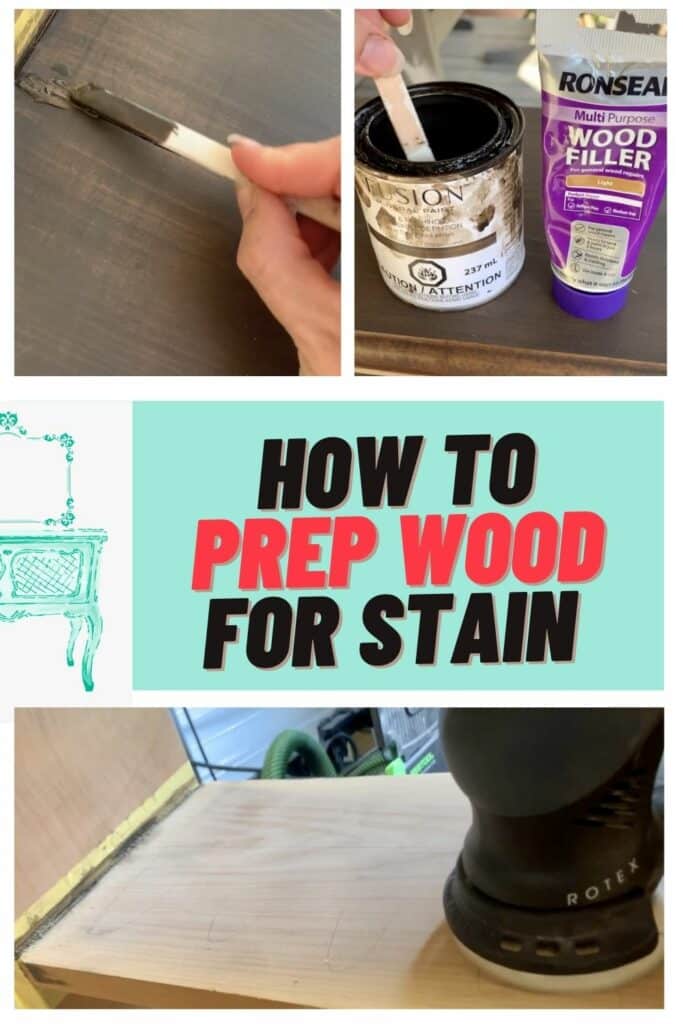
Three ways to prepare low quality wood before using stain
If you stain imperfect wood that has cracks or oil spots, it won’t ever look good. These tips will fix the issues and help make it beautiful.
Can you stain imperfect wood? Yes, you can. Sometimes wood has issues like marks or cracks on it. And the only solution is to paint it. Or far worse, throw it away.
Stained wood is often beautiful. But if you stain wood with imperfections without a few key steps to help, then it won’t look great.
So, here are a few tips to get your wood as perfect as possible before staining.
Like tips and tricks? Here are six more!
This post may include affiliate links so you can easily find the products I love and use myself. If you purchase these products, I may earn a small commission at no extra cost to you.
Three ways to prepare low quality wood before using stain
1. Prepare imperfect wood with… a pencil
Sanding
This isn’t just the usual advice that you should sand, but also a tip as to how to do it well. Sanding is really important because stain highlights scratches and imperfections in the wood.
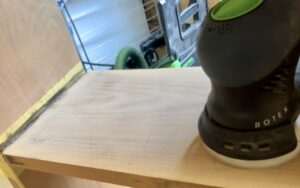
See swirls after sanding? Those are left by the sander. You need to continue sanding until those are removed as the sander hasn’t done its full cycle yet to remove its own marks.
But how do you know if you’ve done an even job?
Here’s the trick!
Use a pencil and make lines over your piece of wood. You can cover it even more than this for a really even sand.
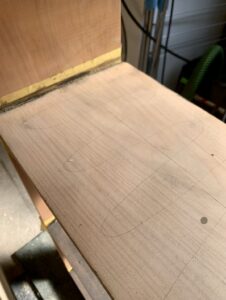
Sand the piece until the pencil lines disappear everywhere. Then you know you’ve sanded the piece evenly. If you have dents where you pressed too hard, add more pencil lines and go again until it’s really smooth.
So is your wood even and ready to stain? How do you know?
You can test it!
2. Prepare imperfect wood with… white spirits
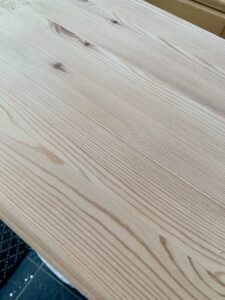
Wiping white spirit (mineral spirits) onto the piece shows how the stain will look.
This works by the white spirit temporarily changing the colour of the wood which highlights the flaws. If there are areas left to sand more or marks you didn’t see before, this is the test that will tell you.
Confused by all the different names for products? Check out the jargon-busting glossary.
Bonus use for white spirits
White spirits also work well for removing oil spots. These spots mysteriously appeared on a bookshelf I worked on (which turned into a beauty).
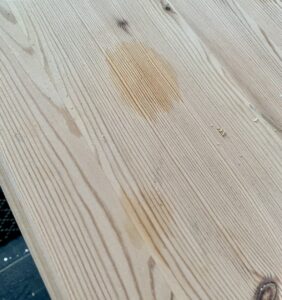
I rubbed white spirits into the spots with a cloth three times and let it dry between applications. Miracle fixer!
3. Prepare imperfect wood with… wood filler
Some people think that you can’t stain wood if it’s cracked. The only solution is to use wood filler and paint over it.
But here’s a tip to fill the crack and still use stain after.
Just as with paint, imperfections are more visible after staining. A crack might not even be visible until you’ve done the first coat of stain but it will look darker than the surface because of the light.
But there is an easy way to fill the crack and still use stain!
Want to know 23 great DIY tools? Get the list!
How to still use stain
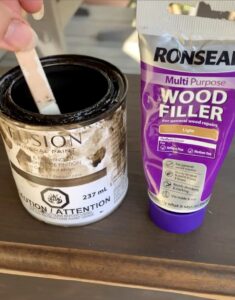
Firstly, mix the stain and wood filler together so it’s even throughout. The key is to remove the original colour of the wood filler so that the stained filler will blend with the piece.
Fill the crack and go above the surface slightly. So, when you sand it back there’s no gap between the crack and the surface.
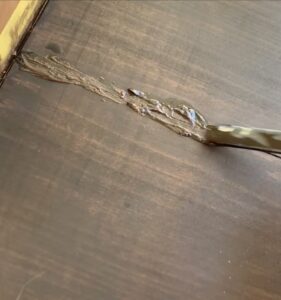
Here’s an example of two cracks. The first crack is filled in but not sanded back. The bottom crack hasn’t had anything done to it yet. There’s a huge difference in how visible they are.
But maybe you like the cracks and the shabbier look, here’s how you can distress furniture mess-free.
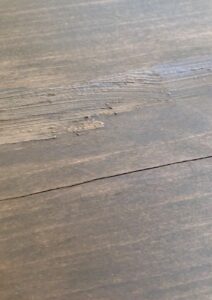
And here’s the bottom crack during the sanding process. The stain has done a great job of covering up the crack. It blends in with the lighter grain in other places on the wood.
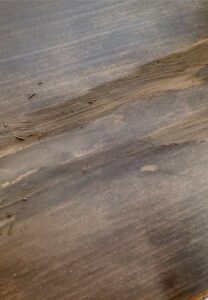
When it dries fully the cracks are much less visible.
While wood filler comes in different colours, the chances of matching your wood or stain perfectly are low. So, it’s a simple trick but works really well if you want to avoid painting your piece.
I hope these tips show you that there are ways to improve your imperfect wood.
Did you know that a pencil, white spirits and wood filler and stain could solve these problems? If you have any other tips, please share them below.
If you liked this post, check out my other tips posts and see what you discover!
Interested to know the best brushes for stain? Here’s my ultimate guide to brushes.
Ever struggle to get paint lids off? Sometimes they’re completely stuck! Here’s how to solve the problem…

Hi there! I'm Rachel Bowyer, a passionate DIY enthusiast with a knack for transforming the old into something beautifully new. With a deep love for furniture painting, refinishing, and the art of crafting. I've been documenting my DIY projects and restoration journey since 2018. I specialise in techniques like decoupage, stencilling, and decor transfers. Join me as we explore the world of creativity and home improvement, one project at a time.
Great tips!! Sure beats buying different wood! 😂
Yes, or just giving up!
Oh wow I never knew about the trick of using spirits. Thanks for sharing
Excellent! Glad to have helped.