Christmas Paint Night Ideas – Fun and Easy Bauble Designs
Looking for Christmas paint night ideas to have fun with your friends? Here are 13 easy bauble ideas to get creative.
These are simple designs to play around with. Whether you’re artistic, into social artworking or just want an easy painting activity with family members.
You could work together to make a set of Christmas decorations or play around with a new hobby and create a one-off ornament for your Christmas tree.
Thanks to Dixie Belle Paint for sponsoring this post.
This post includes gifted products and affiliate links so you can easily find the products I use myself and recommend to friends. If you purchase these products, I may earn a small commission at no extra cost to you.
Christmas Paint Night Ideas
Fun ideas for painting baubles
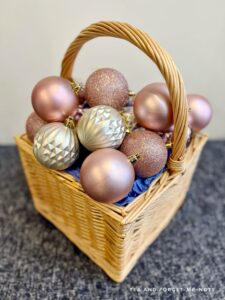
I had an old set of 7cm pink and gold baubles. Some shiny, some glittery and others with ridges. All of these make a great place to start as a blank canvas.
There’s also a bonus NO PAINT idea at the end because it was too cute not to include!
Painted bauble – design 1
This is one of my favourite designs. It’s so simple but with a dramatic result. I painted a set of the baubles white to start, using the colour Fluff. This gave me a matte surface for the paint to apply nicely on top.
I then added one scoop of Sea Spray, which is a texture additive. You simply stir it into the paint until it is well mixed in and has a thick consistency.
Here’s how to use sea spray to create an underwater style chest.
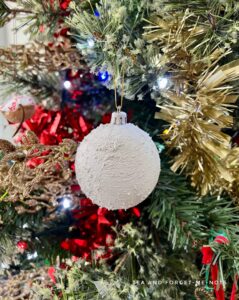
I then added one coat of this all around the bauble. Dabbing it on with a round brush.
And that’s it. I think this looks like a snowball. Isn’t it cute?
I almost even created an entire set of these. But that wouldn’t make for a very interesting blog post on a variety of ways to paint them.
Painted bauble – design 2
A paint party wouldn’t be much fun without a paint pour! To start I painted the base of the bauble with two coats of Palmetto Green. That gave it the festive feel to kick off.
For the shimmering accent, I added a silver metallic paint called Steel Magnolia.
I poured it on top of the bauble and let it flow around the sides. Not covering it perfectly. Then I used a hairdryer to blow some texture into the paint.
What’s great is that it looks completely different from different angles. On one side it’s an almost smooth coating. Another side’s like a rocky moon.
It’s a fantastic way to create different shapes. And with a tool, that a lot of people will have in their homes already.
Painted bauble – design 3
This one was a lot of fun to make. It could get messy…
I started by covering the bauble with black paint, called Anchor. This is a really dark black and makes a great solid colour. Although not a classic christmas colour, it looks impressive.
Time for some festive shimmer on top of the black background. I used two different metallic gold paints, Gold Digger and Wedding Belle.
I got an old toothbrush and used the bristles to spray flecks of gold paint on. Some parts came out as small dots, others blobs of simple lines.

It was lots of fun not knowing how it was going to turn out. With this, you can release your creative side. If you chose dark blue with bright yellow you could create a starry night.
This type of abstract painting makes for easy Christmas decorations or a fun art project.
Painted bauble – design 4
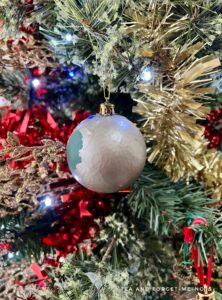
This design is a great choice for a classy bauble with beautiful results.
First, I used Fluff for the white paint as a base for the bauble.
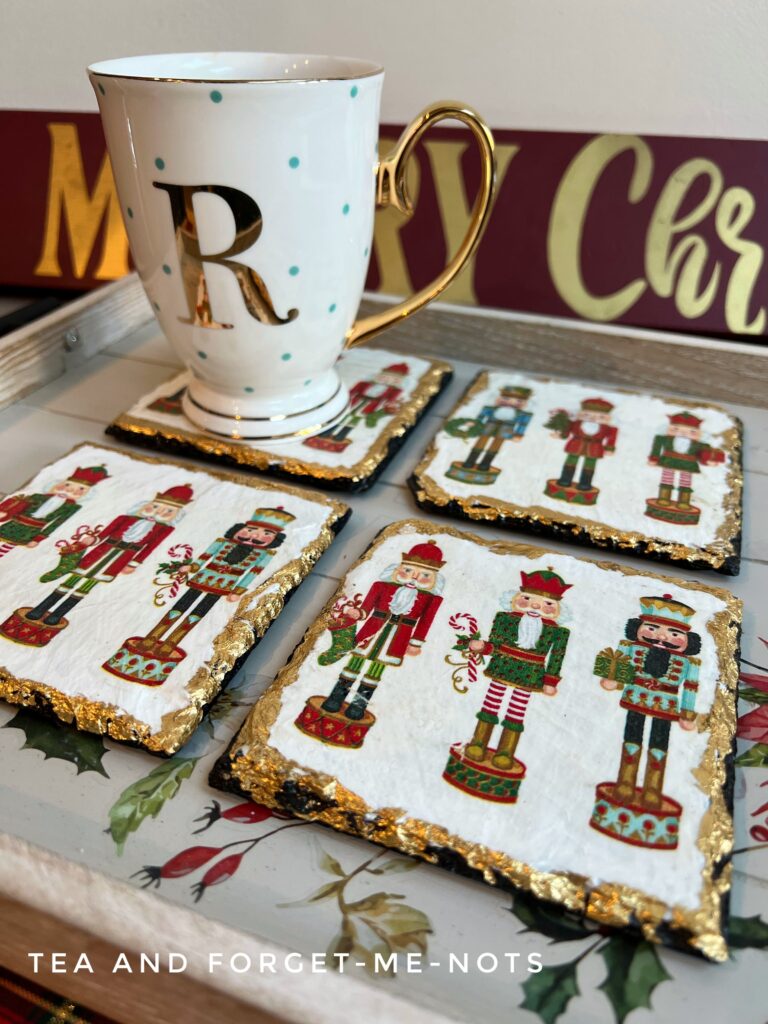
Then I used an image of holly from this Holly and Evergreen Christmas transfer. There were a few different sizes of images of the Christmas season that I could have used. I chose this one as it fit the bauble well.
I also used this transfer to update an old key hook into a festive tray.
The first step is to cut out the holly.
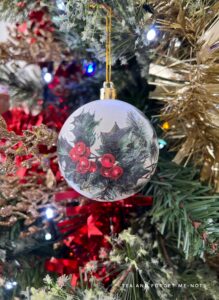
You have to be a little more careful when applying transfer paper around a spherical object as it doesn’t naturally fit. So I then cut into the image so that it would wrap around the bauble better.
I rubbed over the image to attach it to the bauble. The important step is to attach a little bit at a time. As it’s not designed for a ball shape, the easy way is to attach one section and then slightly overlap the next.
This is a great way to have a beautiful painting.
Painted bauble – design 5
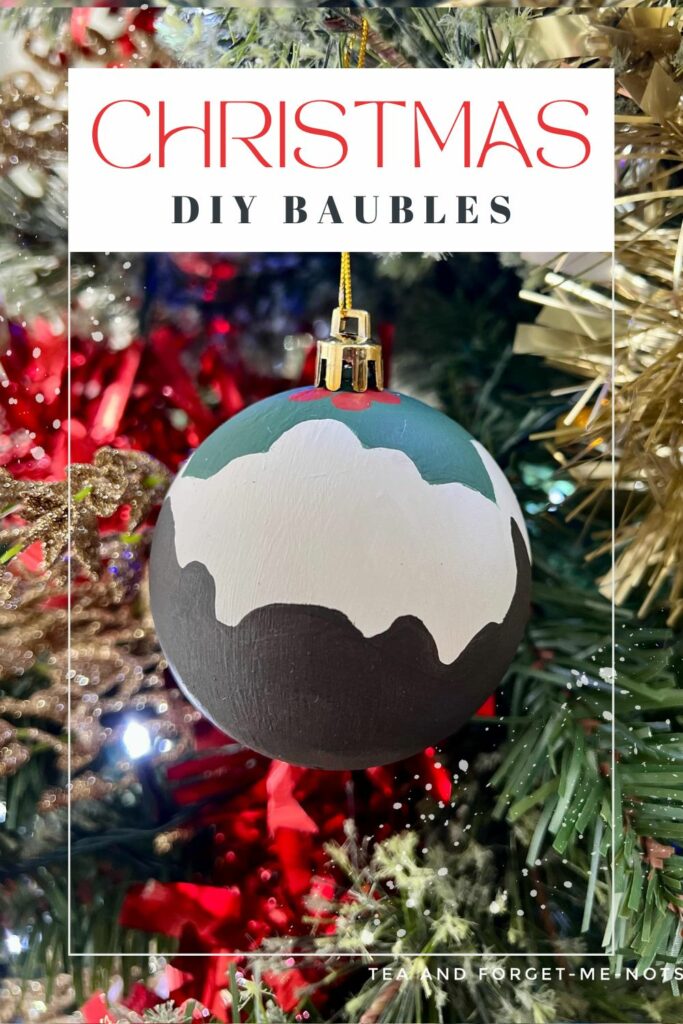
Based on the bonus ‘no paint’ baubles at the end, I knew I wanted to create this one. A Christmas pudding!
This is actually a fun Christmas design that I paint on my nails.
I started by painting a coat of white Fluff across the bauble. Then I added a wiggly line and filled the bottom with the brown colour, Coffee Bean.
I needed two coats of Coffee Bean for this solid coverage.
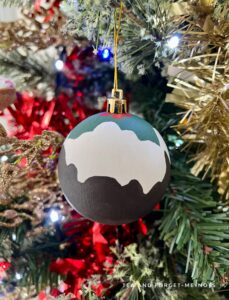
I then painted two holly leaves in Palmetto Green. And for the berries added a pop of colour to the top with Barn Red.
There are so many ways you do this design. With a faux holly leaf glued to the top or adding shimmery glitter to the white cream layer.
I love the simple matte look, cute and fun.
Painted bauble – design 6
Another non-traditional colour scheme. And one best seen in person. This one catches the light!
This design was on the bauble that had a harlequin pattern. Great for adding an extra dimension.
I painted the bauble in Anchor, the dark black. Which already made it look dramatic and cool for a tree decoration. But we could make it a little more sparkly.
I added a coat of Pearlescent Glaze over the top. You dab the excess off with a cloth. The glaze sits in the details and grooves and makes them stand out more.
Then for the final bit of contrast, I dabbed the shiny red Garnet, on a few of the edges. As the bauble moves, the light bounces off the shapes and shimmers and looks stunning.
Painted bauble – design 7
Back to my snowball design. This is just one step further. Now you can add the personal touch.
I used some cookie letter stencils and added some words on top. I chose ‘Merry Christmas’ and painted them in Barn Red and Palmetto Green.
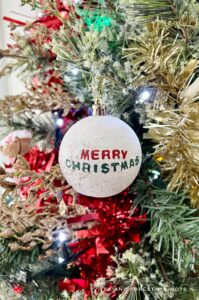
As I had created the rough surface, the stamps didn’t transfer the shape perfectly. So, I touched up the lines with an artist’s flat brush in a few places.
You could write someone’s name or a special message. Personalise them for your home or as a great gift.
It’s a fun way to add something personal without the skill level of a professional artist.
Painted bauble – design 8
This one puts the DIY in a DIY style party. It’s a case of painting until it looks pretty. And of course, when that is, is your opinion.
The base of this bauble was a glittery one so it gave it a natural texture. I painted the base black. An easy canvas to start from.
Then I cracked out the paints! I worked with Malachite, an emerald green clay paint, white Fluff, and a bright pinky red called Bougainvillaea.
Then I added a splash of Steel Magnolia, Gold Digger, and Garnet which is a Gemstone Mousse.
It turned into a planet! The first time I started curving the lines, it reminded me of space.
The colours are a pretty combination but you could make them as bold or as subtle as you like.
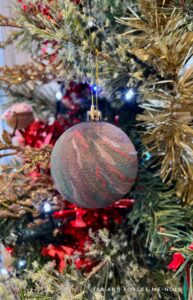
Painted bauble – design 9
For this bauble, I started with a base of Barn Red. Classic colours for Christmas painting ideas are red and gold. A beautiful pairing.
So, I decided to add a whole lot of them both!
I poured Gold Digger onto the top of the bauble and let it drip down the sides. Then I added Garnet on top for them to run together. This was the messiest bauble that I made!
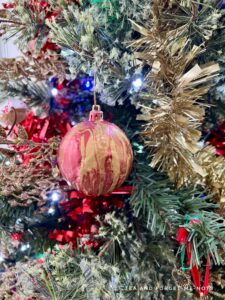
But I was able to use the paint that dripped onto the paper towel on the floor and add it back to the top of the bauble.
It gives an oil-like tie-dye feel to it, but with festive colours.
Painted bauble – design 10
This design needs additional craft supplies. Wooden scrabble-themed tiles!
I did this design on one of the pink glittery baubles. And painted one coat of Palmetto Green. This gave it an even, but not solid coverage over the glitter. Exactly what I wanted.
That left a green base with an occasional shimmer in the light.
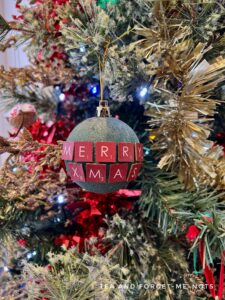
Then I spelled out ‘Merry Xmas’ in craft tiles. I had green and red tiles but red would stand out better on a green background.
By spelling out Xmas, rather than Christmas, you can see the whole word from one angle. I attached them with a wireless hot glue gun.
Painted bauble – design 11
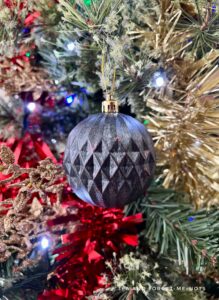
The final painted design. This one uses the harlequin-shaped bauble.
I painted the base with the beautiful Malachite green. Then filled in the top and bottom row of the diamonds with Gold Digger metallic paint. I did two coats of Gold Digger.
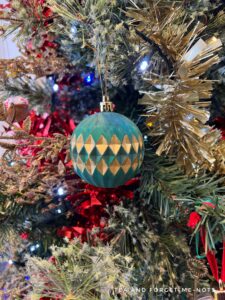
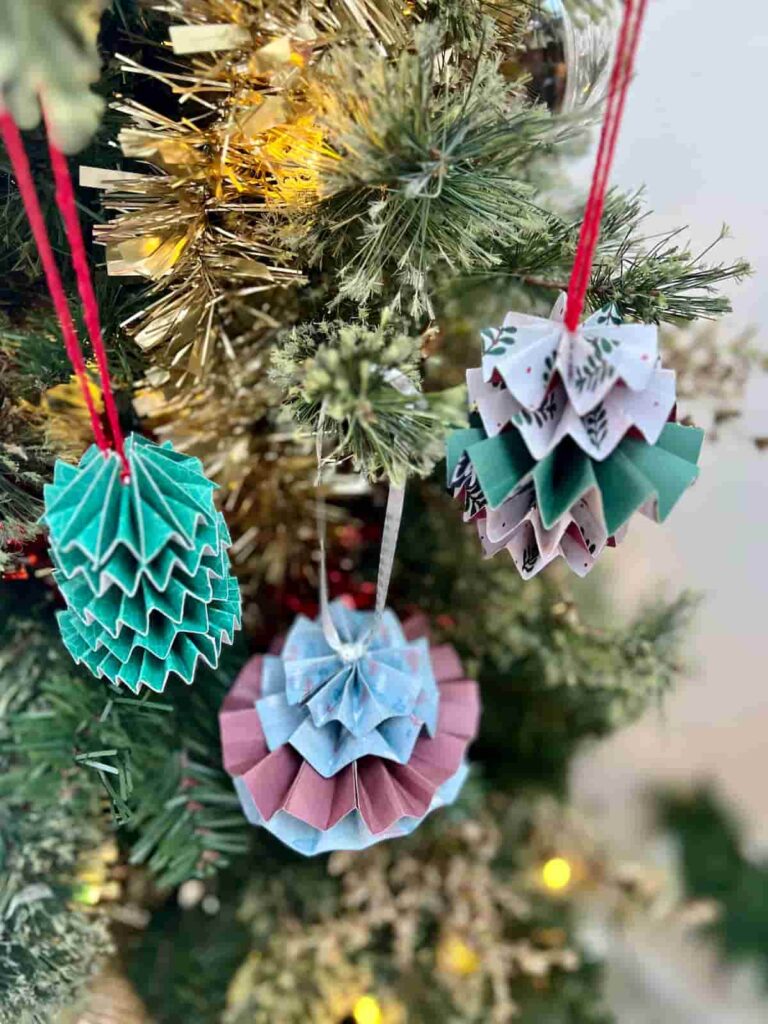
I love the contrast between emerald green and bright gold. The shapes remind me of classic folded paper Christmas ornaments.
Simple but it really stands out.
And my two bonus baubles…
(Almost without using any paint!)
This idea was entirely inspired by Julie from Sum of Their Stories. We did a blog hop together recently and her project was a pompom bauble.
You can even see my comment on her post as to what I wanted to make from having seen hers. And unlike most things I see and want to try, I actually did this one!
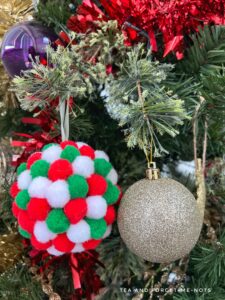
The first pompom bauble I made used the classic colours of red, white and green. It’s as simple as it sounds.
You use a hot glue gun to attach each pompom. I started at the top and worked my way around and down systematically. Placing them tight together so as not to leave gaps.
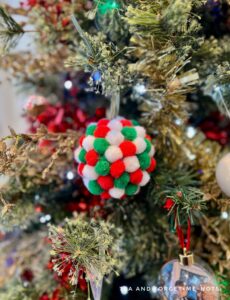
The larger the pompoms, the fewer you’ll need. I used 2cm pompoms and estimate that this took about 50 to cover this 7cm bauble.
And a 7cm bauble it is definitely not anymore! This is how much bigger it is in comparison.
Then the bauble that was inspired by the original. A Christmas Pudding!
But, I didn’t have any brown pompoms. So, the easy solution was to paint them.
I used the brown paint, Coffee Bean, mixed with a little water. Then painted the dark blue baubles. But the mixture made the brown paint look black.
So, I then used the yellow baubles and that kept the chocolatey colour intact.
I squeezed out the excess paint with a paper towel and used a hairdryer to dry them off.
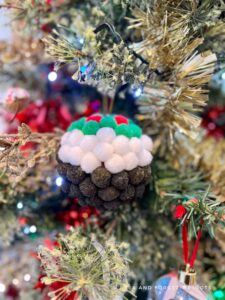
Then for the design. I started with a few red pompoms for the berries at the top.
Then surrounded them with green for the holly. Then followed the design down with the white pompoms for the brandy sauce. The pompoms naturally gave a wiggly line so I didn’t need to create one.
And finally the brown painted pompoms at the bottom for the pudding.
For Christmas art projects, these were great fun. And something everyone can get involved in. I’m tempted to make more with the brightly coloured pompoms left in my collection.
If you loved this project, you’ll love these Christmas paint night ideas too:
Did you make this craft?
I love seeing what you do. Please mention @teaandforgetmenots and share your creations with me!
Pin it for later – Christmas Paint Night Ideas

Hi there! I'm Rachel Bowyer, a passionate DIY enthusiast with a knack for transforming the old into something beautifully new. With a deep love for furniture painting, refinishing, and the art of crafting. I've been documenting my DIY projects and restoration journey since 2018. I specialise in techniques like decoupage, stencilling, and decor transfers. Join me as we explore the world of creativity and home improvement, one project at a time.
Hi Rachel! I love the idea of having a paint night and decorating ornaments! It would be so much fun and everyone would have a keepsake from their time together! Thanks for all the ideas on how to paint the ornaments! I hope you have a very Merry Christmas!
Thanks, doesn’t it sound fun? Works just as easily with children too.
They all look fabulous! I have bookmarked this so that I can make a few next year. Merry Christmas!
Thanks, Elizabeth, Merry Christmas!
Hi Rachel! Wow! I am so impressed with all the designs. They look amazing. I love the sea foam spray ornament and the transfer. Super creative!! Pinned!
Thanks, Anna, I love the snowball too!