Easy Christmas Painting Ideas on Wood for Festive Home Decor
Want to create some affordable home decor for the holiday season? Here are some easy Christmas painting ideas on wood for festive home decor.
Handmade and homemade items are always so special. Whether you keep them for yourself or share them as gifts.
So, here are a couple of simple ideas to add a festive flourish to your decor…
Missed last week’s Christmas craft? Catch up here!
This post includes gifted products and affiliate links so you can easily find the products I use myself and recommend to friends. If you purchase these products, I may earn a small commission at no extra cost to you.
Thank you to Dixie Belle Paint for sponsoring this post.
Easy Christmas Painting Ideas on Wood for Festive Home Decor
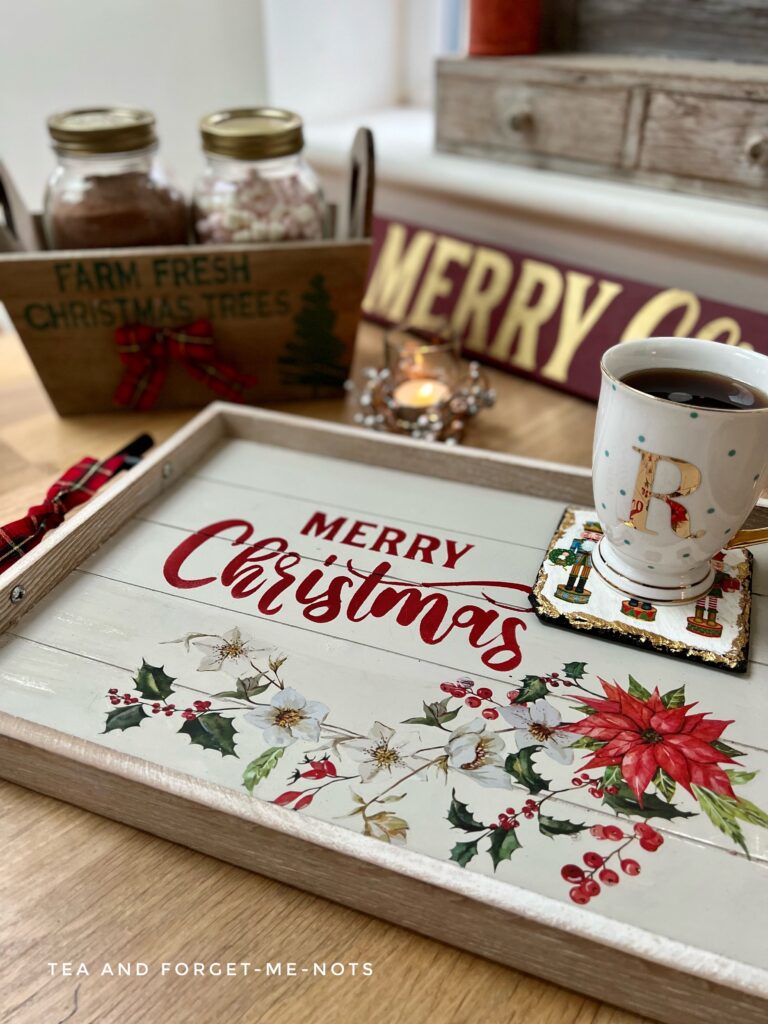
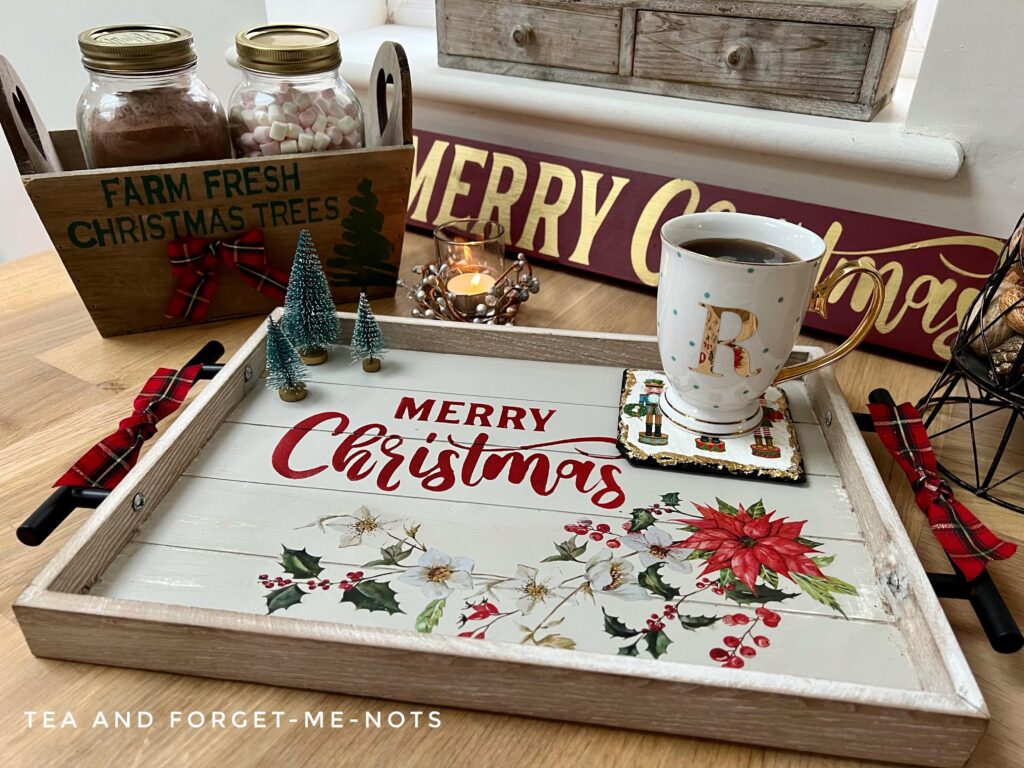
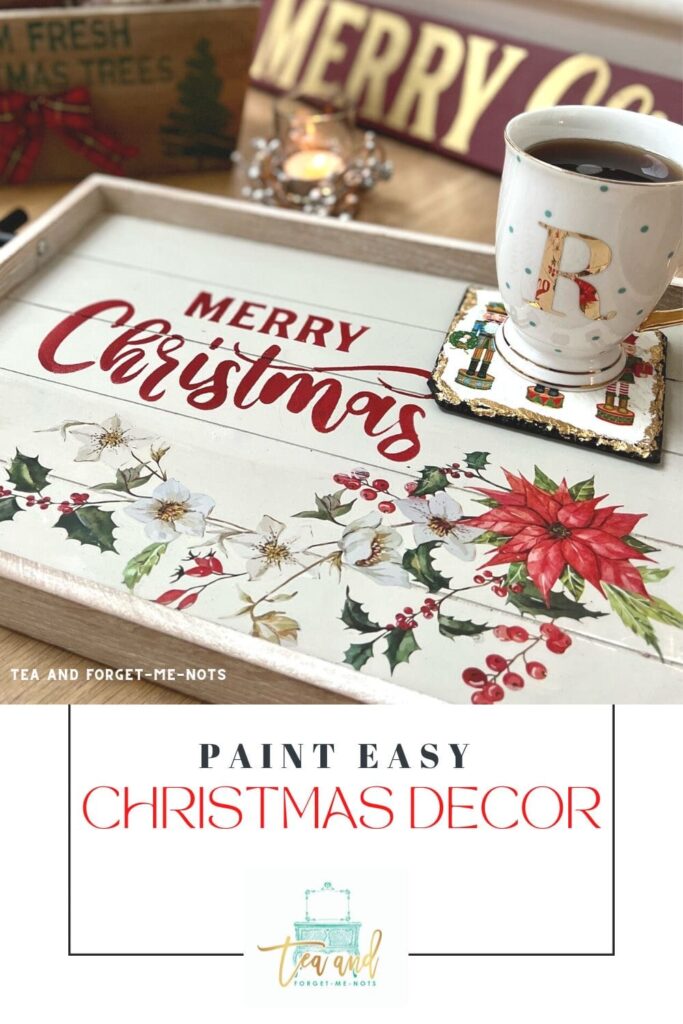
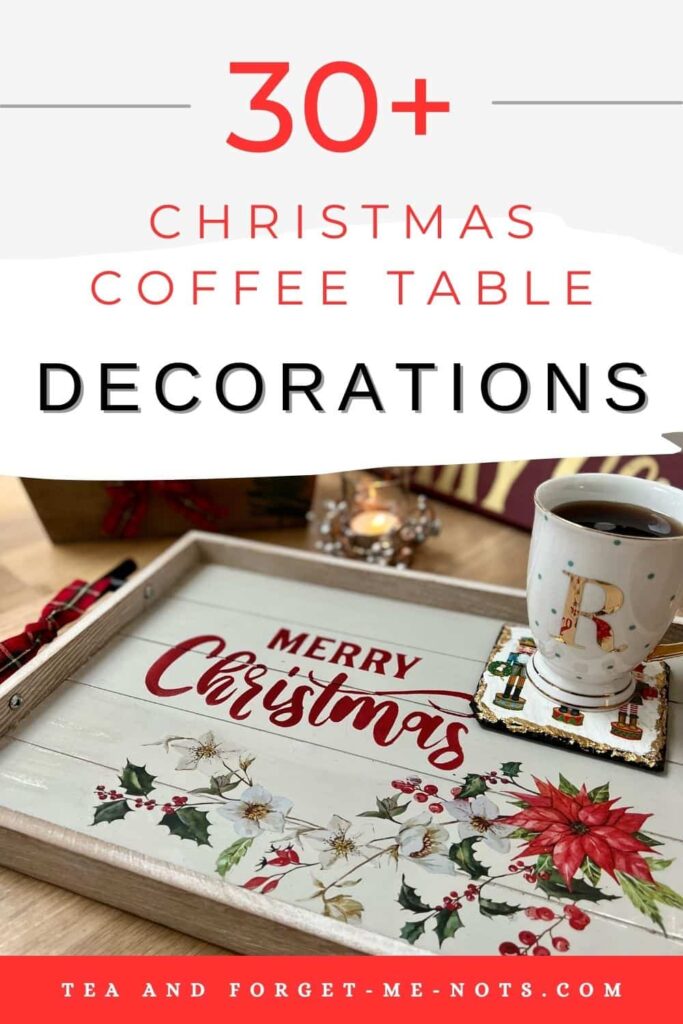
I’m sharing two Christmas painting ideas on wood today. Both with items from a charity shop. You can use almost anything as your canvas to create Christmas decor.
To start, I had this hilarious key hook sign.
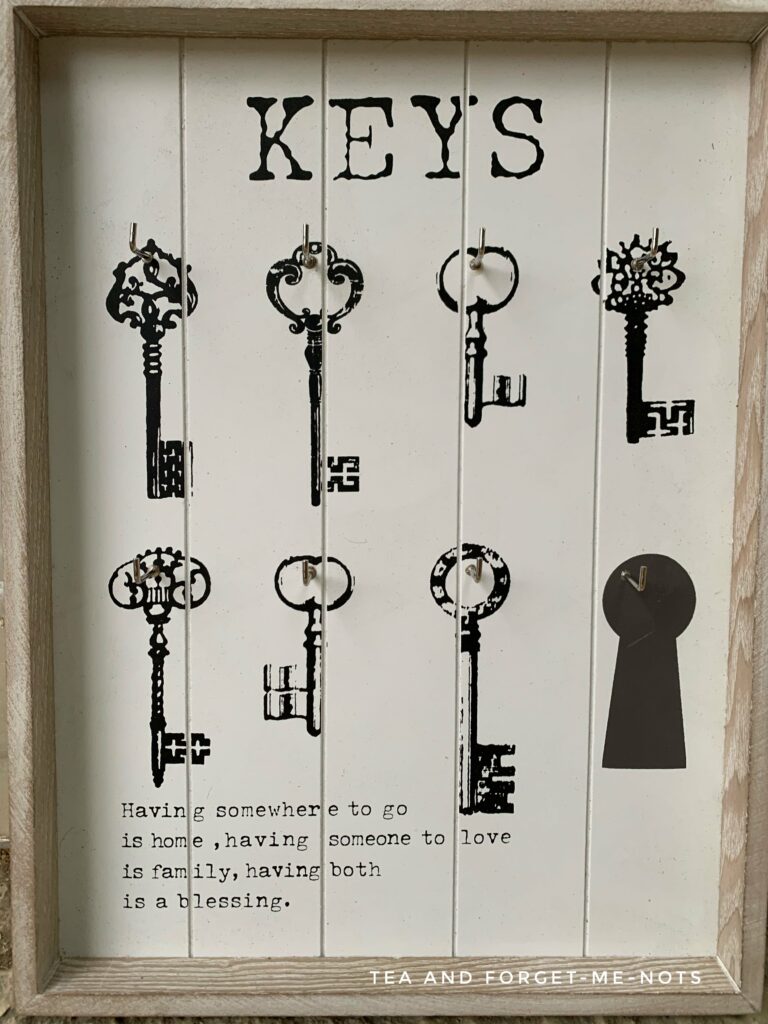
Hilarious because I think someone forgot to change the placeholder image on the bottom right. Or maybe it was meant to look like that…
Either way, I bought it in a charity shop for £2.50. My plan was to turn it into a tray for festive treats!
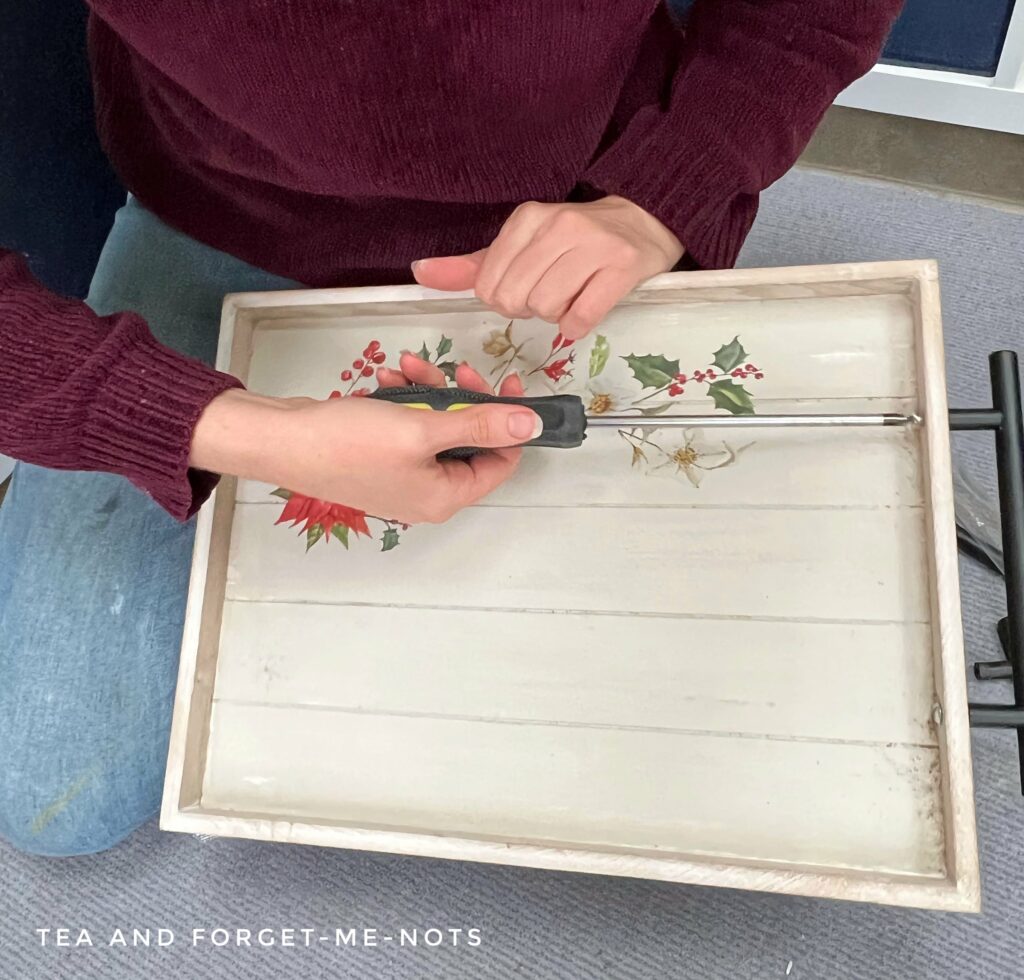
I started by removing the hooks. Which easily twisted out of the wooden backing.
Then I painted the bottom of the wooden sign with a colour called Dried Sage. Leaving some edges distressed for a little rustic charm.

White paint would also work well as a contrast to the Christmas colours. But the Dried Sage made it all a little warmer and cosier feeling.
I used wood filler to hide the small holes from the hooks. And touched up those areas with a little paint.
Wood a little worse for wear? Here’s how you can even make MDF look nice!
Create Christmas decor with a transfer
Then to make it a cute Christmas craft idea!
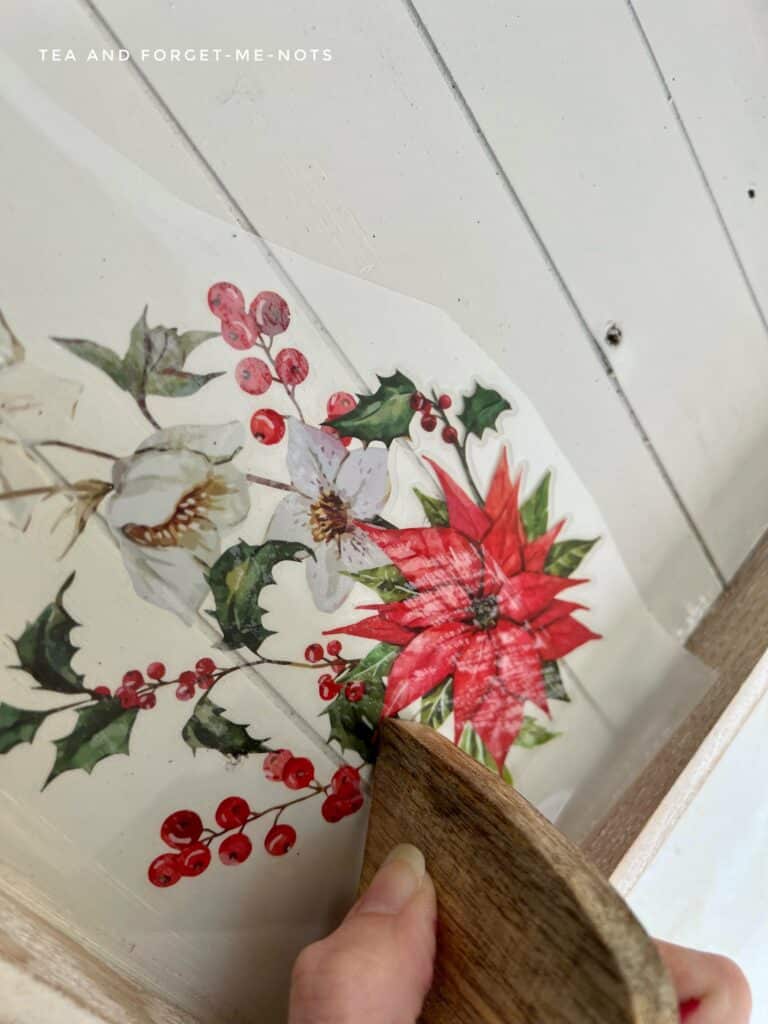
I chose a set of flowers from the Evergreen and Holly transfer. Which is a festive transfer with a Christmas wreath, cardinal birds and poinsettia flowers.
Here are the detailed steps of how to apply a transfer perfectly.
I applied the piece by applying pressure with a wooden tool. You can see where it has attached where the colour changes on the red flower.
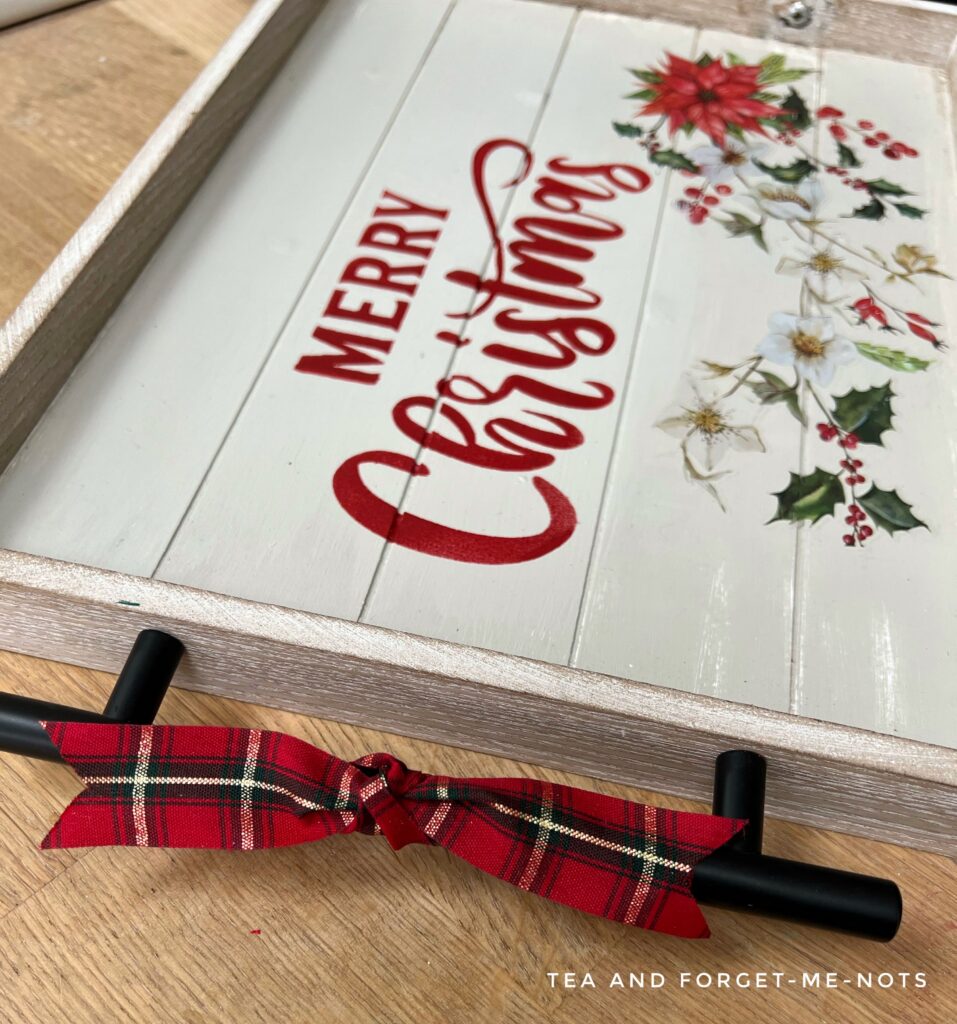
The next step was to add some Christmas words. I created ‘Merry Christmas’ with red paint, called Barn Red. Where the gaps between the wood dipped down, I used a fine artist’s brush to fill in the space.
Paint markers or paint pens would also work for writing words if you have a particularly steady hand. That’s an option if you don’t have a stencil with the words you want to say.
Then I sealed the Christmas wood sign tray with a clear coat.
Although it has the look of rustic decorations. As it will have coasters and cups on the tray, a clear coat is the best material to ensure that the paint and transfer stay intact.
Then finally, how to turn this Christmas sign into a tray. I added some black handles. These are actually reused old handles from my kitchen units.
I used bolt cutters to trim the screws that came with the handles. Then screwed them into the wood frame.
To make them more festive, I added tartan or plaid ribbon to the handles. I tied them on and then cut a triangle shape at the ends.
I love how simple painting projects can make something useful again. It’s what upcycling is all about.
Like when I upcycled this CD tower into something beautiful and functional.
How to stencil on wood
Then onto my second simple home decor project.
I started with this heart-handled old wood basket. I bought it for £1.95, again from a charity shop.
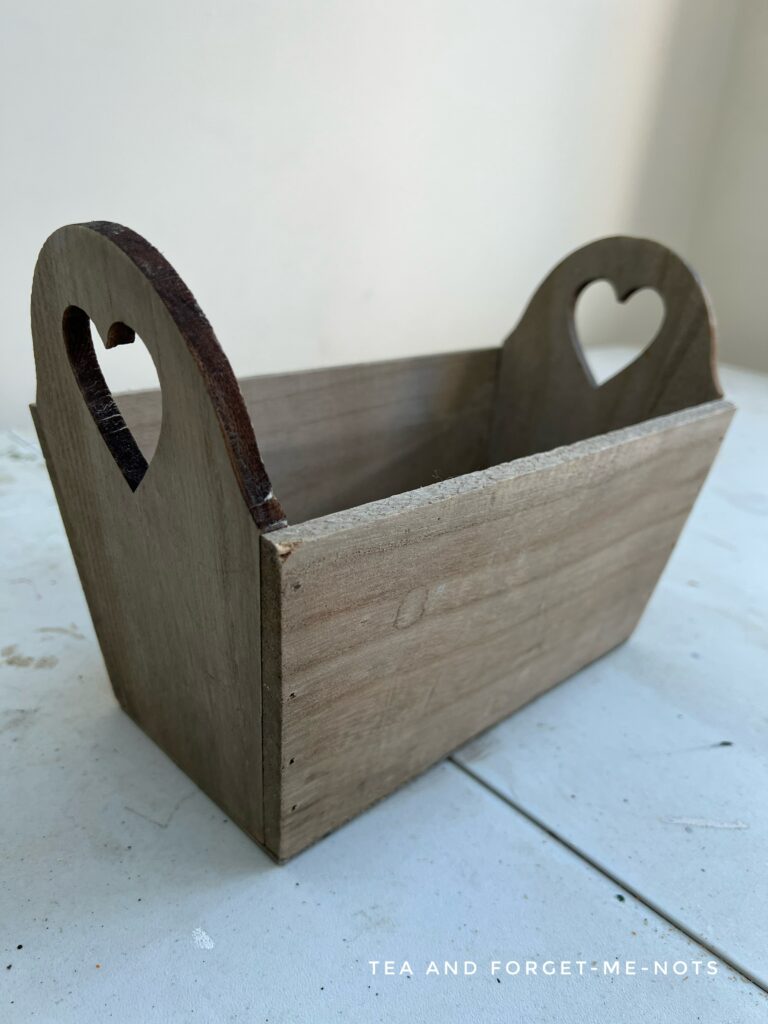
I’ve had this for a long time and not known what to do with it. So I decided to decorate it with a Christmas theme.
I chose a Christmas tree stencil called Holiday Joy. The stencil has four designs and I chose the one with the tree silhouettes.
I love the shape of the tree branches in this design. It looks as though someone has simply swooshed them on with a paint brush.
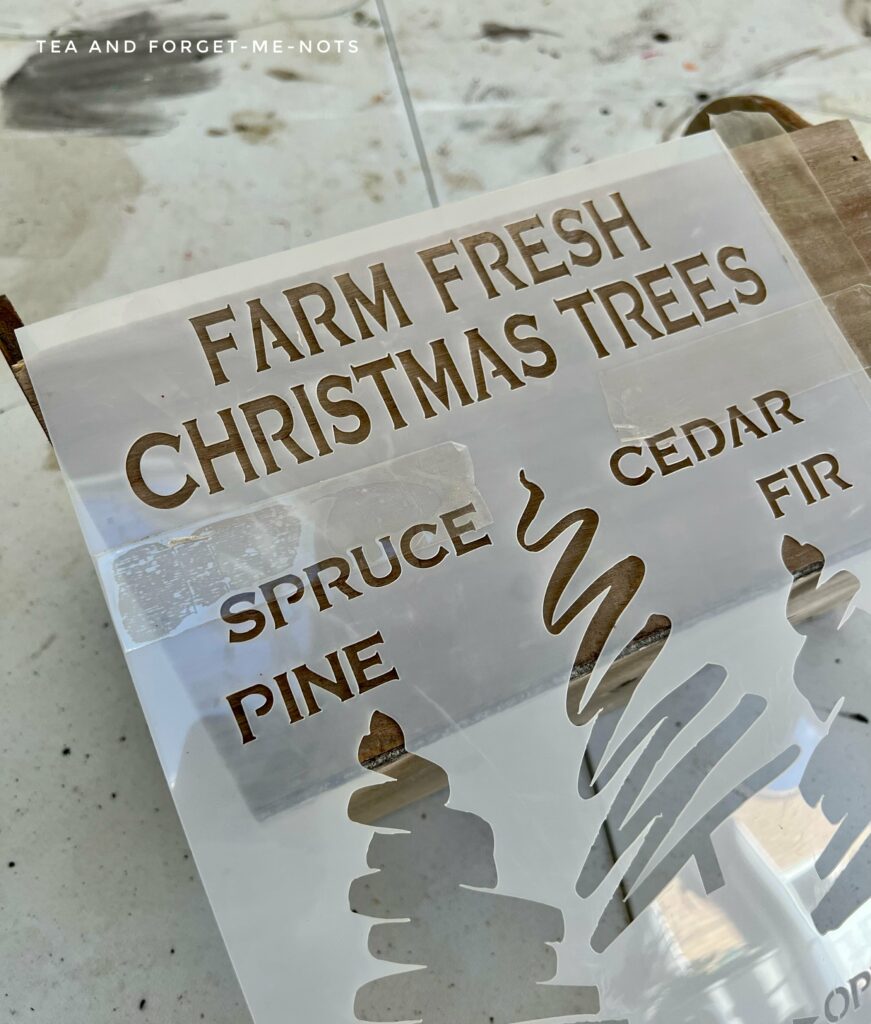
I used tape to flatten the stencil to the surface. Although stencil spray would work well too.
One of the most Christmassy colours in the Dixie Belle range is Palmetto. It’s a classic festive green.
I applied Palmetto with a sponge. The basket doesn’t have a perfectly flat surface. Which is a great way to maintain a rustic look.
But if you want perfectly clean edges, here’s how to do it!
Due to the layout of the words, it left a space for something more.
So, I tied a bow with some Christmas ribbon. And used hot glue to attach it to the basket.
I haven’t mentioned my cordless hot glue gun before. Having no cord to work around is so convenient. I highly recommend it!
What to do with empty mason jars
And to make this a functional part of my decor, I added mason jars. And filled them with hot chocolate and marshmallows.
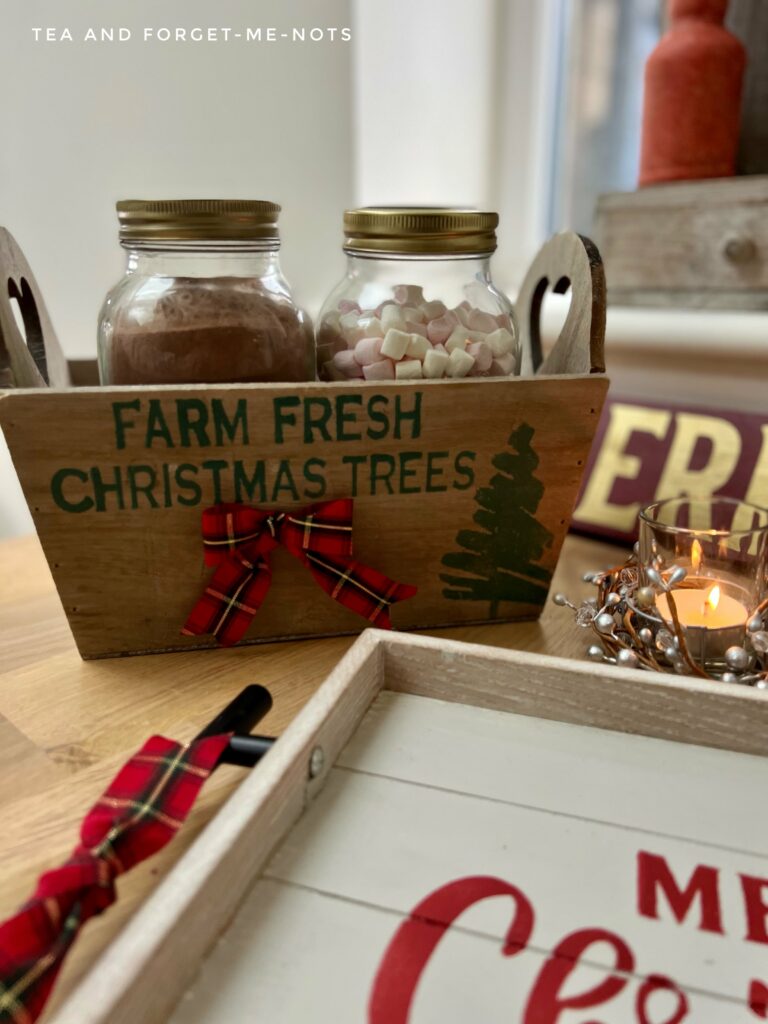
What a fun way to create a hot chocolate station.
One great thing is that this design is on only one side of the basket. So, if I need to I can turn it around and use another design. It’s the perfect way to add a splash of Christmas wood crafts to a room.
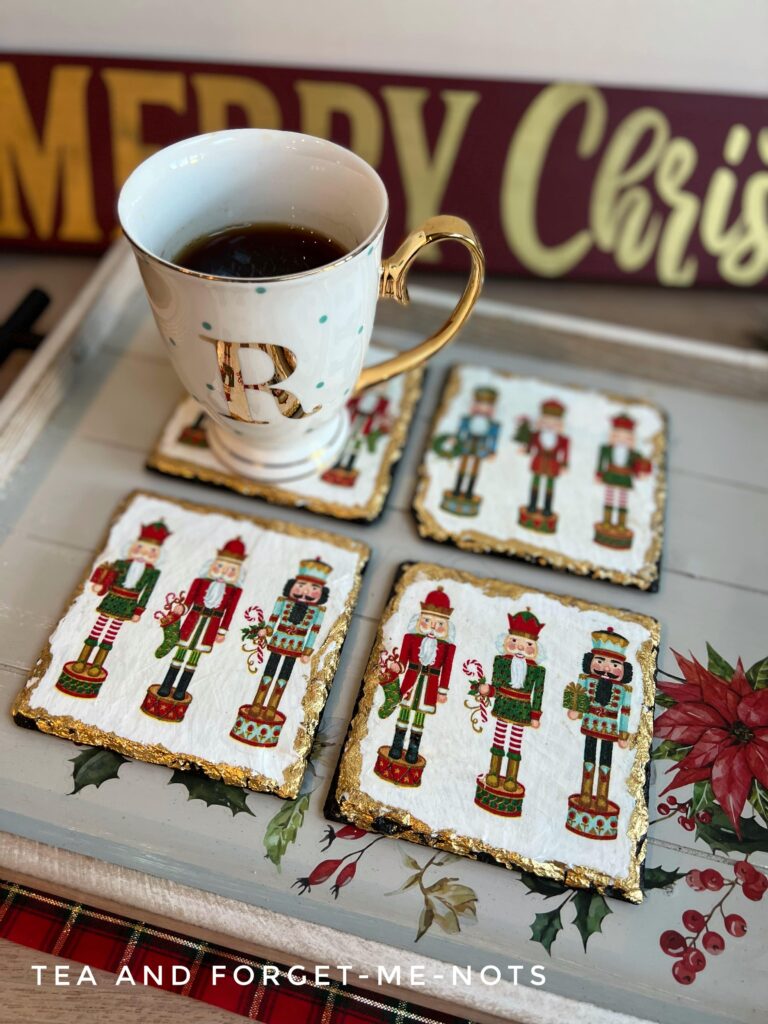
See those lovely festive coasters? Here’s how they were made!
There are so many wonderful DIY ideas for festive and holiday decor. The first thing is simply a case of finding the right inspiration and then having fun painting.
DIY Christmas decorations can also be handmade gifts which make for such special presents.
Such as these handmade wooden crafts to do for Mother’s Day.
Pin it for later – Easy Christmas Painting Ideas on Wood
If you loved this project, you’ll love these projects too:
Did you make this craft?
I love seeing what you do. Please mention @teaandforgetmenots and share your creations with me!

Hi there! I'm Rachel Bowyer, a passionate DIY enthusiast with a knack for transforming the old into something beautifully new. With a deep love for furniture painting, refinishing, and the art of crafting. I've been documenting my DIY projects and restoration journey since 2018. I specialise in techniques like decoupage, stencilling, and decor transfers. Join me as we explore the world of creativity and home improvement, one project at a time.
These are perfect for gift giving Rachel! I think the kids and I would get carried and make a lot of these. Thanks for sharing!
Aw great! Unique gifts are the best.
These came out great.
Thank you, Regina.
Wow! Love both of these projects! You are making so many awesome Christmas decor items! Love how the cute coasters coordinate perfectly with your tray!
Thanks, Donna. It helps to have everything visible when making pieces so I can see how well they go together.
More great transformations
These are beautiful gifts. I love the trays! Thank you for sharing. Have a wonderful Christmas!
Thanks Elizabeth, happy Christmas to you too.