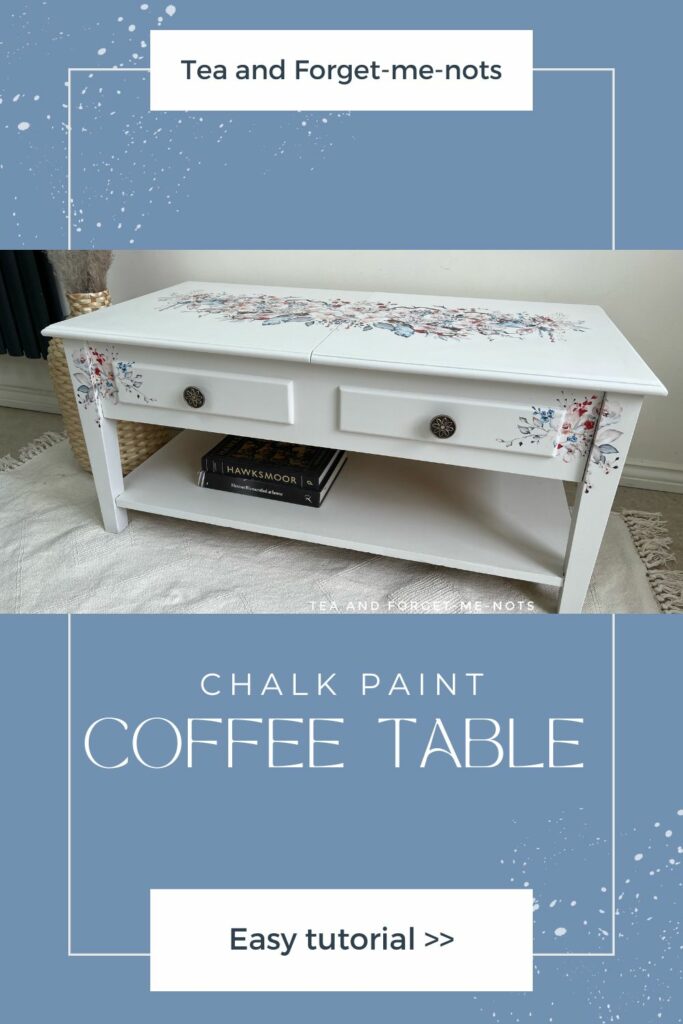
Beautiful coffee table makeover with chalk paint | Bohemian Wedding Transfer
Have a coffee table in need of a refresh? Here’s how to give it a beautiful update with a chalk paint coffee table makeover.
A coffee table is a good choice for a simple upcycling project. They often have easy-to-paint, flat surfaces. And can make a dramatic difference to the look of a space.
Thank you to Dixie Belle Paint for sponsoring this post.
This post includes gifted products and affiliate links so you can easily find the products I use myself and recommend to friends. If you purchase these products, I may earn a small commission at no extra cost to you.
Beautiful chalk paint coffee table makeover
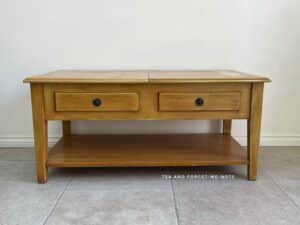
I got this coffee table for free on Freecycle. Freecycle can be a treasure trove for a quality piece of furniture.
Here’s how I find free furniture. A thrift store is another good option for projects for furniture makeovers.
I’ve had this in storage since last year. Or maybe even longer. I didn’t have any inspiration for it, so I let it wait.
The table was in good condition. A few scratches but nothing that a small amount of wood filler wouldn’t solve.
This project is part of a DIY blog hop.
Do It Over’ Designers are a group of talented bloggers who love to recycle, upcycle and DIY. It’s about taking something old or unused and ‘doing it over’ into something new.
Check out all the ‘Do It Over Designers’ at the bottom to see their lovely do-overs too!

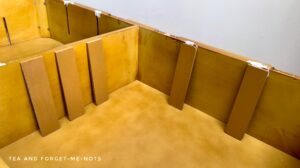
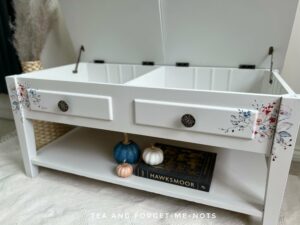
The design of the inside of the drawers was unusual. I don’t really understand them. Why would you want several little cubby holes rather than the full space for storage?
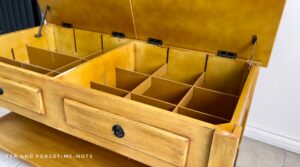
Am I missing something? Surely an open area to store books and games is more helpful.
So, the first thing was to remove the dividers. They came out just by pulling them. Although I did break one by being a bit too forceful!
A much more useful space. But it did leave the problem of the random holes around the edges.
The first necessary step in this DIY coffee table makeover was cleaning. As it had been in my shed for a long time, I started by vacuuming it. Fortunately, the table wasn’t in such rough shape.
Then I cleaned with White Lightning, decanted in a spray bottle and a lint-free rag. And gave it a final wash with a clean damp cloth to remove any leftover soap.
I knew this would be a clean and classic look, so I wanted a smooth finish. So, I used Dixie Mud in white as a wood filler over some of the dings. I also added this to the top of the divider holes so that they wouldn’t be visible from the top.
How do you paint a coffee table without sanding it?
Normally the next step is the sanding process. Where I would scuff up the finish with a sanding block or sanding sponge. However, I went with the easy option.
The entire piece was wood veneer. Which meant that I needed to be very careful with sanding so as not to make a hole in the veneer.
Light sanding with fine sandpaper can work. But sometimes it’s not enough to get the grip you need for the chalk paint.
So, I used one of my favourite products. Slick Stick. A primer for shiny surfaces which means that you don’t need to sand the entire table.
I did one coat of Slick Stick with a roller. A roller is great to avoid brush marks on the table top and base of the table, especially as this is the first coat.
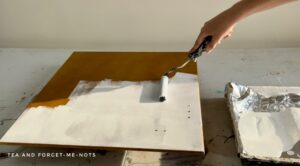
Light coats are key to getting a clean finish. Especially as I didn’t want any distressed areas on the finished table. It’s great that it doubles up as the first coat of paint too.
What kind of paint do you use for a coffee table?
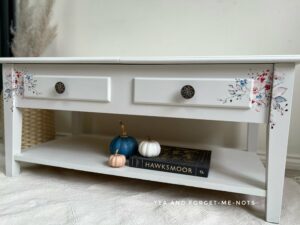
In classic farmhouse coffee table makeover style, I also chose white chalk paint.
I used Dixie Belle’s Fluff. Fluff is one of their soft white chalk paints.
It’s a classic colour and gives a beautiful finish. The first time (and only other time) I’ve used it was on this fabulous repurposing project.
I could already see with the first coat of chalk paint that a neutral color was a good choice. Especially with the extra decorative plans that I had for it!
The second coat was my favourite. When it starts to look like the end result and you can see what a beautiful finish it will have.
I needed three coats of paint using Fluff. Which is good coverage for white paint. I’ve done many many coats before with other white paint.
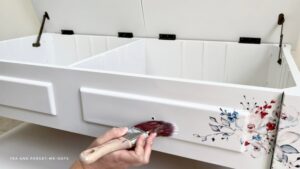
I used an artist paint brush around the edges of the fake drawers. Then I smoothed out the brush strokes with the roller.
As I removed the lift-up lids from the table to paint, it took a couple of days to get all of the coats on each side of the lids.
How to hide holes in furniture
Now, those pesky holes left by the dividers. I had two options, either fill the holes in or cover them up.
Initially, I tried to repurpose the original dividers. I cut them to the height of the drawers on a mitre saw. However, they were too chunky for the look I wanted.
And I didn’t have the tools to safely cut them any thinner.
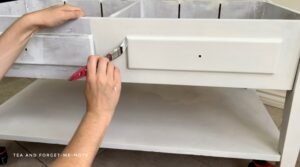
So, plan B. I bought some bamboo wood strips. They were thin enough to cut with scissors and sand smooth with sandpaper.
I then painted the entire surface to match the rest of the table.
I glued them into place with Gorilla wood glue. And secured them whilst drying with Frog Tape. Frog Tape is a good option as it is low-adhesive so isn’t likely to pull off the fresh paint when removed.
I really like the delicate details these bamboo strips added. They solved a problem but made the coffee table look more interesting at the same time.
Can you put transfers on chalk paint?
Now onto the exciting part. A new transfer! I love a good transfer and Dixie Belle has just released a new series of them.
I chose the furniture transfer that I thought would best complement the chalk paint project. It’s called Bohemian Wedding Transfer.
It’s a really pretty floral design. With one large central piece, and several smaller floral designs.

Fortunately for me, the large piece came in two sections. And I had two lids!
I measured the centre of both the design and the lids to ensure that I placed them evenly.
Transfers are a popular choice because they’re so easy to make furniture stand out. Here’s my recent favourite!
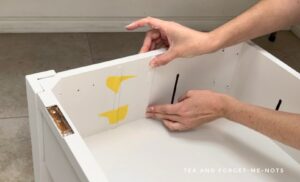
I used the ruler tool to rub over the surface of the transfer in both a back-and-forth and circular motion. You can easily see when it has transferred to the surface because the colour gets duller. This is because it’s no longer on the backing paper and is further away.
The above photo shows how to check when the transfer has been applied. If the plastic is clean, then it has attached. If there are bits you have missed, then you can put the paper back down and rub some more.
How to clean old hardware
I needed new knobs as one of the old knobs was broken. I wanted something that didn’t stick out like a sore thumb. After all, the drawers were fake and the handles were only decorative.
One of the many good things about having a retail booth in a barn, is that kind customers sometimes give us things. And someone gave the barn a whole mountain of old knobs and handles which they had collected over the years.
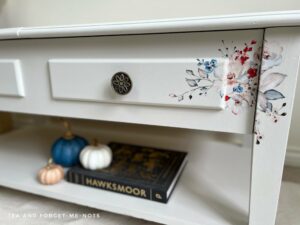
To complement the transfer, I chose a handle with a floral design. Pretty, with just a little bit of bling.
I cleaned them up with Barkeepers Friend and an old toothbrush. It was a quick fix which gave them back their sparkle.

I then chose the additional transfers for the drawers based on what looked nice next to the new knobs. I like that the designs offer lots of symmetrical options so I could pair two together.
It’s a little tricker applying furniture transfers over the edges. So I flattened out the transfer by pushing the ruler into the edges first.
How do you seal a chalk paint coffee table?
And finally, time for some sort of protective top coat. I thought about using furniture wax to give the piece some depth and texture. Dark wax wouldn’t have worked with the white and florals.
But as it was a table top and likely to get high traffic, I chose a simple option. Two coats of Clear Coat in Satin.
To get the depth, I could still add a coat of clear wax on top of this as an option later. That would offer a little extra protection and a different sheen for good measure.
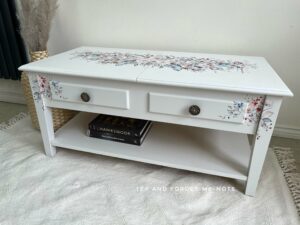
I love how this coffee table makeover turned out. It has a perfect new look to be the pride of place in a living room.
Other than the drying time between coats, it was a quick makeover.
With a little paint and a transfer, this has turned into a new coffee table.
As a coffee table makeover idea, I’m really pleased. And as with all good DIY furniture projects, this one is more functional with better storage now too.
I hope you enjoyed seeing the progress of this coffee table. If you did, please consider subscribing.
And here’s the YouTube video, to see how it all comes together.
If you’d like to see a makeover of a shabby bookshelf, this was a huge upgrade!

Pin it for later – coffee table makeover with chalk paint

Hi there! I'm Rachel Bowyer, a passionate DIY enthusiast with a knack for transforming the old into something beautifully new. With a deep love for furniture painting, refinishing, and the art of crafting. I've been documenting my DIY projects and restoration journey since 2018. I specialise in techniques like decoupage, stencilling, and decor transfers. Join me as we explore the world of creativity and home improvement, one project at a time.
Beautiful! I love the paint and transfer and the storage space inside. What a unique piece.
Thanks very much, Kim!
I don’t know the original use of that coffee table, but for us fibre freaks it would make a great piece to store yarn!! Wish I had one just like it lol. The Bohemian Wedding Transfer is so pretty on the Fluff. Didn’t realize that Fluff needs so many coats of paint; good to know. I just used Silk and got away with only one by spraying it over primer.
I must have bad luck with white paint then as I thought three coats was ok! Yarn seems like a good choice for the cubby holes.
ha ha! I was thinking exactly the same when I saw all those cubby holes – perfect for yarn!! This is such a beautiful makeover, the transfers are so lovely, they finish it off perfectly.
I clearly need to expand on my crafting so that it would have occurred to me! Thanks, Julie!
This is such a beautiful transformation, Rachel. The transfer is the perfect finishing touch and you were right about removing those dividers. Now you have a much more usable space!
Thanks, Ann. It does look night and day!
You certainly have an eye for transforming a freebie coffee table into a work of art, Rachel! Your table looks fabulous in white and I love the transfer you chose, too! I’m always in awe of ladies who tackle woodworking projects! Well done and very impressive! I also learned about a few new useful products – White Lightning and Slick Stick! Thanks for sharing!
Thanks so much, Gail. Slick Stick is definitely a great product.
This is another beautiful transformation! Pinned!
Thanks, Cindy!
It always makes me happy to see something upcycled, but you blew this out of the park Rachel! Beautiful!
Aw, thank you so much, Maria.
Very pretty coffee table makeover and a clever way to hide the divider holes inside. The floral transfer and placement are lovely!
Thank you, Marie. Covering the holes was definitely an interesting problem to solve.
Holy cow that looks good and how nice that it has storage!!
Thank you, Tania.
Your coffee table makeover looks absolutely wonderful! I’d like to try transfers one day, but I’m just too cheap right now to buy the good ones. Lol.
Haha that a good reason, they can be expensive. Although someone told me that smaller ones are available at Dollar Tree.
IT looks so beautiful!
Thank you, that’s very kind.
I have a kitchen that needs to be painted. Unfortunately, years ago I painted water based paint over oil based paint. Now my drawers and cabinets are all chipped from using the wrong paint. Wondering if I could use your method of Slick Stick instead of sanding everything down.
Hi Nora, unfortunately Slick Stick won’t help over chipped paint. Best to strip it before starting again for a quality finish.